Metis Edit
Metis analyzes the Data Product, identifies the relevant dbt model, applies the requested changes, validates the implementation, and prepares the changes for review.
Instead of manually identifying the relevant project files and making changes, you can describe the required change using natural language. Metis analyzes the project context and identifies the relevant files and models.
Edit Flow Use Cases
Use Edit Flow when you need to modify an existing Data Product, such as:
- Updating an existing transformation
- Changing business logic
- Modifying a dbt model
- Updating project configuration
- Making other supported changes to an existing Data Product
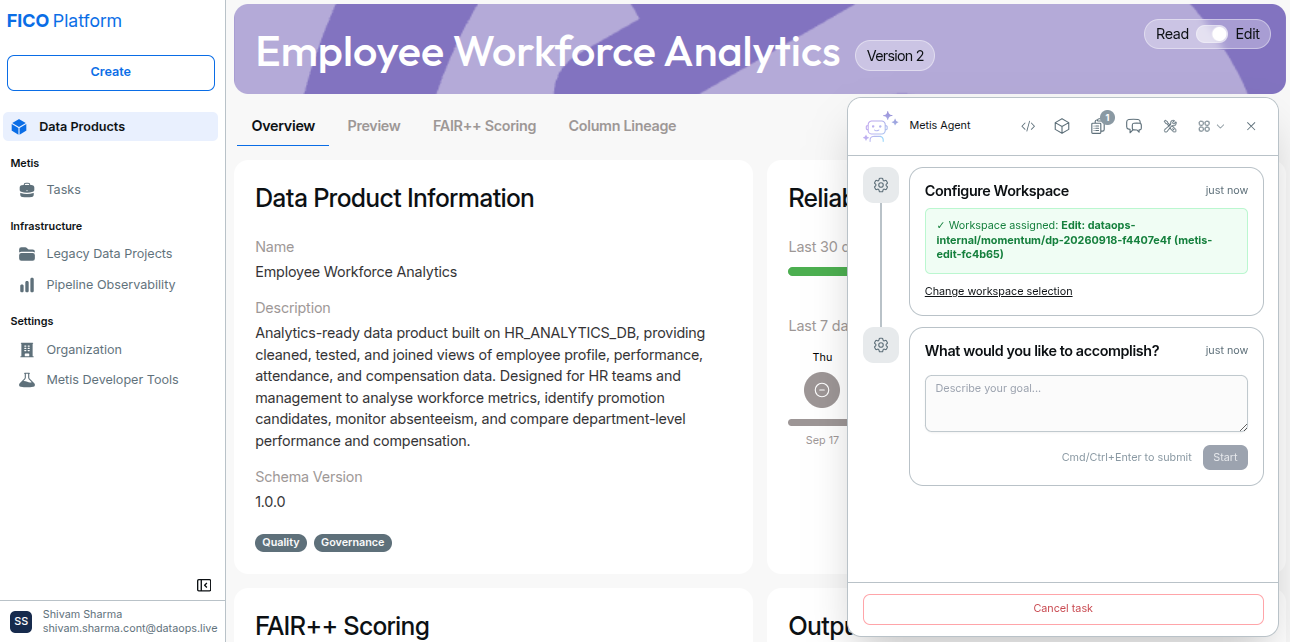
Metis Edit is intended to modify an existing Data Product. The Data Product must be available in an editable context.
Step 1. Open the Data Product Preview
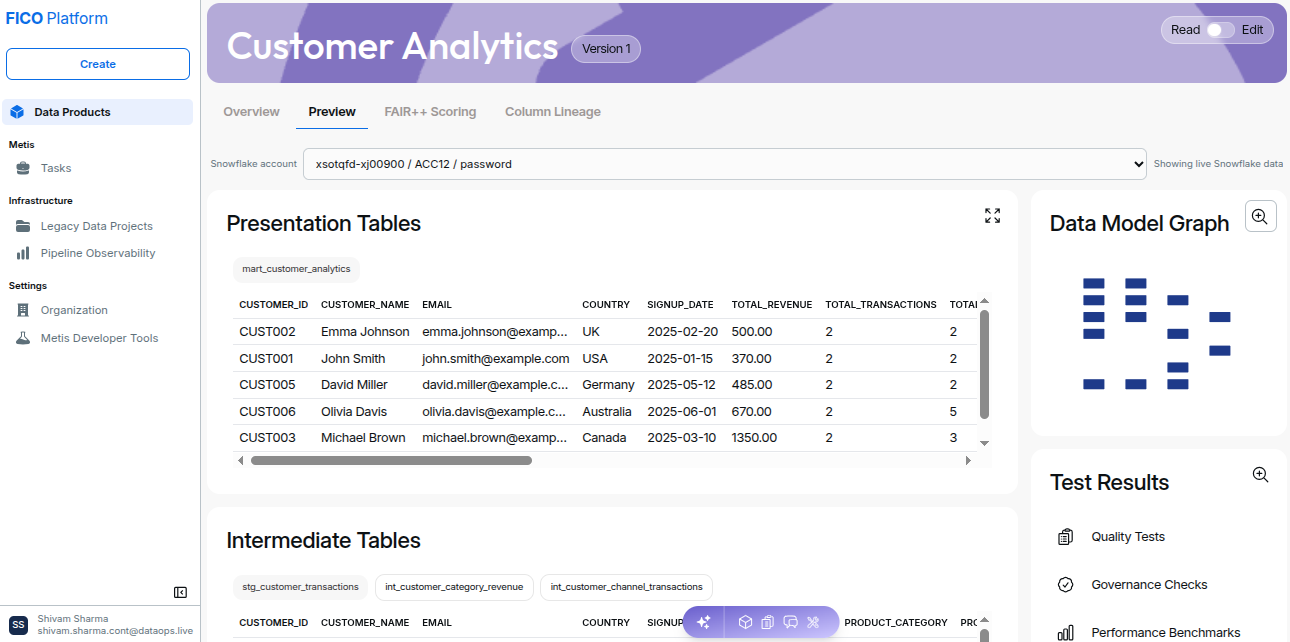
After selecting a Data Product, open the Preview tab.
The Preview page provides a view of the data generated by the Data Product. Depending on the Data Product, users may see:
- Presentation Tables
- Intermediate Tables
- Data Model Graph
- Test Results
- Quality Tests
- Governance Checks
- Performance information
The Preview provides useful context before requesting a change because it allows users to understand the current structure and output of the Data Product.
Step 2. Enable Edit Mode
The Data Product page provides a Read / Edit control. To make changes through Metis, switch the Data Product to Edit mode.
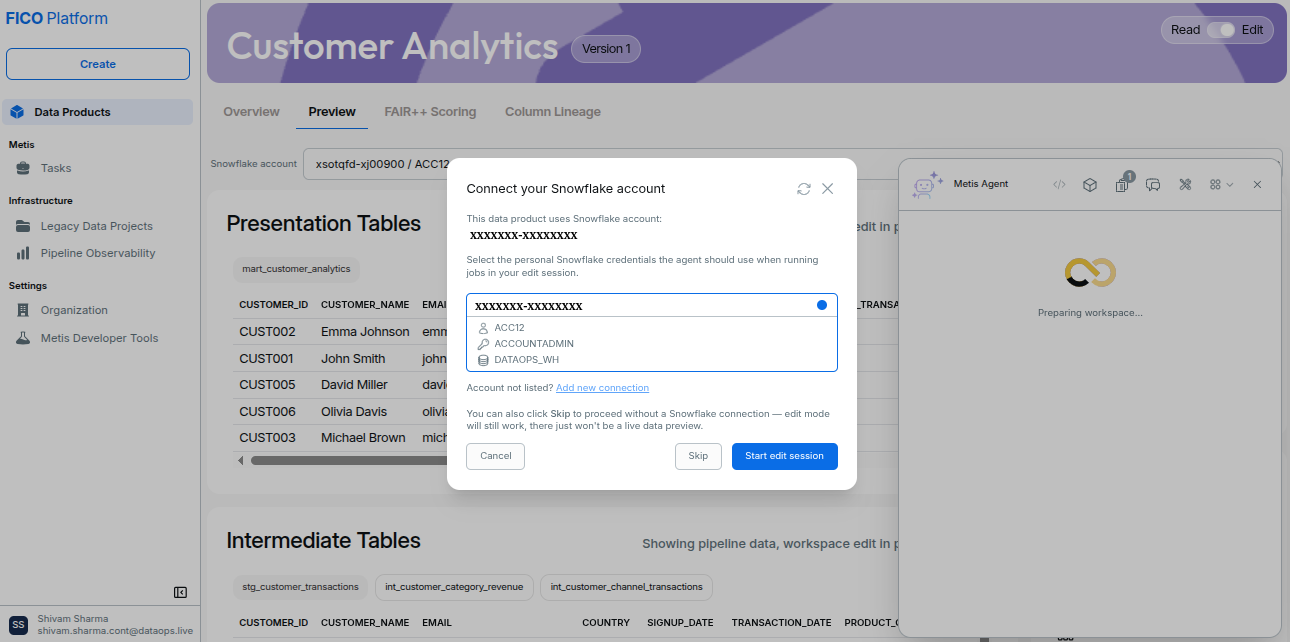
When Edit mode is enabled, Metis prompts you to connect a Snowflake account that the agent will use during the edit session.
Connect a Snowflake Account
User need to select the Snowflake account and credentials that Metis should use for the edit session.
It provides the following options:
- Select an existing connection - Select an available Snowflake account and credentials from the list.
- Add new connection - To configure a new Snowflake connection if the required account is not available.
- Start edit session - To start the edit session using the selected Snowflake connection.
- Skip - To continue without establishing a Snowflake connection. The edit session can still be started, but a live data preview will not be available.
- Cancel - To close the window without starting an edit session.
After selecting the required Snowflake connection, select Start edit session to begin editing the data product.
Once the edit session is established, Metis configures the development workspace where the requested changes will be performed. You can then describe the required changes using natural language instead of manually specifying the dbt model or SQL implementation.
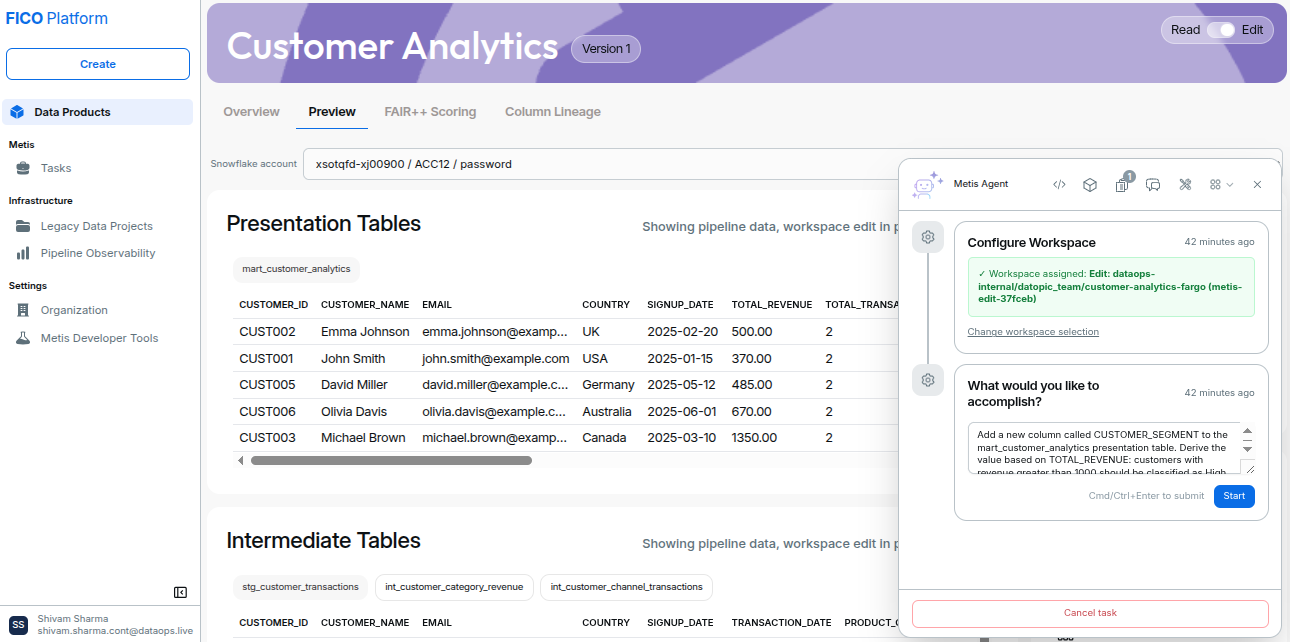
Metis analyzes the project context and determines where the requested changes need to be made.
Step 3. Start the Metis Task
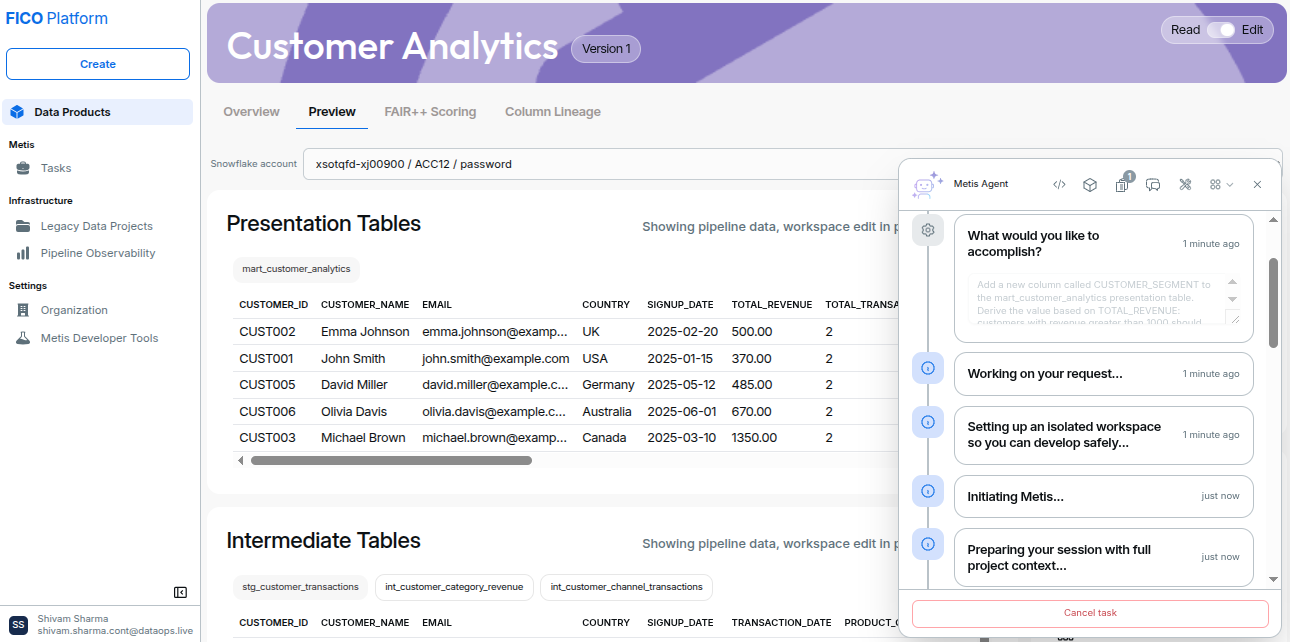
After entering the request, select Start. Metis creates a task and begins processing the request. It displays the progress of the operation as it moves through different stages.
- Initially, the workflow may display messages such as:
- Started
- Setting up an isolated workspace
- Starting your AI assistant
- Preparing your session with full project context
- Sending your request to the agent
These messages indicate that Metis is preparing the development environment and providing the AI agent with the relevant project context.
Step 4. Metis Validates and Reviews the Changes
After identifying the correct model, Metis modifies the model according to the user's request.
This gives users visibility into what the AI agent changed rather than simply reporting that the task succeeded. Once the requested changes and validation steps are complete, Metis marks the task as Completed.
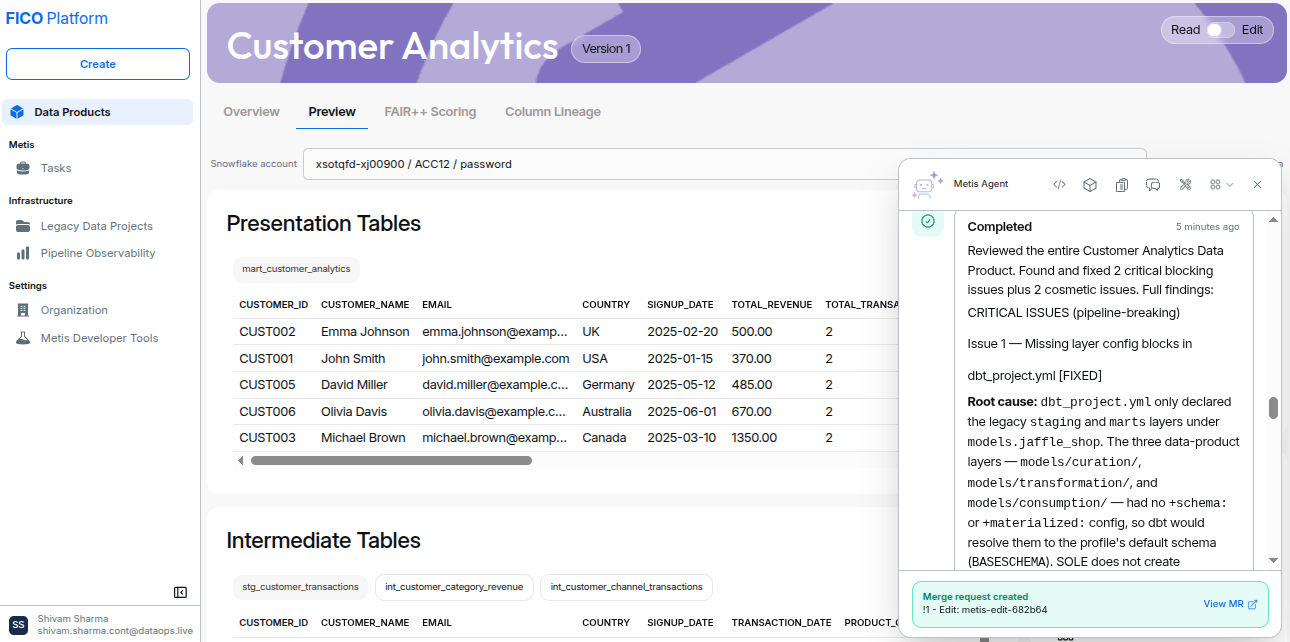
Always review the changes proposed by Metis before submitting them for review.
Step 5. Create a Merge Request
When the requested changes are complete, select: Finish and Open MR
Metis prepares the changes for review and creates a Merge Request. The Merge Request contains the changes generated during the Metis task.
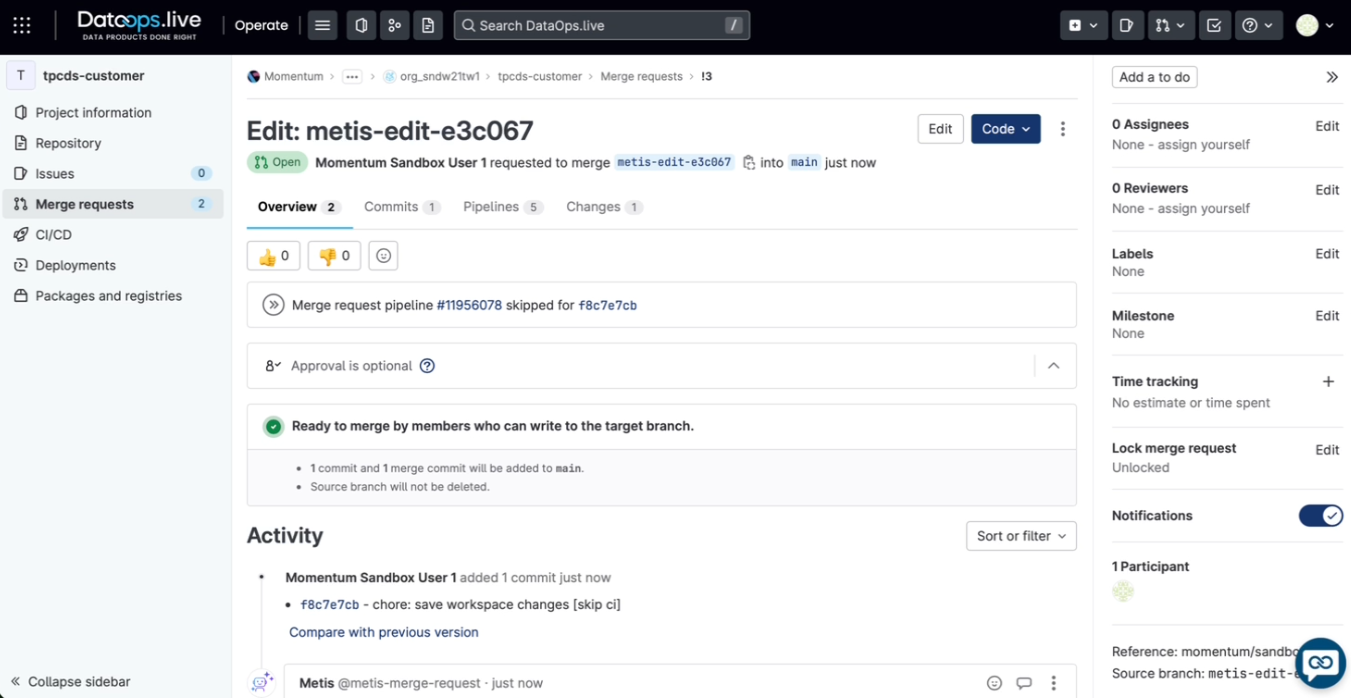
The generated changes can therefore be reviewed before they are merged.