Adding Users to DataOps.live
A user is a login that permits a person, or a system, entry to the data product platform. Users are created by our Support team and assigned to an account with specific permissions on projects and groups.
Yet, customers can take control of their onboarding process by creating users independently if they have set up Single Sign-On (SSO), bypassing the need for assistance from DataOps.live staff. As a result, users can access the platform and be ready to collaborate and contribute to the development within their assigned accounts once the project's maintainer or owner, within that account, invites users and grants them specific permissions on projects and groups.
The following topics describe these two approaches.
Creating users via the Support team
To request the creation of new users and grant them access to a specific account:
-
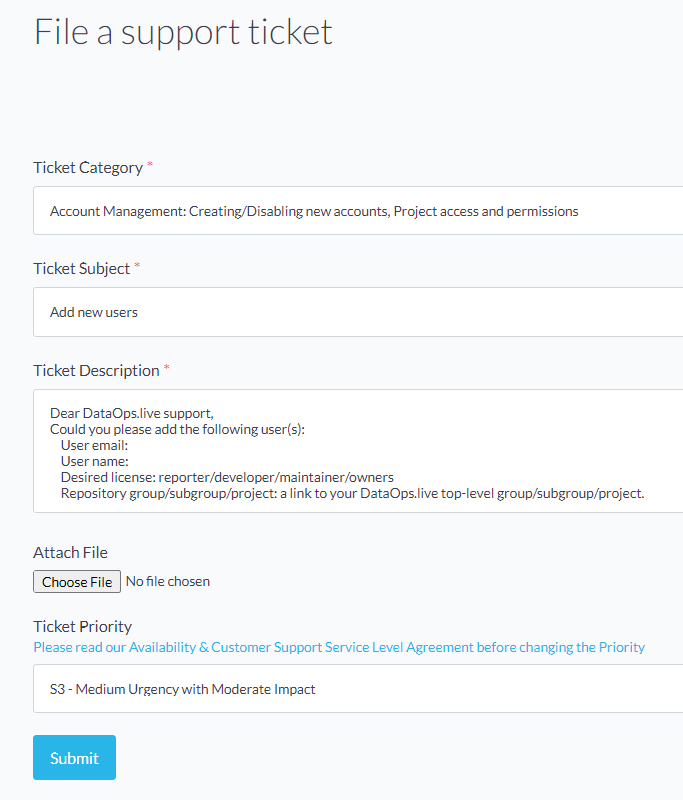
Log in to the Support Portal and click File a Support Ticket.
-
Fill in the details of your ticket specifying the ticket category as Account Management:.
-
In the Ticket Description field, list the user name and email address, and specify the permission required and access you wish to grant to the users as shown below:
User email:
User name:
Desired permission: reporter/developer/maintainer/owners
Repository group/subgroup/project: a link to your DataOps.live top-level group/subgroup/project.This helps create the account and grants new users account-level access with specific permissions.
-
Click Submit.
Once you receive confirmation that the Support team has resolved the ticket - created the account and users - new users can access the items in that account (group/subgroup/projects).
However, suppose you have only provided users' names and email addresses in your ticket without specifying any permissions on the account projects and groups. Once the Support team adds those users, they can only access the platform without further action. But you can still invite the added users yourself as a maintainer or owner of the top-level group, subgroup, or project. Refer to the topics below for detailed steps.
Creating users automatically via SSO
Through the integration of Single Sign-On (SSO), user onboarding to the platform is simplified, granting customers more autonomy. Customers can now take control of user creation, making onboarding faster and easier.
All that is needed is to add the new user to the respective customer's SSO implementation, e.g. the Active Directory (AD) group that has DataOps access permission.
Once the SSO user logs in for the first time, the user is automatically created on the platform — all without needing Support team involvement. The user has no other permissions on the platform. You must still add them to the desired group or project with a respective role.
This approach enhances user autonomy and minimizes administrative burdens.
Inviting a user to a group or subgroup
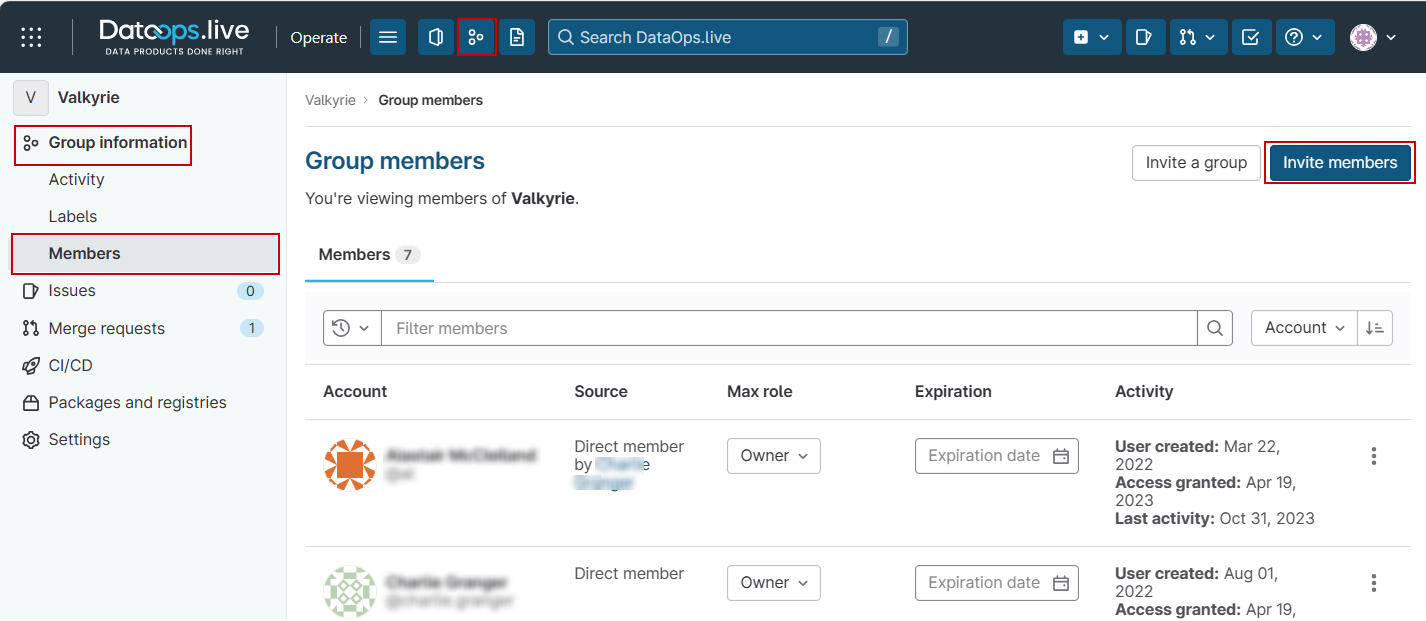
When a user is added to the data product platform without authorization to access account groups or subgroups, the maintainer or owner of the top-level group or subgroup within that account can invite the user and grant them access.
-
Log in to the data product platform.
-
Click Groups on the menu bar and navigate to your group or subgroup.
-
Click Group information or Subgroup information and select Members.
-
Click Invite members on the top right.
-
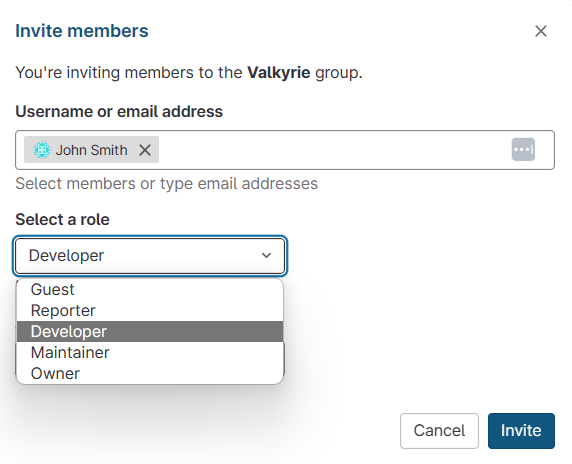
In the open popup, click in the Username or email address field and select a platform member or enter the new user's email address.
-
Select the role you want to assign to the user in the group or subgroup. Refer to Roles and Permissions for more details.
-
Click Invite to add the user to the group or subgroup.
Inviting a user to a project
When a user is added to the data product platform without authorization to access the account projects, the maintainer or owner of the projects within that account can invite the user and grant them access.
-
Log in to the data product platform.
-
Click Projects on the menu bar and navigate to your projects.
-
Click Project information and select Members.
-
Click Invite members on the top right.

-
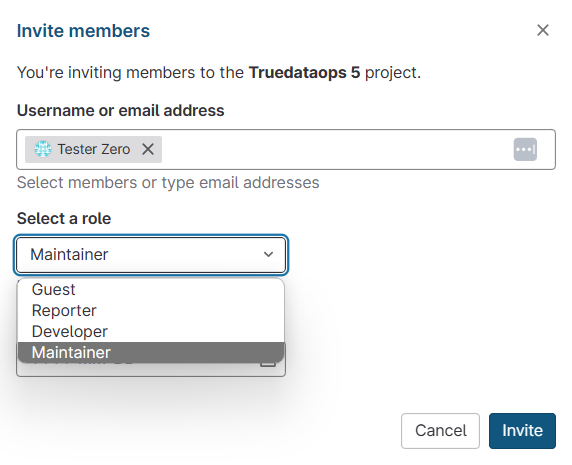
In the open popup, click in the Username or email address field and select a platform member or enter the new user's email address.
-
Select the role you want to assign to the user in the project. Refer to Roles and Permissions for more details.
-
Click Invite to add the user to the project.