DataOps Docker Runner Installation
Step 1 - Fetch registration tokens from the data product platform
The registration token is generated automatically in DataOps.live and is used to link together the runner you are about to create with your specific DataOps project or group.
Runner registration tokens are scoped to either a top-level group, sub-group, or project.
Follow these steps to obtain your registration token:
-
Connect to the data product platform.
-
Open the group (preferred) or project you want to create the runner for.
-
At the group level, follow the below steps:
-
Click CI/CD → Runners. Choosing the group makes the runner available to all projects in that group.
-
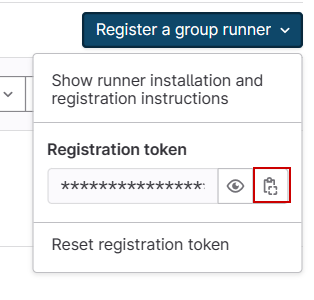
Expand Register a group runner on the top right and copy the registration token.
-
-
At the project level, follow the below steps:
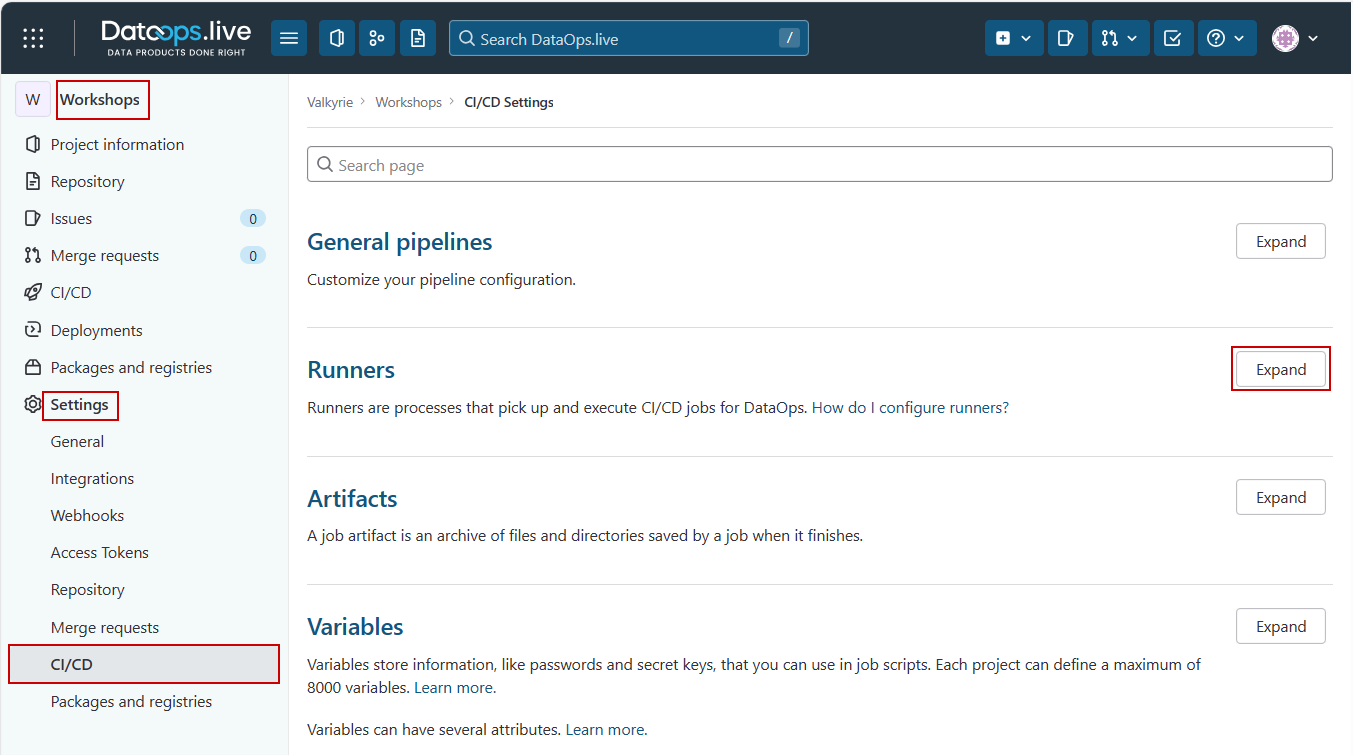
- Click Settings → CI/CD.
- Find the Runners section and click Expand.
- Copy the registration token from inside the Project runners section under Set up a project runner for a project.

Step 2 - Connect to Docker Hub
On your runner host's command line, run the following command:
docker login --username dataopsread --password dckr_pat_82FQ4O6N4yb6fXJc15kIvX4Qrtg
Try prefixing the command with sudo if it doesn't work. However, the
usermod -aG docker hasn't been done correctly and may cause future issues.
dataopsread is a read-only service account to allow you to pull the dataopslive/dataops-runner image.
Step 3 - Register the runner
-
To make running commands consistent, copy and modify the following environment variables and export them to your command line environment.
export IMAGE_TAG='latest'  # DockerHub image tag and the version of the runner
export IMAGE=dataopslive/dataops-runner:$IMAGE_TAG  # DockerHub repo path and tag
export AGENT_TAG=<YOUR_RUNNER_NAME>  # DataOps runner tag
export AGENT_NAME=$AGENT_TAG-$IMAGE_TAG  # Runner full name
export DATAOPS_URL=https://app.dataops.live/  # Data product platform
export REGISTRATION_TOKEN=<YOUR_REGISTRATION_TOKEN> # Token from the UI in step 1noteMake sure you adjust the
IMAGE_TAGvalue to the value provided as part of the release notes if you need to choose a specific version other than thelatest.
You can use theIMAGE_TAGvaluelatest-nextto enable additional features not yet inlatest. See Release Notes for more information. -
Execute the following command:
docker run --rm -v /srv/dataops-runner-$AGENT_NAME/config:/etc/gitlab-runner $IMAGE register \
   --non-interactive \
   --executor "docker" \
   --docker-image dataopslive/dataops-utils-orchestrator:5-stable \
   --url "$DATAOPS_URL" \
   --run-untagged="false" \
   --locked="true" \
   --access-level="not_protected" \
   --registration-token "$REGISTRATION_TOKEN" \
   --description "$AGENT_NAME" \
   --tag-list "$AGENT_TAG"
Once you return to the UI in the same location, you will find the new runner you created. For example:

The runner has a random identifier that cannot be changed. The Last Contact: Never in the example above indicates that the new runner has been registered but is not yet running.
Step 4 - Update runner configuration
Several key configurations are required that are not set using the standard register command. Set these by running the following commands on your server:
# allow the agent to run up to 8 concurrent jobs
sudo sed -i 's/concurrent = .*/concurrent = 8/' /srv/dataops-runner-$AGENT_NAME/config/config.toml
# have agent poll server every 1 second
sudo sed -i 's/check_interval = .*/check_interval = 10/' /srv/dataops-runner-$AGENT_NAME/config/config.toml
# mounts the /app into /local_config inside every runner that is started by this agent.
sudo sed -i  's/    volumes =.*$/    volumes = ["\/app:\/local_config:rw","\/agent_cache:\/agent_cache:rw", "\/secrets:\/secrets:ro"]/' /srv/dataops-runner-$AGENT_NAME/config/config.toml
Step 5 - Set up DataOps vault: credentials and secrets
The data product platform's basic security model is that the platform and repository contain all the information about what to do. But they have none of the credentials actually to do it. Only the DataOps runner stores these credentials, so no one else can access them.
The vault concepts section describes this process in more detail. We recommend you read that page before proceeding any further.
DataOps requires a directory from the host called /secrets with /secrets/vault.yml and /secrets/vault.salt.
To create the minimum base vault configuration, run:
sudo mkdir -p /secrets
echo {} | sudo tee /secrets/vault.yml > /dev/null
echo $RANDOM | md5sum | head -c 20 | sudo tee /secrets/vault.salt > /dev/null
Full details on when and how to add to these are in the vault concepts section.
Step 6 - Start the runner
docker run -d --name $AGENT_NAME --restart always -v /srv/dataops-runner-$AGENT_NAME/config:/etc/gitlab-runner -v /var/run/docker.sock:/var/run/docker.sock $IMAGE
or, for extra debugging:
docker run -e DEBUG=true -d --name $AGENT_NAME --restart always -v /srv/dataops-runner-$AGENT_NAME/config:/etc/gitlab-runner -v /var/run/docker.sock:/var/run/docker.sock $IMAGE
You should now see:

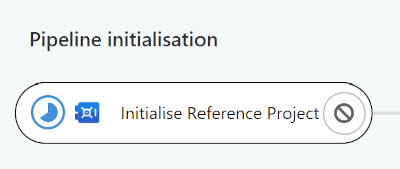
At this point, you should be able to run a pipeline (e.g., the full-ci.yml created from the template project). If the first job in the pipeline changes to a blue pie, the job is running on your Runner, everything is connected, and you can move on.
If not, check your setup and, if needed, contact support@dataops.live.
Starting and stopping the DataOps runner
Once you have completed Steps 1 to 6 of the initial runner setup, you don't need to repeat the steps every time to start or stop the runner.
To start:
export AGENT_TAG=my-documentation-runner   # Change this to your desired name xxx-runner
docker start $AGENT_TAG
To stop:
export AGENT_TAG=my-documentation-runner   # Change this to your desired name xxx-runner
docker stop $AGENT_TAG
Checking the runner health
You can check if your runner is still contacting the data product platform from your group or object CI/CD page. To do this:
-
Navigate to your group or project CI/CD settings and expand the Runners section.
Depending on how you have registered your runner, it will show under one or more of the available runners lists.
-
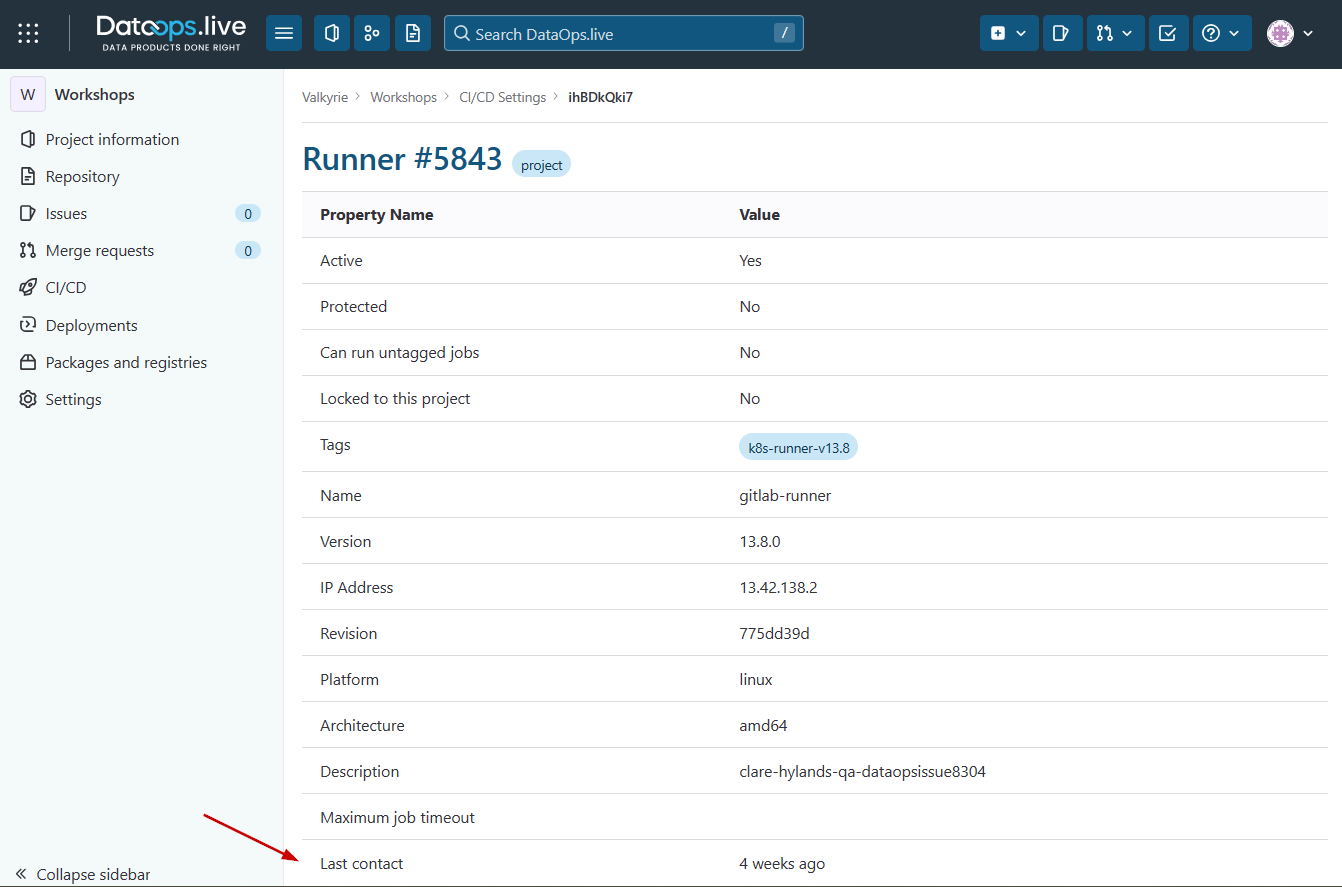
Find your runner on this page and click the runner ID.

This opens a detailed page where you can see more information about your runner. The Last contact field shows whether your runner is healthy.
We also recommend monitoring disk space and CPU usage when setting up with Docker. These should give a good indication of the runner's health.