Configuring MCP Servers with DataOps.live Assist
An MCP (Model Context Protocol) server connects DataOps.live Assist to external services such as APIs, databases, or custom scripts. It automates tasks like web scraping, data extraction, or browser-based automation within ETL pipelines. This guide covers everything you need to configure MCP servers with DataOps.live Assist.
Editing MCP settings files
You can edit both global and project-level MCP configuration files directly from the Assist MCP settings view:
-
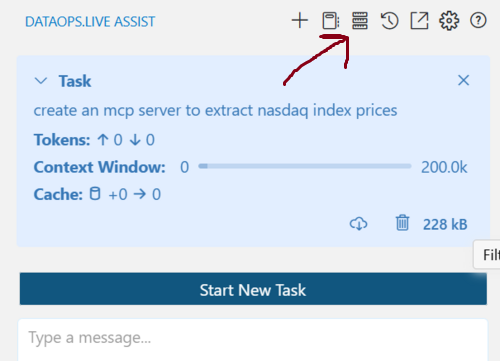
Click the three-bar icon in the top navigation of the Assist pane, as shown in the image.
-
Scroll to the bottom of the MCP settings view.
-
Click the appropriate button:
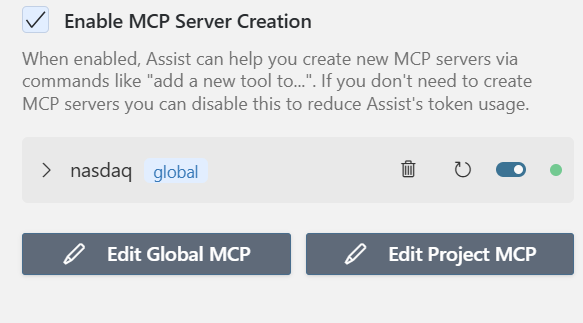
- Edit Global MCP: Opens the global
mcp_settings.jsonfile. - Edit Project MCP: Opens the project-specific
.assist/mcp.json. If this file does not exist, Assist creates it for you.

- Edit Global MCP: Opens the global
You can manage MCP server configurations at two levels:
- Global Configuration: These settings apply across all workspaces unless you override them at the project level.
- Project-level Configuration: This allows you to set up project-specific servers and share configurations with your team by committing the file to version control. If the file exists, Assist automatically detects and loads it.
Enabling or disabling MCP servers
When you turn off MCP Servers, the system removes all related logic and definitions from the system prompt, preventing connections to MCP servers. It also turns off use_mcp_tool and access_mcp_resource. Leave them off if you do not intend to use MCP Servers. By default, the system enables them.
-
Click the three-bar icon in the top navigation of the Assist pane.
-
Check/Uncheck
Enable MCP Servers.
Managing individual MCP servers
Each MCP server has its configuration panel where you can modify settings, manage tools, and control its operation. To access these settings:
-
Click the three-bar icon in the top navigation of the Assist pane.
-
Locate the MCP server you want to manage in the list.
Deleting a server
-
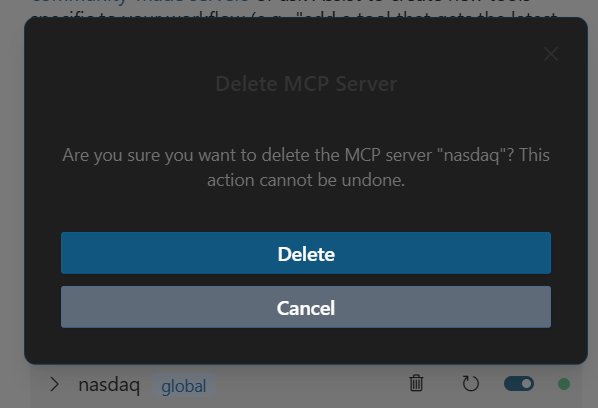
Press the 🗑 next to the MCP server you want to delete.
-
Press the Delete button on the confirmation box.
Restarting a server
Press the ↻ button next to the MCP server you want to restart.
Enabling or disabling a server
Press the toggle switch next to the MCP server to turn it on or off.
Network timeout
To set the maximum wait time for a response after calling a tool on the MCP server:
- Click the Network Timeout dropdown at the bottom of the MCP server's config box and choose your preferred time. The default is 1 minute, but you can set it to anything between 30 seconds and 5 minutes.
Auto-approve tools
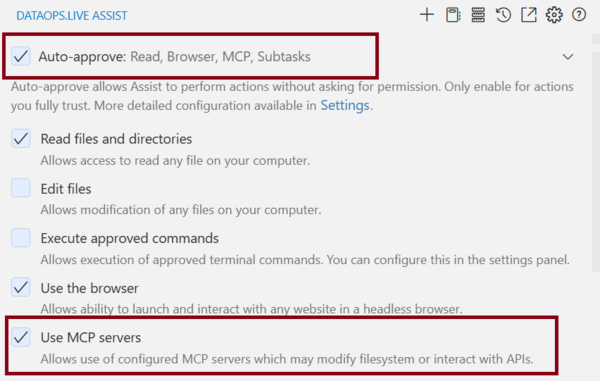
Assist applies MCP tool auto-approval on a per-tool basis. Auto-approval is off by default. To turn on auto-approval:
- Go to the auto-approval toolbar and enable the global Use MCP servers option.
- Open the MCP server settings and find the specific tool you want to auto-approve.
- Check the 'Always allow' box next to that tool's name.
When you enable 'Always allow', Assist automatically approves that tool without asking for confirmation.
Note that the global Use MCP servers setting is the priority. If you turn it off, Assist won't auto-approve any MCP tools, even if individual tools have auto-approval enabled.
Develop configuration example
Here's an example of configuring a Puppeteer MCP server in Develop:
{
  "mcpServers": {
    "puppeteer": {
      "command": "npx",
      "args": ["-y", "@modelcontextprotocol/server-puppeteer"]
    }
  }
}
This configuration:
- Directly uses
npxwithout needing a shell wrapper - Uses the
-yflag to answer "yes" to any prompts during installation automatically - Runs the
@modelcontextprotocol/server-puppeteerpackage, which provides browser automation capabilities
Note that you do not always need to manually configure these files. You can tell Assist what you need, and it will do it for you.