Automated DBT Migration Quickstart Guide
This section walks you through migrating your dbt Core project into a fully streamlined data pipeline. Here is how it works: you’ll move your dbt Core project to Snowflake, and DataOps.live provides pipeline capabilities (CI/CD, orchestration, and more) to those dbt models within Snowflake.
The Automated DBT Migration platform manages the automatic migration for you, ensuring a smooth transition. Plus, you gain access to DataOps.live Develop, a browser-based development environment where you can innovate and test your models with the help of DataOps.live Assist.
Note: For current enterprise customers, this automated DBT migration flow only works if your environment includes a runner named dataops-runner.
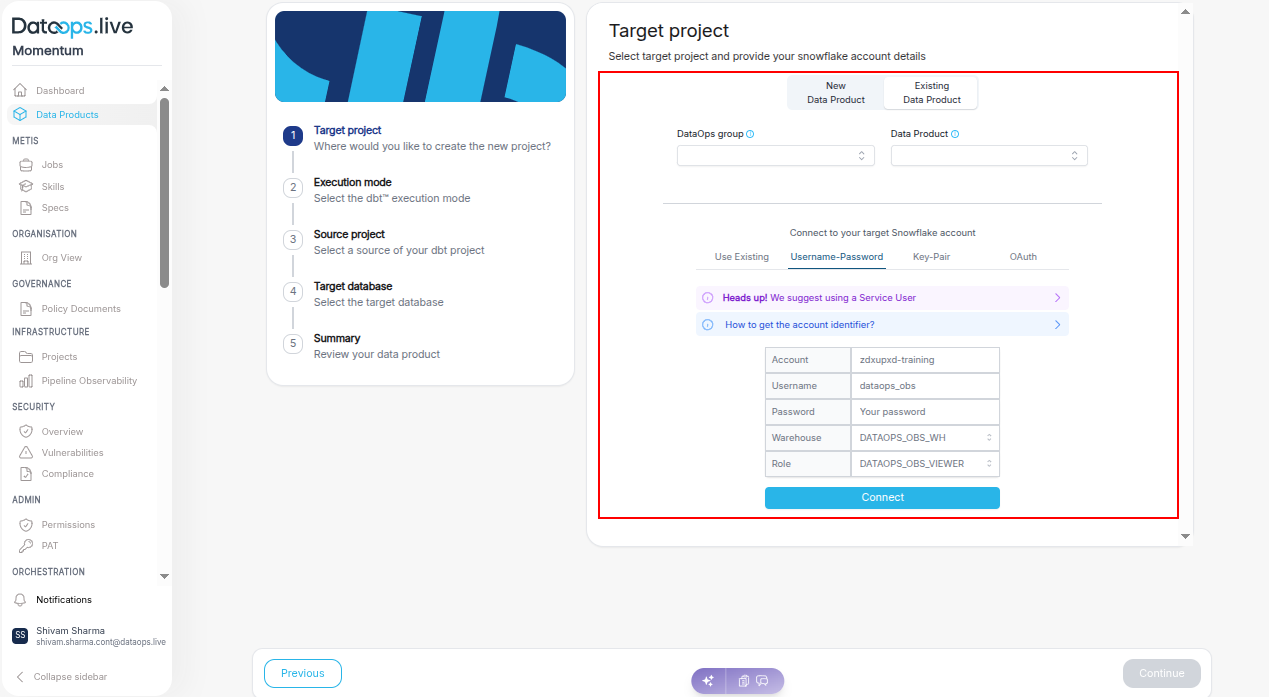
Step 1. Define the target project in Snowflake
-
Start typing the name of an existing DataOps group to display a list of options. The group is contained within your customer account and has projects and subgroups.
-
Enter a name for the new project in the New Data Product field.
-
Enter the login information for the Snowflake account where you want to execute the dbt project and click Connect.
-
Once you see the successful connection message, click Continue.

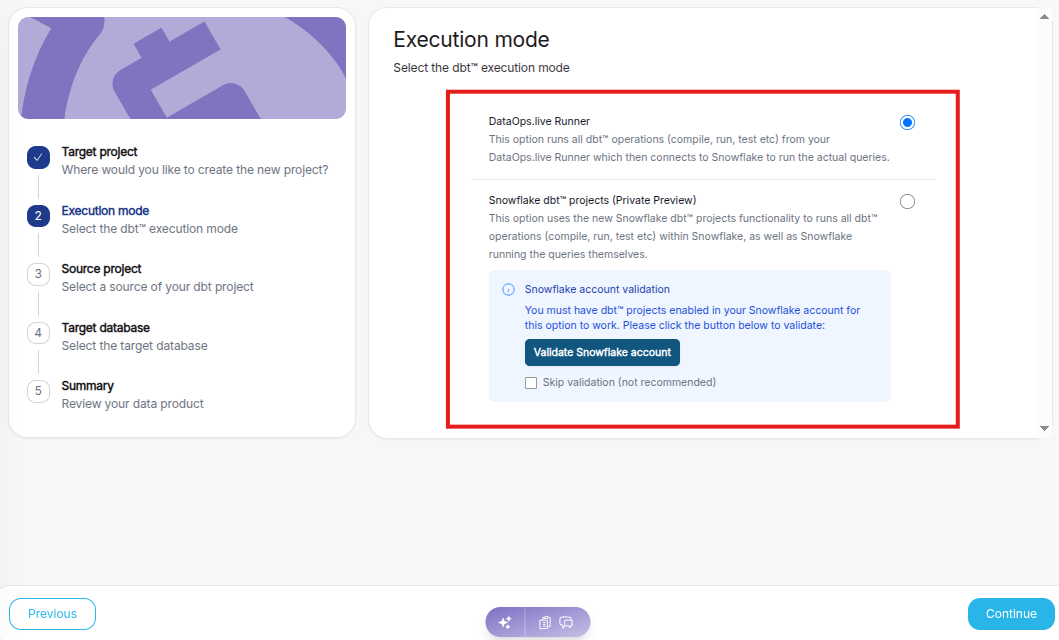
Step 2. Select the dbt execution mode
-
You can choose either DataOps.live Runner or Snowflake dbt Projects, depending on where you want the dbt operations to be executed.
-
Once you select the required execution mode, click Continue.
Step 3. Select the source dbt project
-
Select a source of your dbt project:
- Upload project: Upload a ZIP file containing your existing dbt project. This option allows you to import and run your own dbt codebase directly within the platform.
- Use example: Use a preconfigured sample dbt project (such as Jaffle Shop) to quickly explore dbt features and functionality without any additional setup.
- dbt Cloud: Connect an existing dbt Cloud project by providing the repository URL, enabling integration with projects already managed in a Git repository.
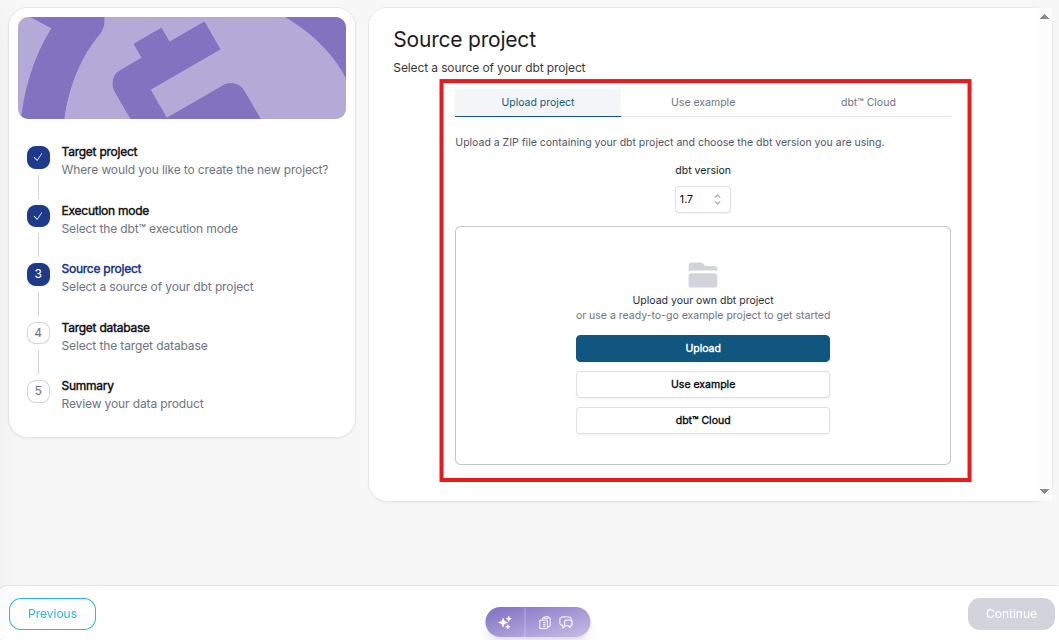
Once you select the source of your dbt project, click “Continue.”
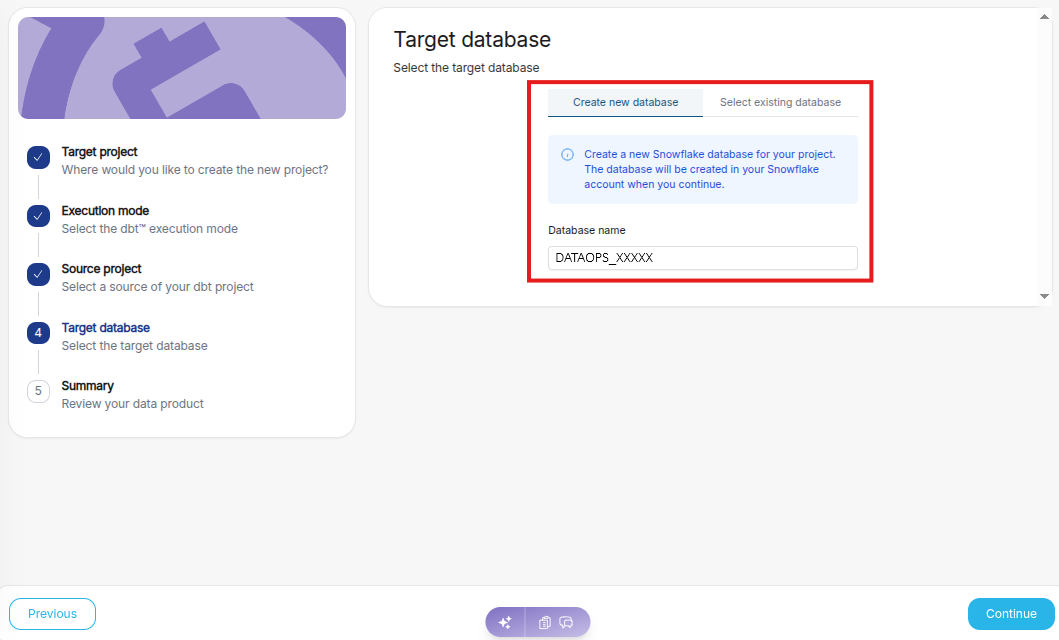
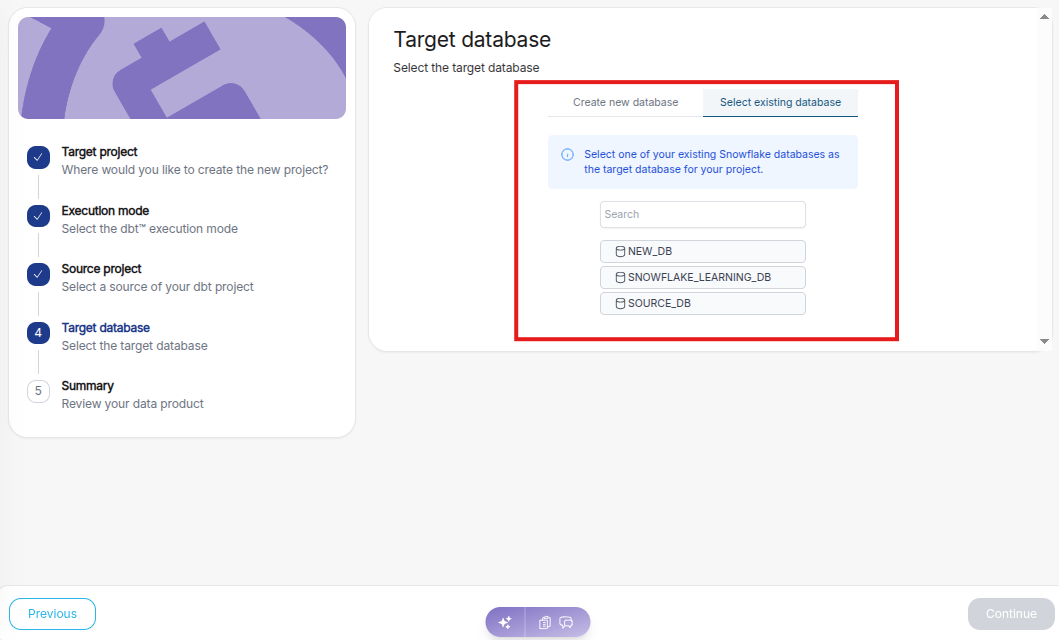
Step 4. Define the target database for your model
Select the target database where your dbt models will be created and executed. You can either create a new database or select an existing database based on your project requirements.
-
Create a new Snowflake database by specifying a database name. The platform will automatically create this database in your Snowflake account when the project setup continues.
-
Choose an existing Snowflake database from the available list to use as the target database for storing and executing the dbt models and click “Continue.”
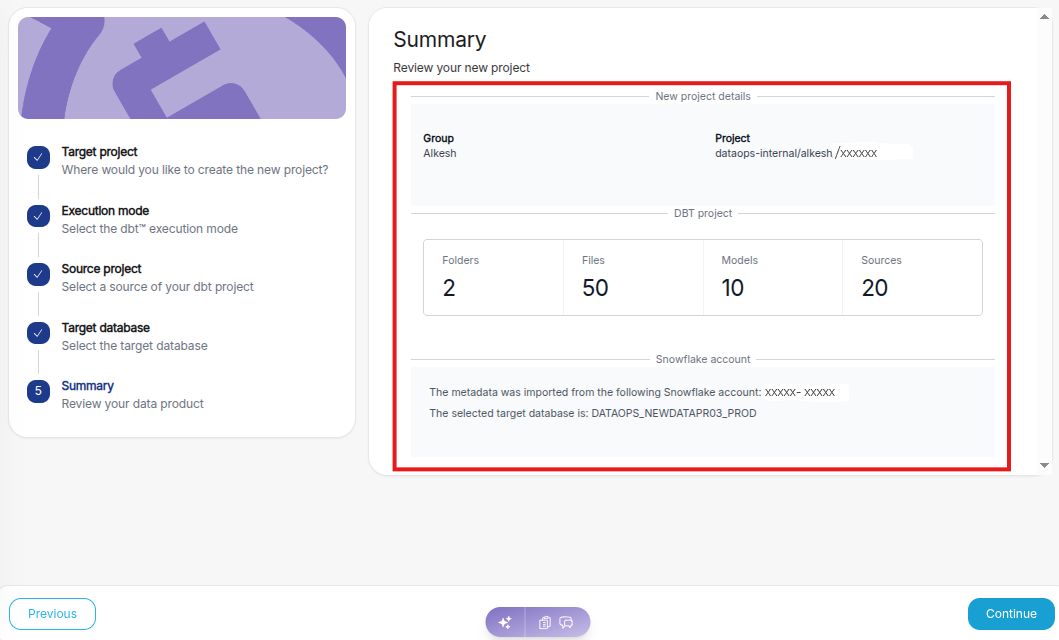
Step 5. Review summary
Review the project configuration summary, including project details, dbt project statistics (folders, files, models, sources), and the selected Snowflake account and target database before proceeding to create the project.
Once you confirm the configuration, click “Continue.”
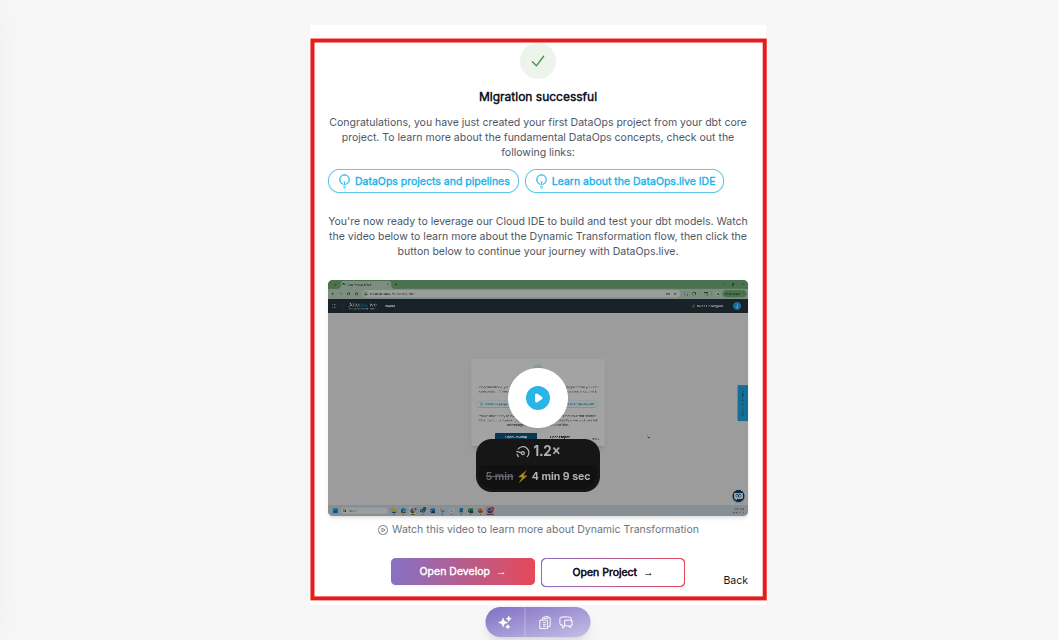
From the confirmation window, do one of the following:
- Click Open Develop to launch our browser-based development environment and start development on the dbt project.
- Click Open Project to open the pipeline on the DataOps.live platform.