Metis Assisted Create
Metis Assisted Create helps you create a Data Product by describing your requirements in natural language. Metis analyzes your requirements, recommends relevant data sources, creates an OpenSpec specification, generates the Data Product, and deploys it.
Instead of manually setting up the project and identifying the required data sources, you can provide your requirements and let Metis guide you through the creation process.
Metis Assisted Create Overview
Use Metis Assisted Create when you want to create a new Data Product with guidance from Metis.
It is useful when you want to:
- Describe your Data Product requirements in natural language.
- Get recommendations for relevant data sources.
- Generate and review the Data Product specification.
- Generate and deploy the Data Product with Metis.
Create Data Product with Metis
The Metis Assisted Create workflow guides you through seven stages.
| Step | Stage | Purpose |
|---|---|---|
| 1 | Intent | Describe the Data Product you want to create. |
| 2 | Sources | Connect to Snowflake and select the data sources that will be used. |
| 3 | Planning | Metis analyzes the requirement and creates the Data Product specification. |
| 4 | Review Spec | Review and validate the generated OpenSpec specification. |
| 5 | Generation | Metis generates the Data Product based on the approved specification and selected sources. |
| 6 | Review Product | Review the generated Data Product configuration and output ports. |
| 7 | Deploy | Deploy the Data Product and monitor the pipeline until publication is complete. |
Step 1: Describe Your Data Product
The Intent step is where you describe what you want to create.
Enter your requirement in natural language. You can describe the business purpose, expected outputs, data to be used, calculations, or other requirements for the Data Product.
For example:
Customer Lifetime Value Predictor that combines customer data, demographics, and combined sales data to predict future customer spending patterns and identify high-value customers.
Metis analyzes the requirement and uses it as the starting point for the Data Product creation process.
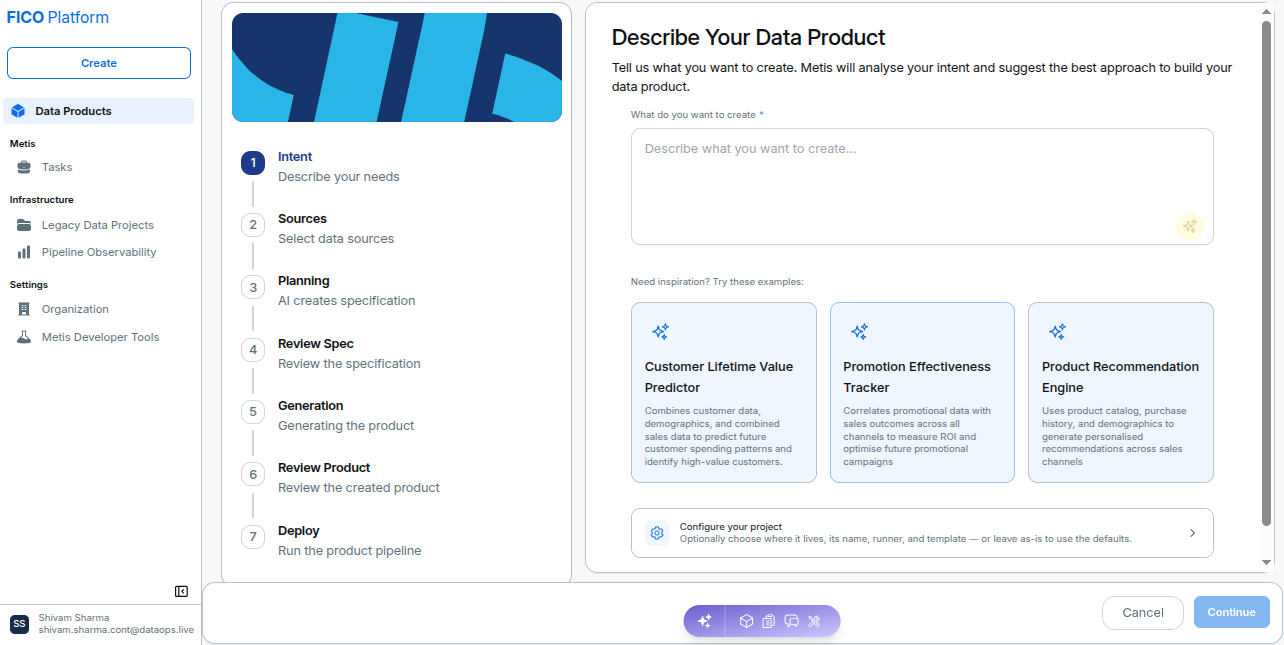
Enhance the Requirement with Metis
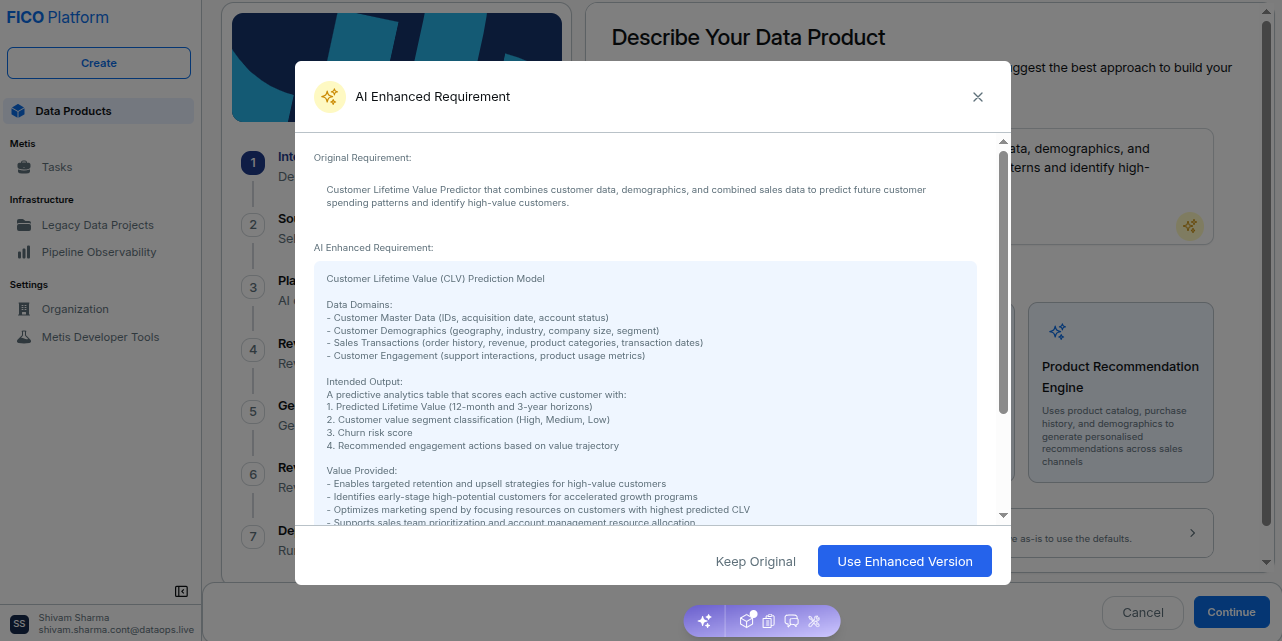
Metis can enhance your requirement to make it more detailed and implementation-ready.
Select Enhance my Data Product requirements with Metis to generate an enhanced version. Review the original and enhanced requirements, then select Keep Original or Use Enhanced Version.
Configure Your Project
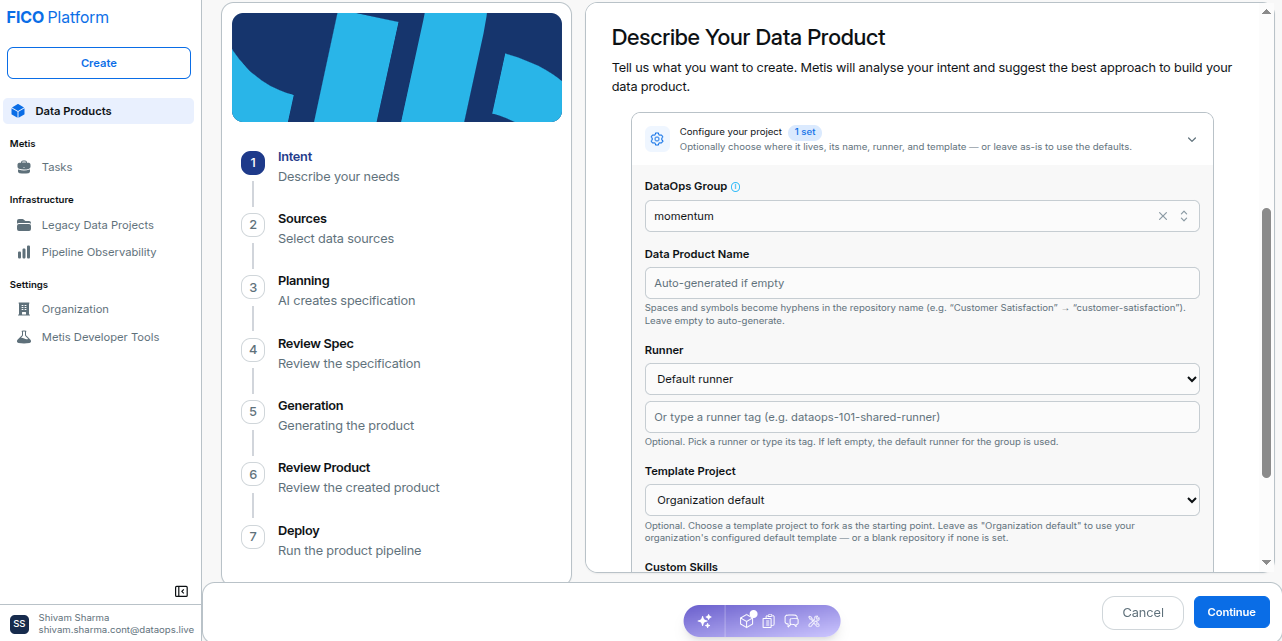
The Configure your project section is optional. You can customize where and how the Data Product is created.
You can configure:
- DataOps Group – Select the group where the Data Product will be created.
- Data Product Name – Enter a name or leave it empty to generate one automatically.
- Runner – Specify a runner tag or use the group's default runner.
- Template Project – Select a template project or use the organization default.
- Custom Skills – Select reusable organization-specific instructions for Metis to follow.
Custom Skills
Custom Skills let your organization define reusable instructions, such as naming conventions and modeling preferences, for Metis to follow when creating Data Products.
During Configure your project, you can select the Custom Skills you want Metis to use for the Data Product.
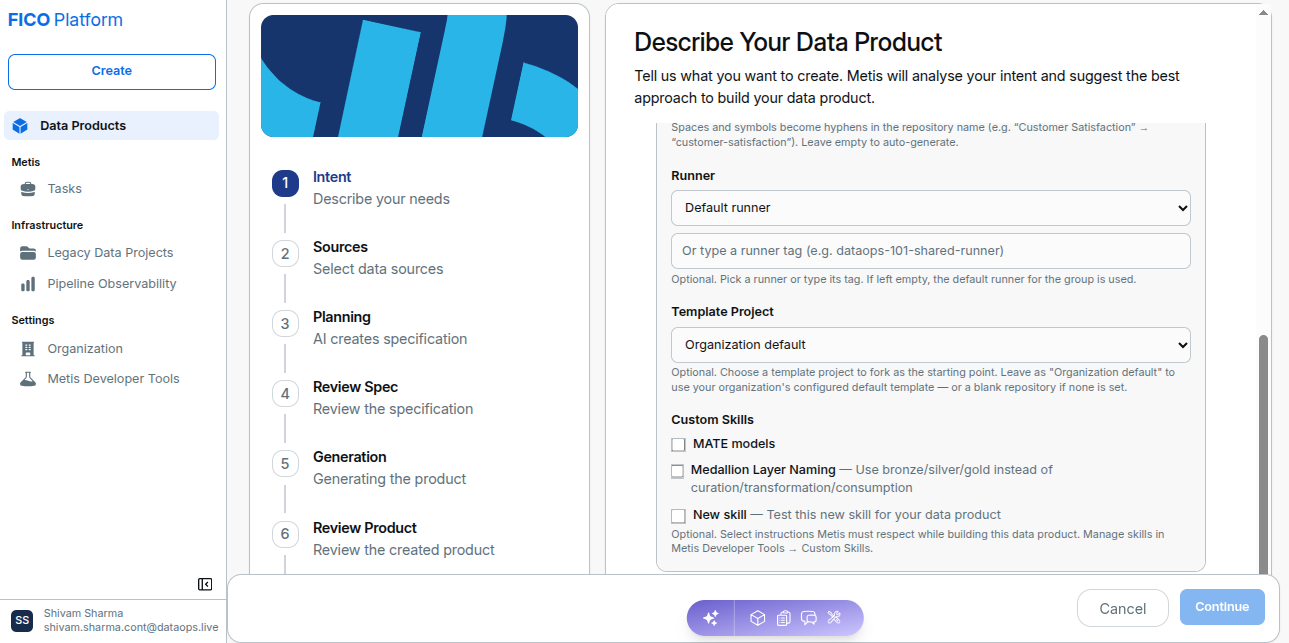
To create, edit, or manage Custom Skills, go to Settings → Metis Developer Tools → Custom Skills. For more information, see Metis Developer Tools.
Select Custom Skills that are relevant to your Data Product requirements and organizational standards. Custom Skills can be reused across future Data Product creation workflows.
Step 2: Select Data Sources
After defining your requirements, continue to Sources.
In this step, Metis recommends relevant data sources based on your requirements. You can select from existing data sources or connect to a new Snowflake account.
Choose a Data Source
The Select Data Sources step provides two options:
- Existing Data Source – Select from data sources that are already available in your organization.
- New Data Source – Connect to a Snowflake account and select the data you want to use for the Data Product.
Metis initially displays data sources recommended based on your Data Product requirements.
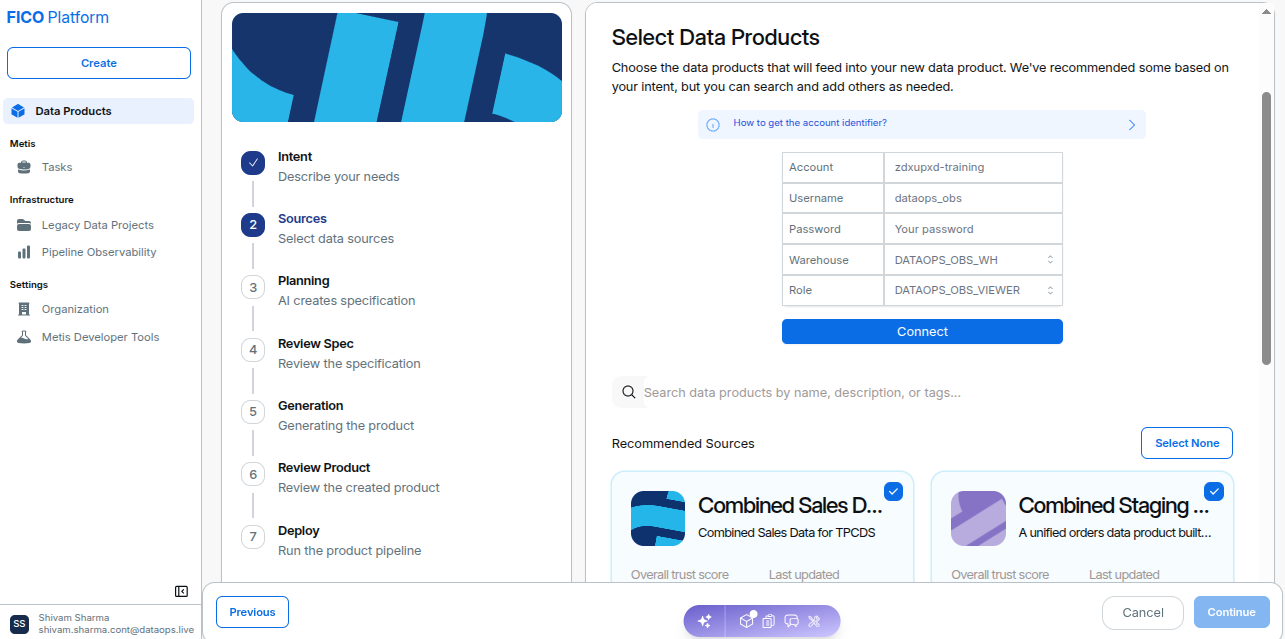
Use an Existing Data Source
Select a recommended data source, or choose Browse All Data Sources to search and select another available data source from your organization.
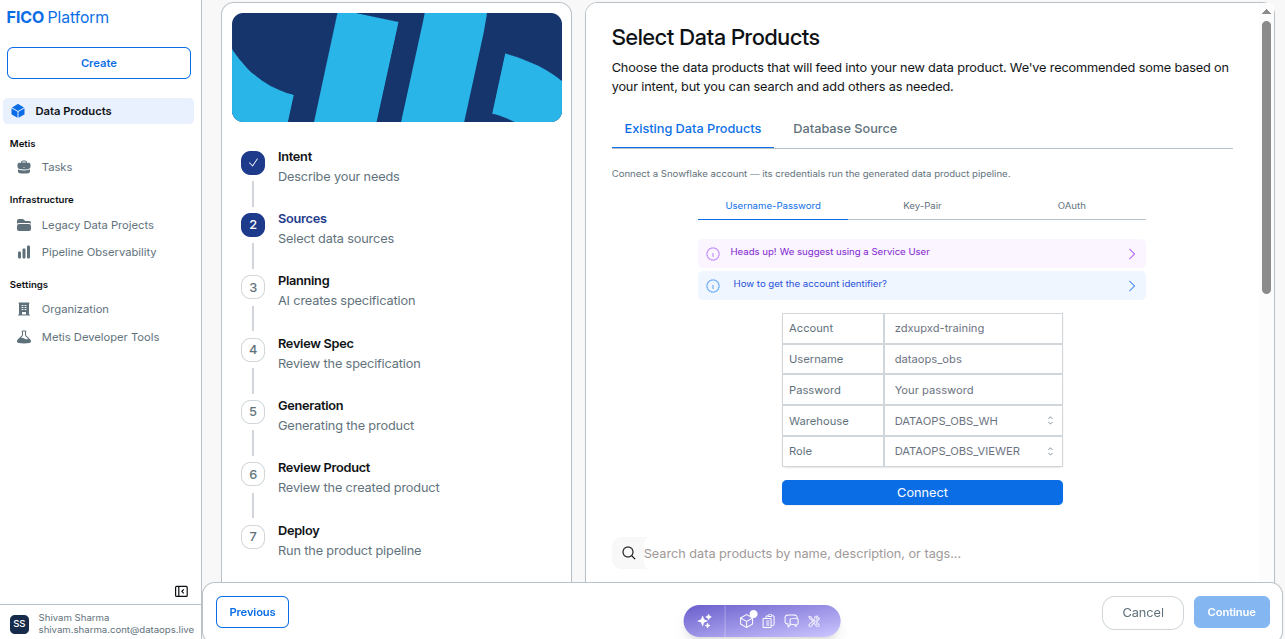
Connect to a New Data Source
Select New Data Source to connect to a Snowflake account.
Choose an authentication method:
- Username-Password — Enter Account, Username, Password, Warehouse, and Role.
- Key-Pair — Enter the required key-pair connection details.
Select Connect to establish the connection.
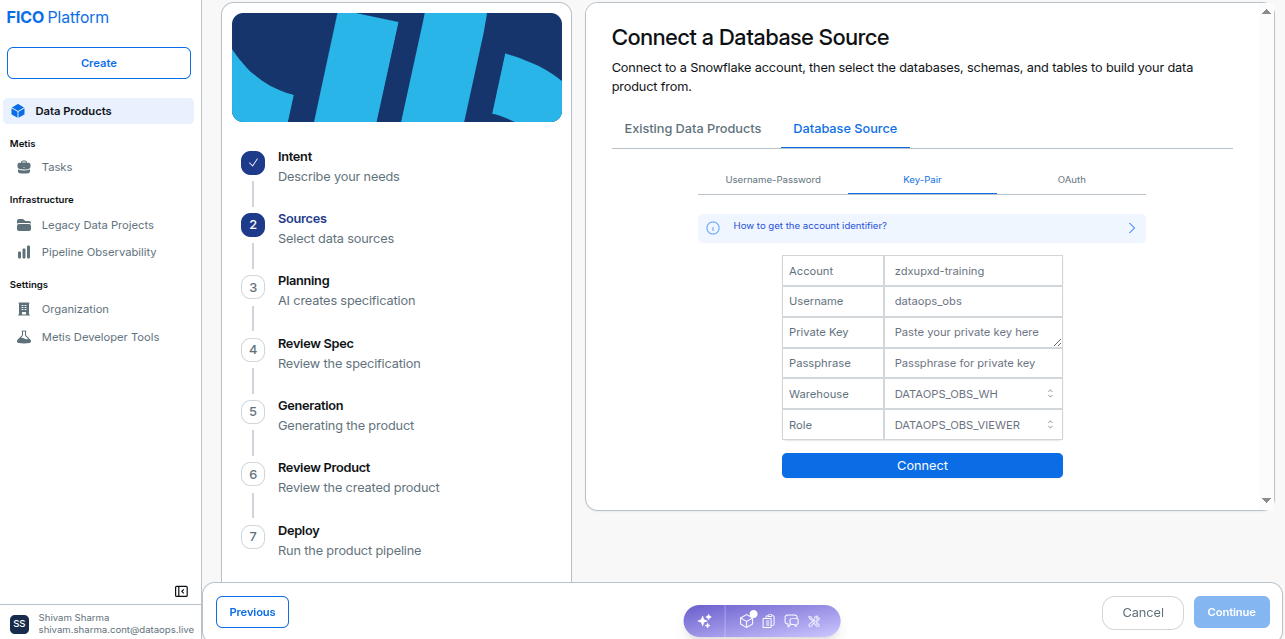
Metis recommends using a Service User for the Snowflake connection. Make sure the account has the required permissions to access the data needed for your Data Product.
Select Databases, Schemas, and Tables
After successfully connecting to Snowflake, Metis displays the available databases.
Select the database you want to use. You can then browse its schemas and tables and select the data required for your Data Product.
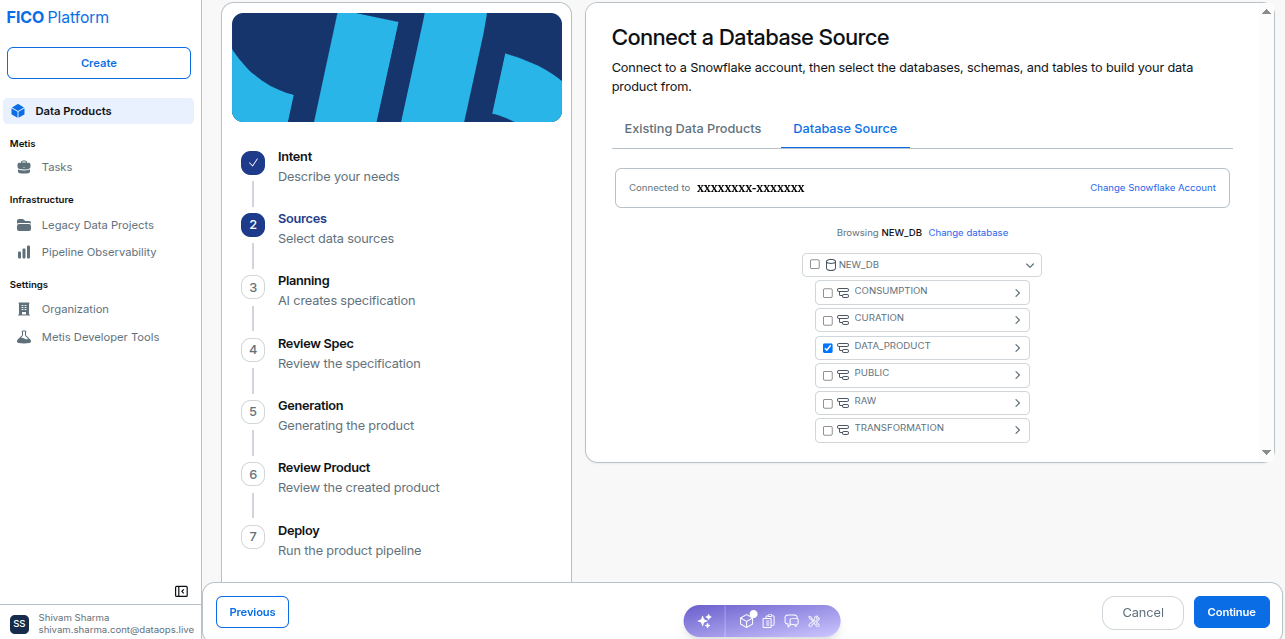
Once you have selected the required data sources, select Continue to proceed to Planning.
Choose only the databases, schemas, and tables required for your Data Product. This helps Metis generate a more relevant specification during the Planning step.
Step 3: AI Planning
During the Planning step, Metis creates an OpenSpec specification for the Data Product.
Metis prepares the workspace, analyzes the selected sources, and processes the requirement to determine how the Data Product should be implemented.
The planning process can include activities such as:
- Preparing the workspace and AI assistant.
- Analyzing the project context, OpenSpec artifacts, and source Data Products.
- Determining and updating the Data Product structure and specification.
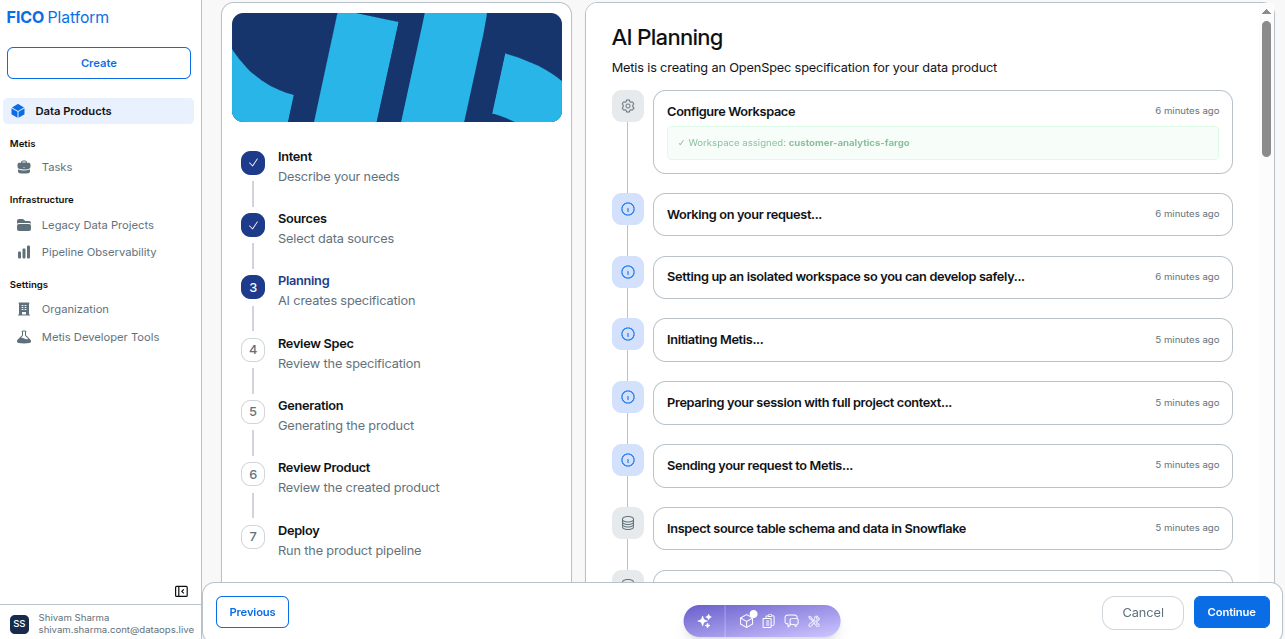
Answer Questions from Metis
Metis may ask questions to gather additional information required to complete the specification.
Enter your response and submit it to continue the planning process.
Review Metis's question carefully and provide the information required to complete your Data Product specification.
Step 4: Review the Specification
After planning is complete, Metis presents the generated OpenSpec specification for review.
The Review Specification step allows you to inspect the proposed implementation before Metis generates the Data Product.
The specification can contain requirements describing:
- Data transformations, calculations, and business logic.
- Output tables, columns, and data structures.
- Data Product behavior and refresh or materialization requirements.
- Expected scenarios and conditions.
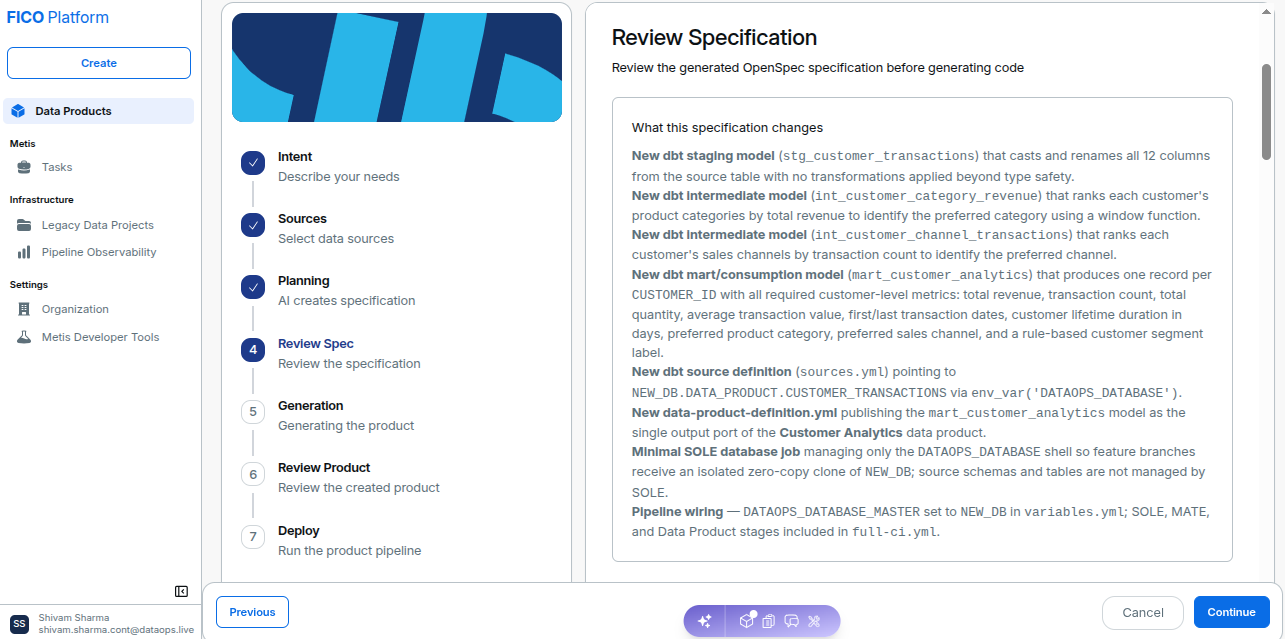
Review the proposed changes carefully.
If the specification accurately represents your requirements, select Continue to proceed with generation.
Review the specification before continuing. This is the main checkpoint where you can validate that the proposed implementation matches the intended Data Product behavior.
Step 5: Generate the Data Product
After the specification is approved, Metis moves to the Generation step.
Metis generates the Data Product configuration based on:
- Your original or enhanced requirement.
- The selected data sources.
- The generated OpenSpec specification.
- Information collected during the planning process.
The generation process runs through a series of activities, including preparing an isolated workspace, starting the AI assistant, loading project context, and sending the request to the agent.
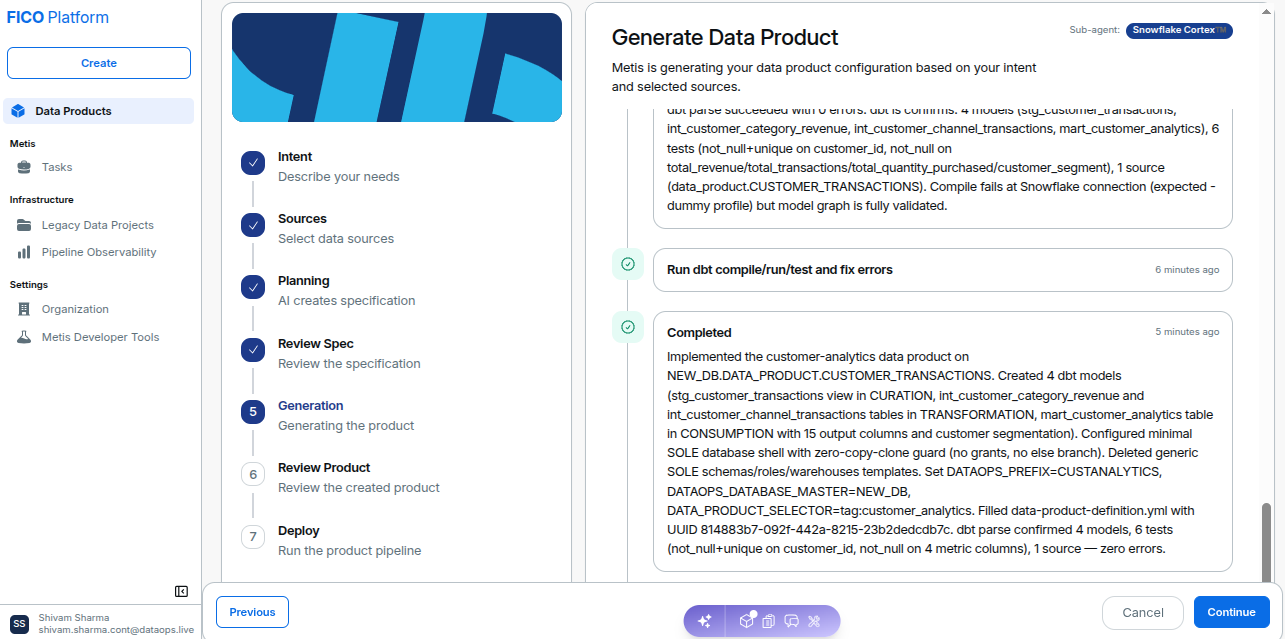
Metis continues processing until the Data Product has been generated.
Step 6: Review the Generated Data Product
Once generation is complete, Metis displays a Generation Summary.
The summary provides an overview of the generated Data Product and allows you to review the generated configuration before deployment.
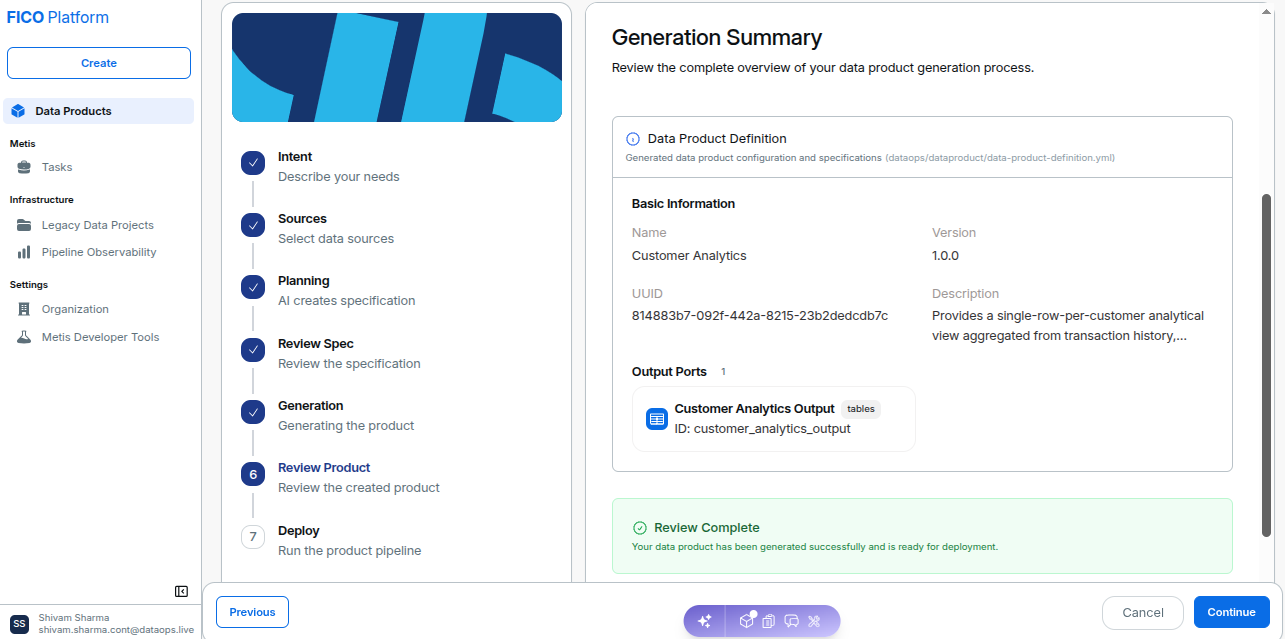
Review the generated Data Product and confirm the configuration and output ports before continuing to deployment.
Step 7: Deploy the Data Product
The final step is Deploy.
Metis pushes the generated workspace and starts the pipeline responsible for compiling, validating, and publishing the Data Product.
The deployment screen provides visibility into the pipeline jobs and their current status.
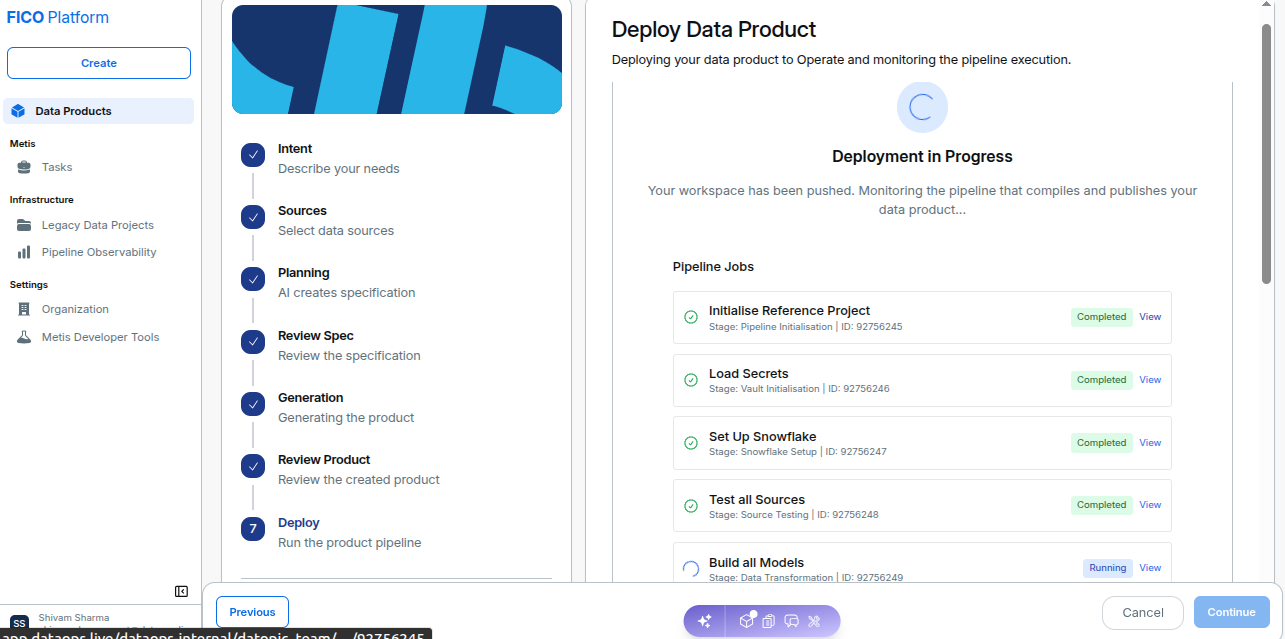
Pipeline stages can include activities such as:
- Initializing the project, loading secrets, and setting up Snowflake.
- Verifying source access and populating the workspace.
- Building AI models, analyzing column lineage, and generating the Data Preview.
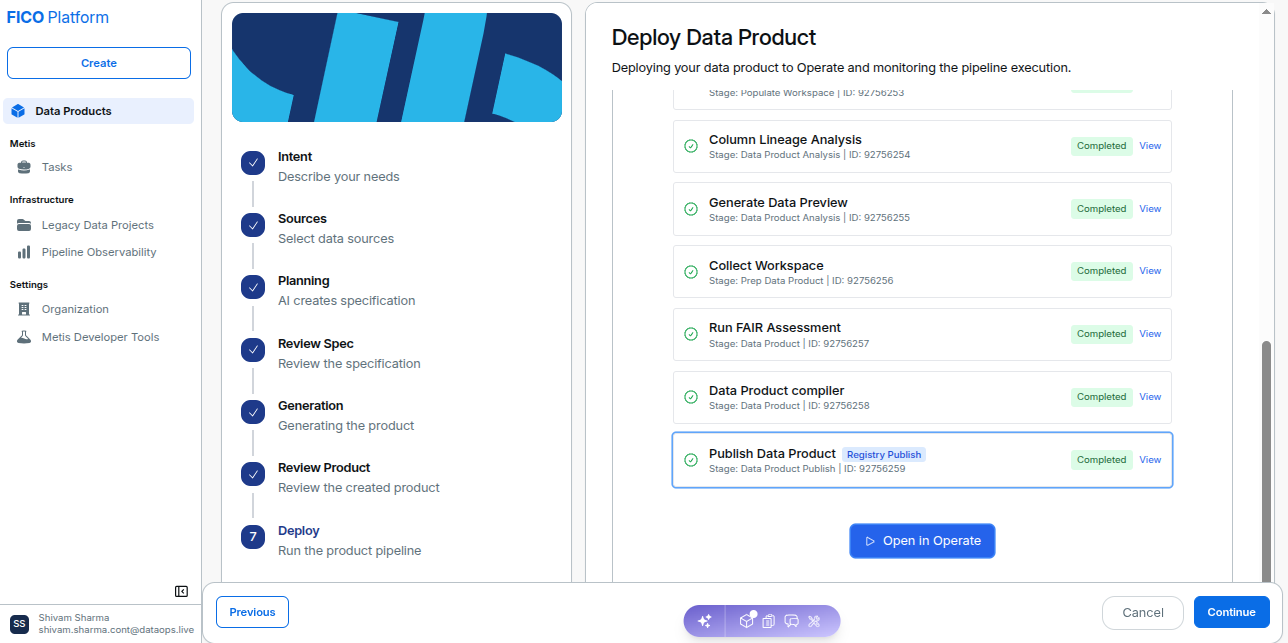
- Compiling and publishing the Data Product.
Each job displays its current status, allowing you to monitor deployment progress.
Publish the Data Product
After the required deployment jobs complete successfully, the Publish Data Product stage is completed.
You can then select Open in Operate to access the deployed Data Product and its operational information.
Creation Complete
When the deployment and publication process is complete, Metis displays a confirmation that the Data Product is ready.
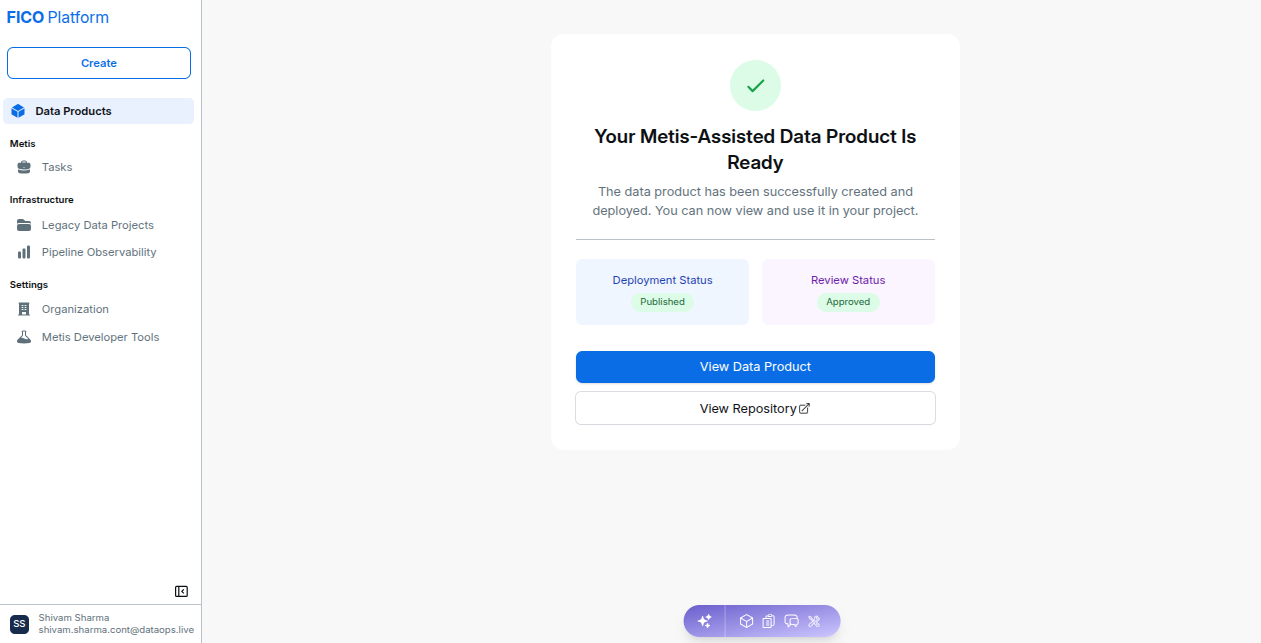
The completion screen displays the deployment and review status and provides options to navigate to the Projects area or view the newly created data product.
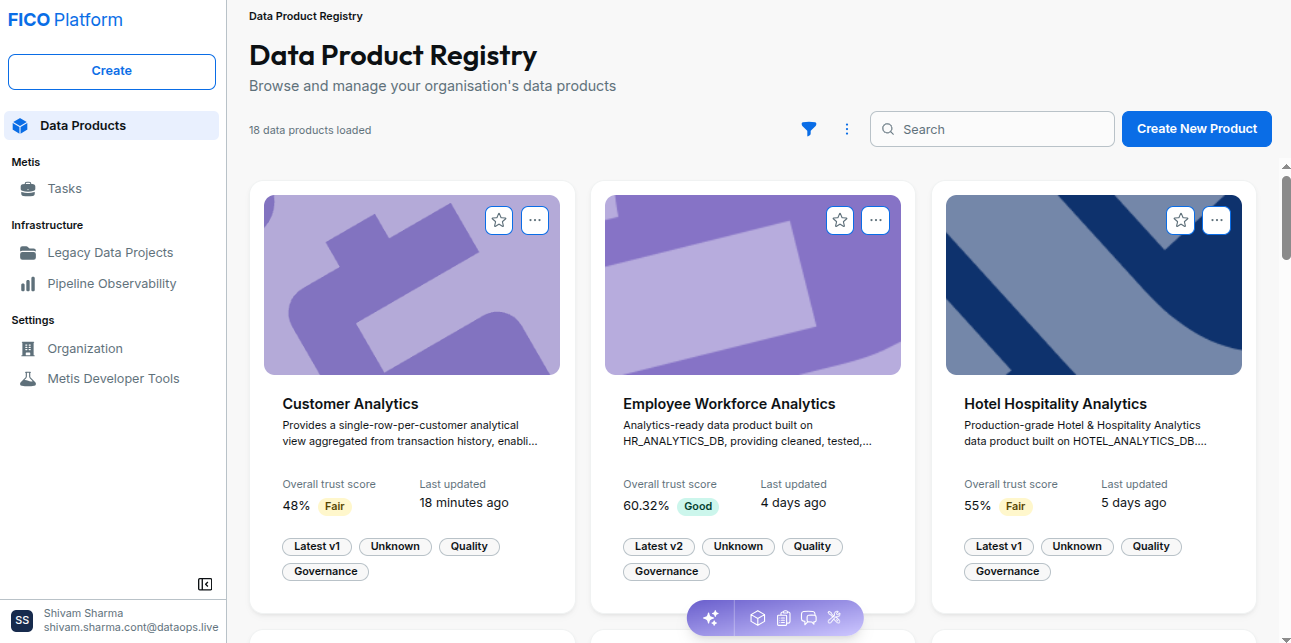
Select View Data Product to open the Data Product Registry, where the newly created data product is available to view and manage.
Select View Repository to open the repository containing the generated data product project.
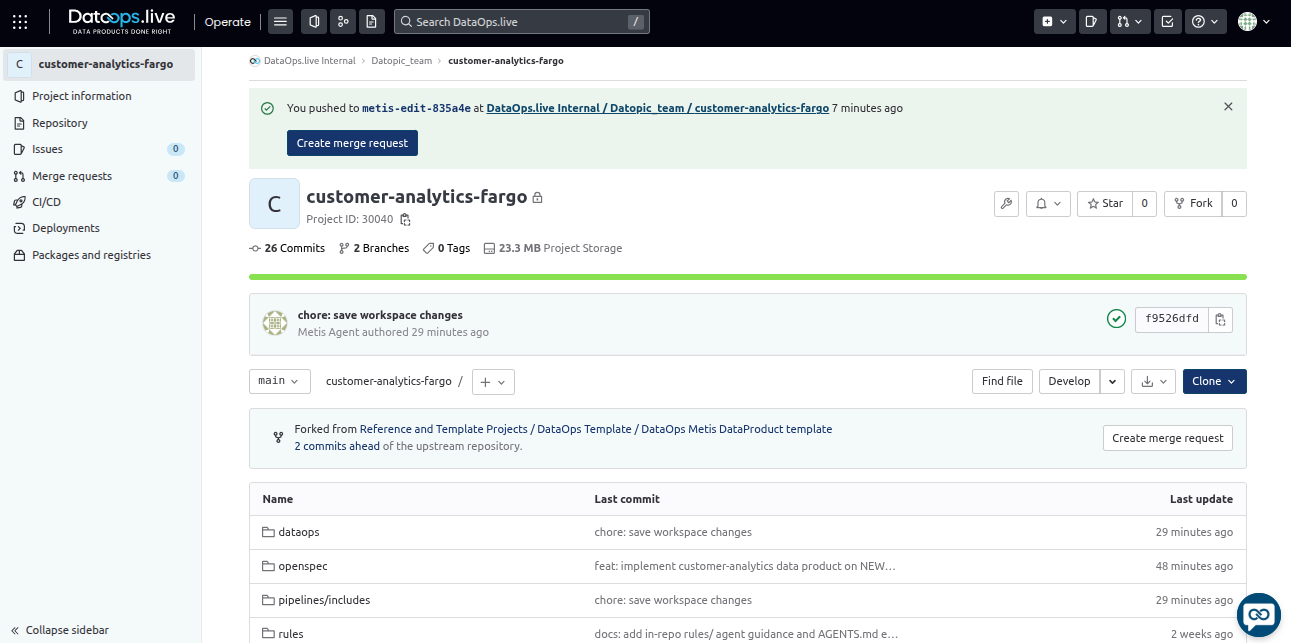
A successfully completed workflow results in a Data Product that has been:
- Generated from the provided requirements.
- Configured using the selected data sources.
- Validated through the generated specification.
- Deployed through the Data Product pipeline.
- Published and ready for use.
Metis assists with Data Product creation, but generated requirements, specifications, and Data Product configurations should be reviewed before deployment to ensure they meet your organization's requirements and governance standards.