Building Data Products
Data products can be standalone or composite, depending on their purpose and operational approach. Running DataOps pipelines results in building data products, updating them, and refreshing their data to create different versions of the data products once there are any changes.
A data product is the output of a single DataOps pipeline - a parent pipeline that may use child pipelines. Building a data product involves data quality, data governance, reproducibility, scalability, and maintainability. DataOps.live achieves this by using robust engineering practices, version control, testing, automation, and collaboration methodologies, all enhanced by the powerful SOLE and MATE engines and the orchestration capabilities.
The data product platform offers a data product registry and metadata objects managed within the platform infrastructure at a group or project level to manage data products and their dependencies.
Standalone data products
Standalone data products workflow
The basic top-level workflow to create a standalone data product is as below:
- Configure the data product definition in the specification file.
- Add the Data Product orchestrator to the pipeline.
- Schedule (or trigger) the data product to run regularly.
- Optionally, push to your data catalog for business users.
Building a standalone data product
-
Log in to the data product platform.
-
Navigate to your project and create a data product specification file under
/dataopsin a new folder in your project directory.data product definition templateid: [data product id ]
name: [data product name]
description: [data product description]
schema_version: 1.0.0
dataset:
name: [Name of the dataset]
description: [description of the dataset]
mate_models:
- select: [selector of the models that we would like to include in the data product]
output_ports:
-id: [id of the output_port]
name: [output port name]
type: [type usually Tables]
description: [description of the output port]
service_level_indicators:
- mate_tests:
- select: [selector of the test that we would like to include in the data product]
service_level_objectives:
- name: [name of the SLO]
description: [description of the SLO]
test_select: [selector of the test that is related to this SLO]Example of a data product specification file:
DataProductA.ymlid: DataProductA
name: Data Product A - Person data
description: Data Product A - Person data - for data product demos - derived from WidgetCo Customer Segmentation Data Product and Streamlit app.
schema_version: 1.0.0
output_ports:
- id: PersonData
name: Data Product A - Person data
type: tables
description: Data Product A - Person data - for data product demos
service_level_indicators:
- mate_tests:
- select: dim_customer
service_level_objectives:
- name: PERSON_DATAPRODUCT models test
description: All PERSON_DATAPRODUCT models tests should pass
test_select: dim_customer
dataset:
name: Person_data
description: Data Product A - Person data
mate_models:
- select: dim_customer -
Add a Data Product orchestrator job to the pipeline.
The Data Product orchestrator enriches the Data Product Specification with the metadata from the pipeline run. By using the provided MATE selectors in the specifications file, the orchestrator adds all the objects and tests that are part of the data product. Once you run the pipeline that includes the orchestrator, you upload a data product manifest to the data product registry.
noteYou can use different methods to transform data in your data products. For more information, see Creating Custom Data Products Snippets.
-
Create a
data_product_orchestrator.ymljob file with the following structure:data_product_orchestrator.yml"Data Product Orchestrator":
extends:
- .agent_tag
stage: "Data Product"
image: $DATAOPS_DATAPRODUCT_RUNNER_IMAGE
variables:
DATAOPS_DATA_PRODUCT_SPECIFICATION_FILE: [path to the data product specification file]
DATAOPS_DATA_PRODUCT_REFERENCE_FILE: [path to the Data Product Manifest that we would like to use for backward compatability][optional]
DATAOPS_DATA_PRODUCT_REFERENCE_FILE_FROM_DIFFERENT_BRANCH: 1 [optional]
script:
- /dataops
artifacts:
paths:
- dataops/report/data_product_manifest_viewer/
name: "Data Product Manifest Viewer"
expose_as: "dataopsreport"
icon: ${DATAOPS_ICON}The
artifacts:section of this script adds a human-readable output of the data product manifest in the report section of the pipeline: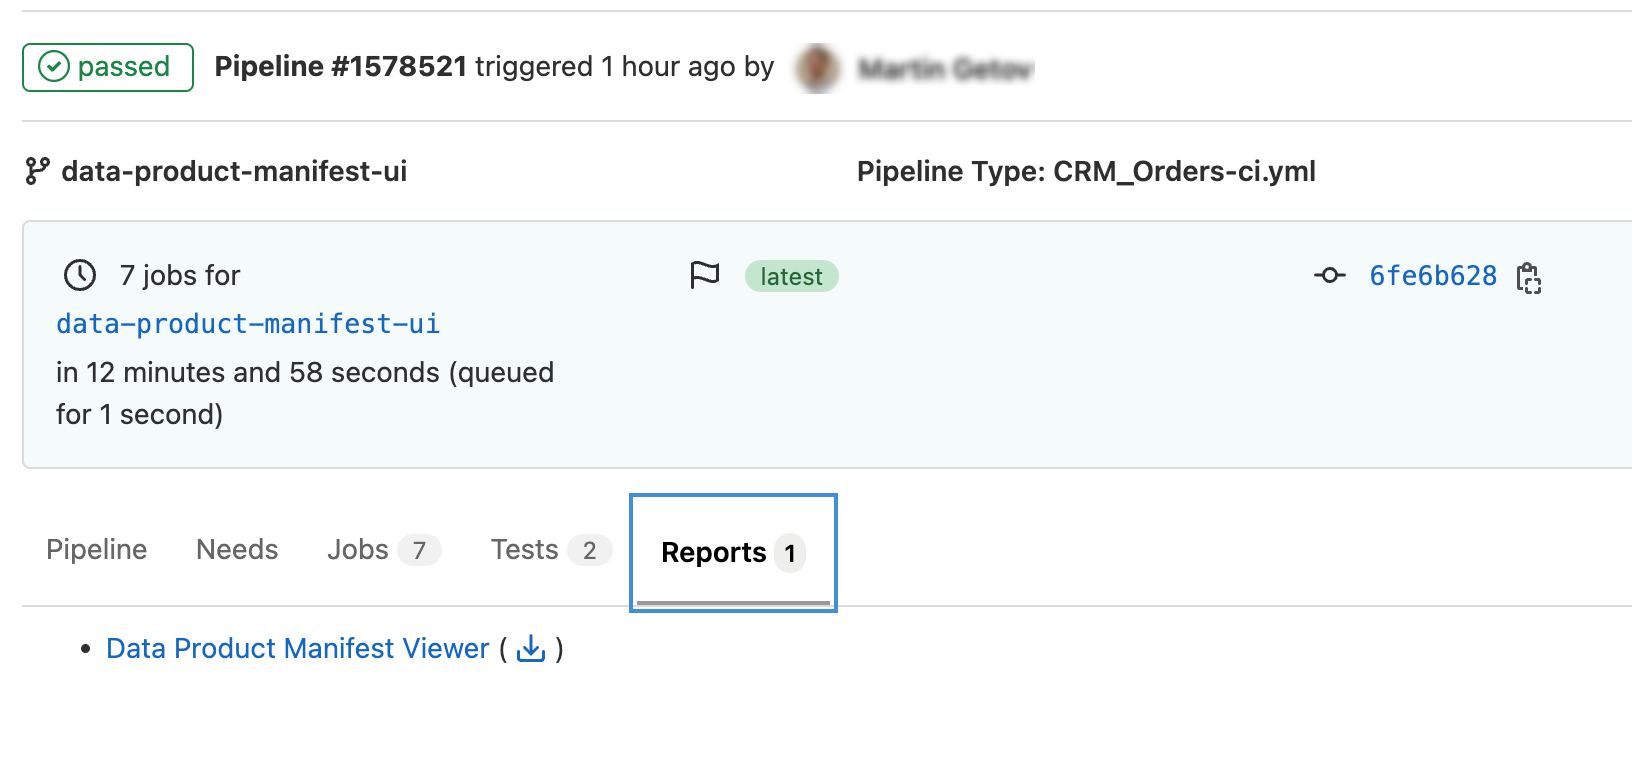
-
Click the report name to view the data product metadata generated by the pipeline.
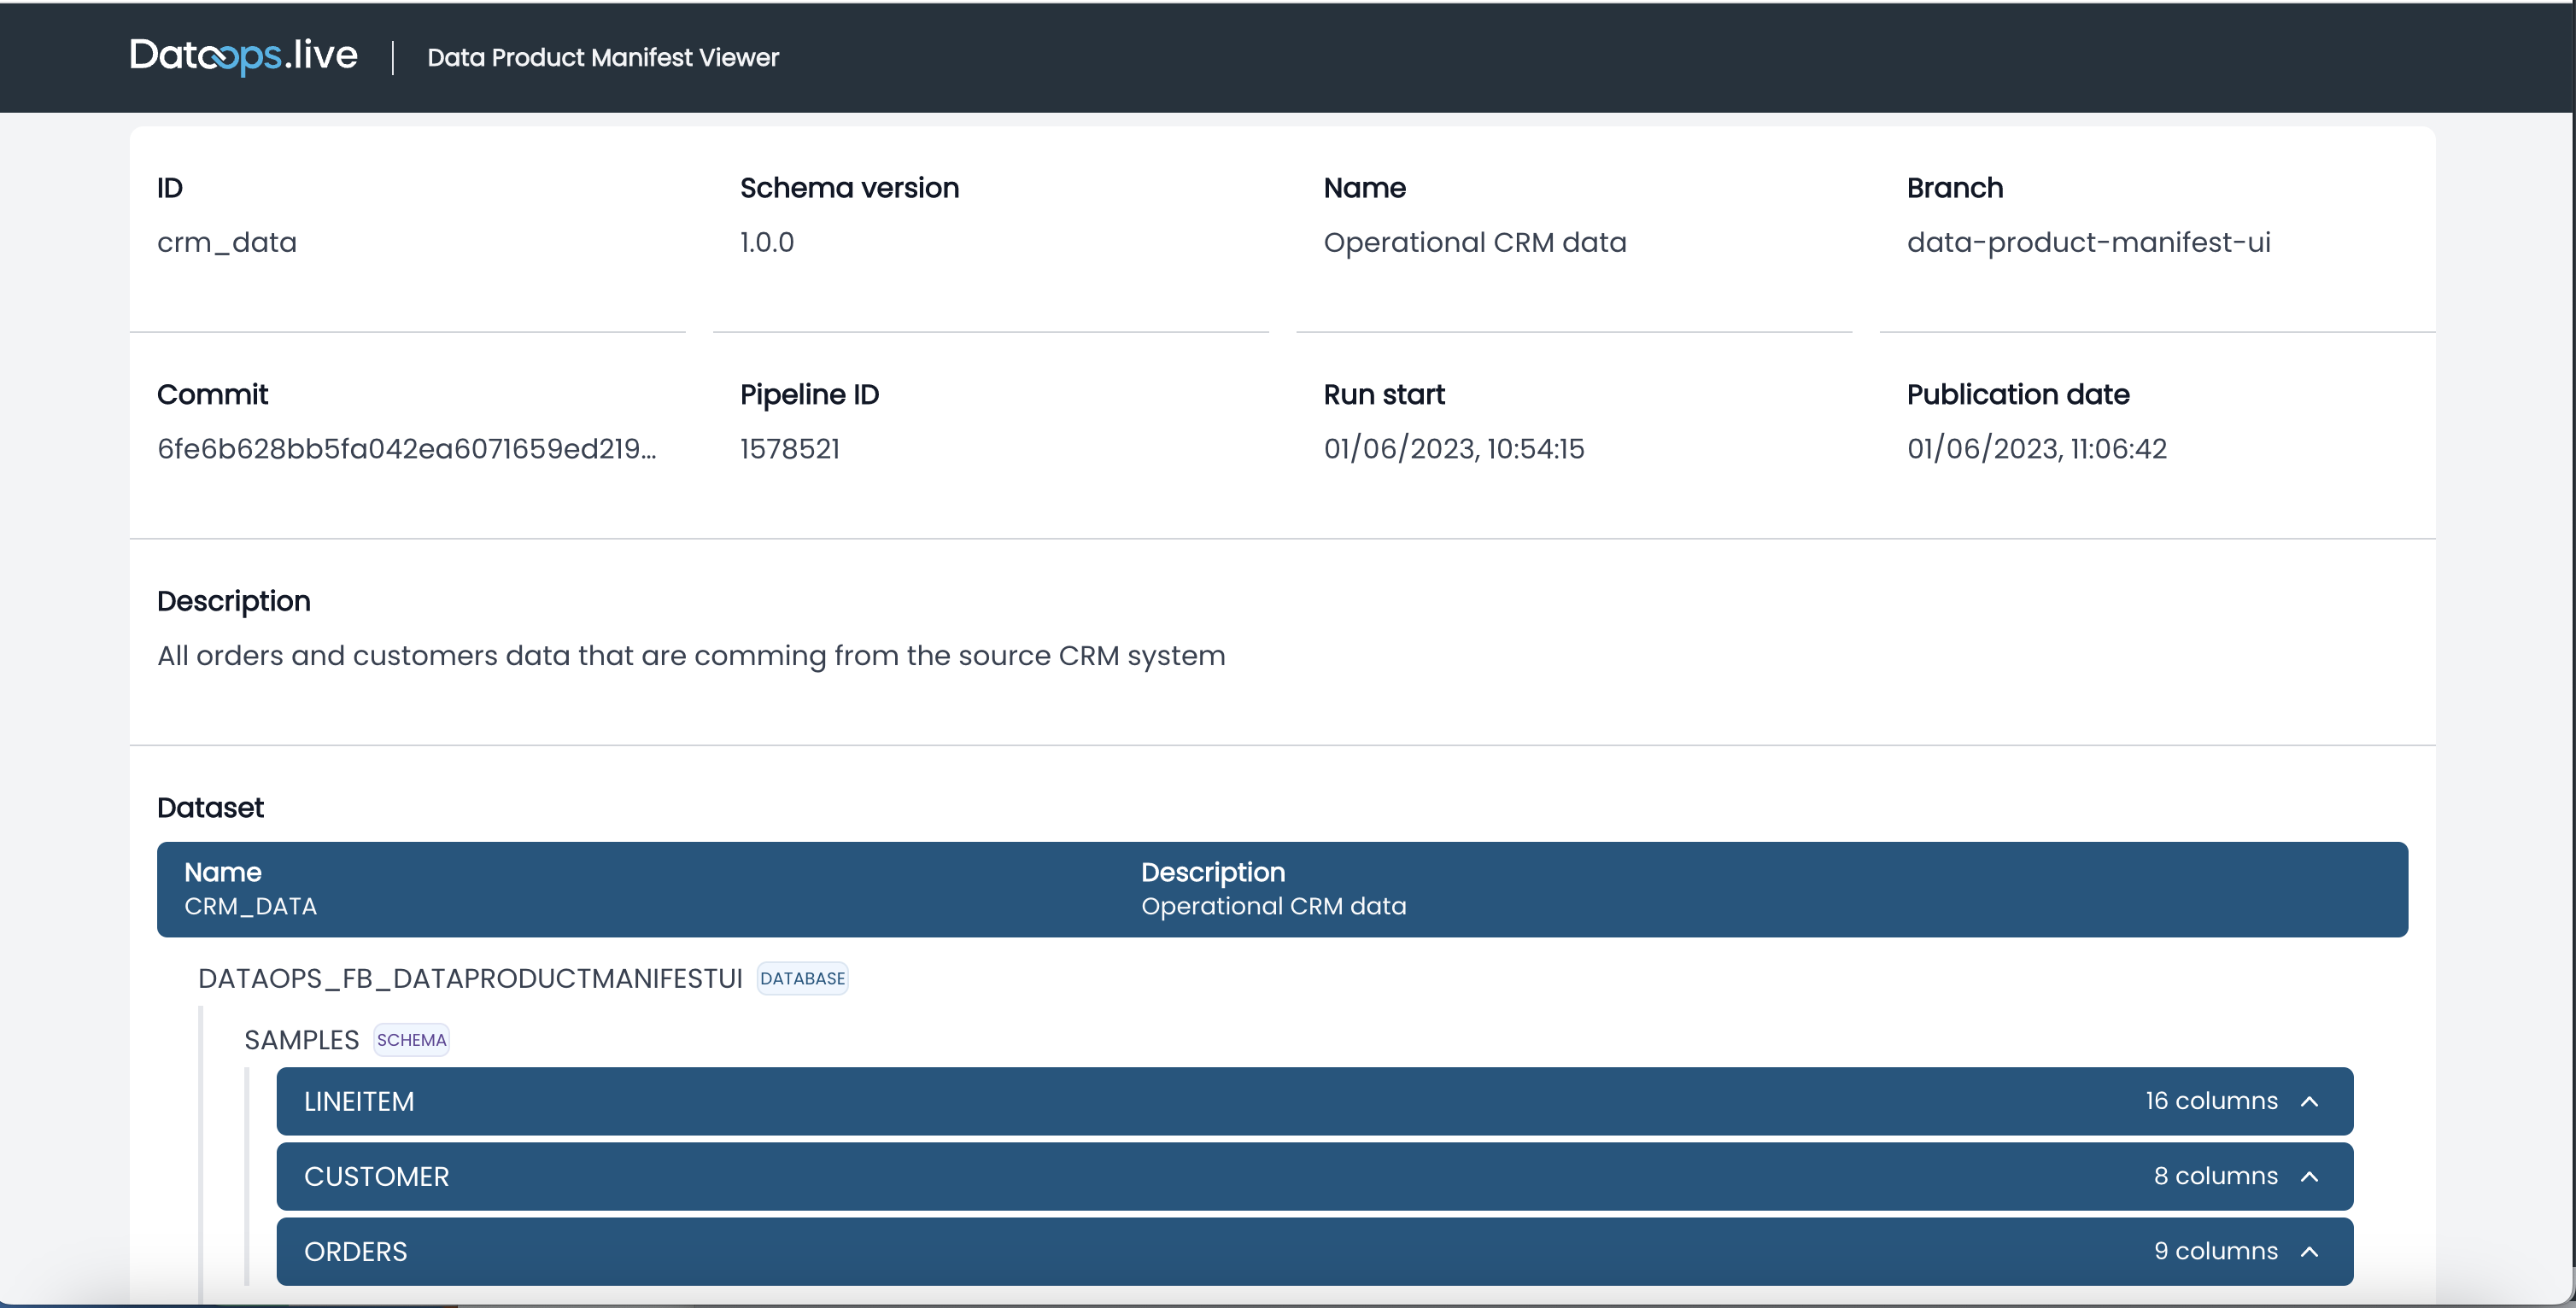
-
Add
Data Producttowards the bottom of the list, beforeClean Up, in the filepipelines/includes/config/stages.ymlof the pipelines - the predefined job will be in this stage.stages.ymlstages:
- Pipeline Initialisation
- Vault Initialisation
- Snowflake Setup
- Additional Configuration
- Data Ingestion
- Source Testing
- Data Transformation
- Transformation Testing
- Generate Docs
- Data Product
- Clean Up
-
-
Run the
full-ci.ymlfile containing the pipeline definition in your project directory.See Running Pipelines for more information about the methods to run pipelines.
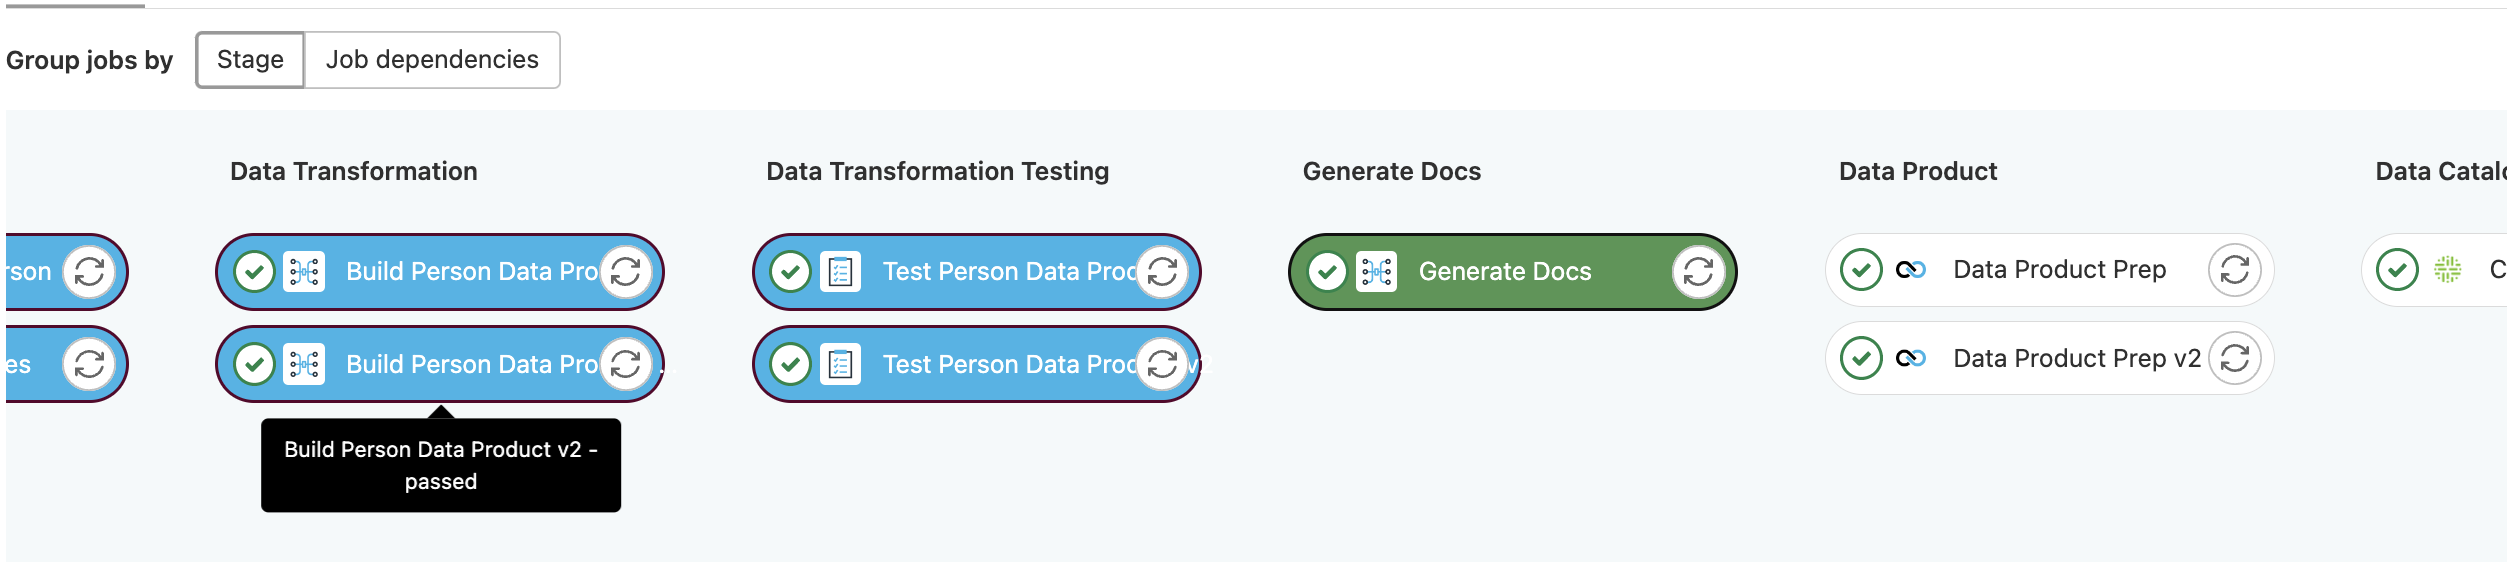
Building a multi-version data product pipeline
You can load multiple versions of one data product in a single pipeline. However, we recommend having different database schemas for each of the versions. To avoid data duplication, you can create a view on top of one of the versions and include this view in the other version. This approach is possible when objects don't have any change between the data product versions.
1. Create the new models for the new data product version
- In your project directory, navigate to
/dataops/modelling. - Create new models for the new version. It is recommended to have a different subfolder for each of the versions.
2. Create a data product specification file for the new data product version
You can create a copy of the current data product version specification and add a suffix after the name, e.g. my_data_product_v2.yml.
-
Change the
schema_versionattribute in the specification. -
Change the
mate_modelsandselectunder themate_testselector.my_data_product_v2.ymldataset:
mate_models:
- select:
[
selector of the models that we would like to use for the new data product,
]
service_level_indicators:
- mate_tests:
- select:
[
selector of the test that we would like to use for the new data product,
]
service_level_objectives:
- name: [name of the SLO]
description: [description of the SLO]
test_select:
[
selector of the test that we would like to use for the new data product in this SLO,
]The new selector selects the models and tests that will be part of the new data product version.
-
Save the data product specification for the new data product version.
3. Create MATE jobs for the new models and tests
Create or update the MATE jobs with new models and tests representing your new specifications.
4. Create a Data Product orchestrator job that will use the new version specification file
Update the orchestrator to point to the following specifications.
"Data Product Orchestrator v2":
  extends:
    - .agent_tag
  stage: "Data Product"
  image: $DATAOPS_DATAPRODUCT_RUNNER_IMAGE
  variables:
    DATAOPS_DATA_PRODUCT_SPECIFICATION_FILE: dataops/data-product-definitions/my_data_product_v2.yml
  script:
    - /dataops
  artifacts:
    paths:
      - dataops/report/data_product_manifest_viewer/
    # the name of the artifacts should be different for each version
    name: "Data Product Manifest Viewer v2"
    expose_as: "dataopsreport"
  icon: ${DATAOPS_ICON}
5. Include the new jobs in the -ci.yml file
Working with data products in DataOps development environment
You can use the ready-to-code DataOps development environment to speed up the development process and automatically assemble all the necessary resources to create more robust data products and manage their lifecycle.
The basic top-level workflow to create a data product using the DataOps development environment within the data product platform is as below:
- Create a project from a template.
- Define the data product infrastructure using SOLE.
- Configure orchestration for data ingestion using MATE capabilities.
- Configure data transformation using the transformation and auto-ingestion capabilities in MATE.
- Configure automated testing using MATE.
- Iterate and test.
Running tests for a single data product
Once in the DataOps development environment, you can run a single test by running these commands.
For this to work, you must set up the MATE environment variables and have access to Snowflake.
# The DBT project folder
cd dataops/modelling
dbt docs generate
cd ../../
# change the variables to actual files
dpd --spec ${specification_file} --ref ${reference_manifest}
The generated report for this data product will pop up in your browser. Make sure your browser does not block this popup.
Adding mapping between data products specification and reference specification
You need the mapping to run the data-product-test.sh script. This script is used by the pre-commit and the VS Code plugin for testing data products.
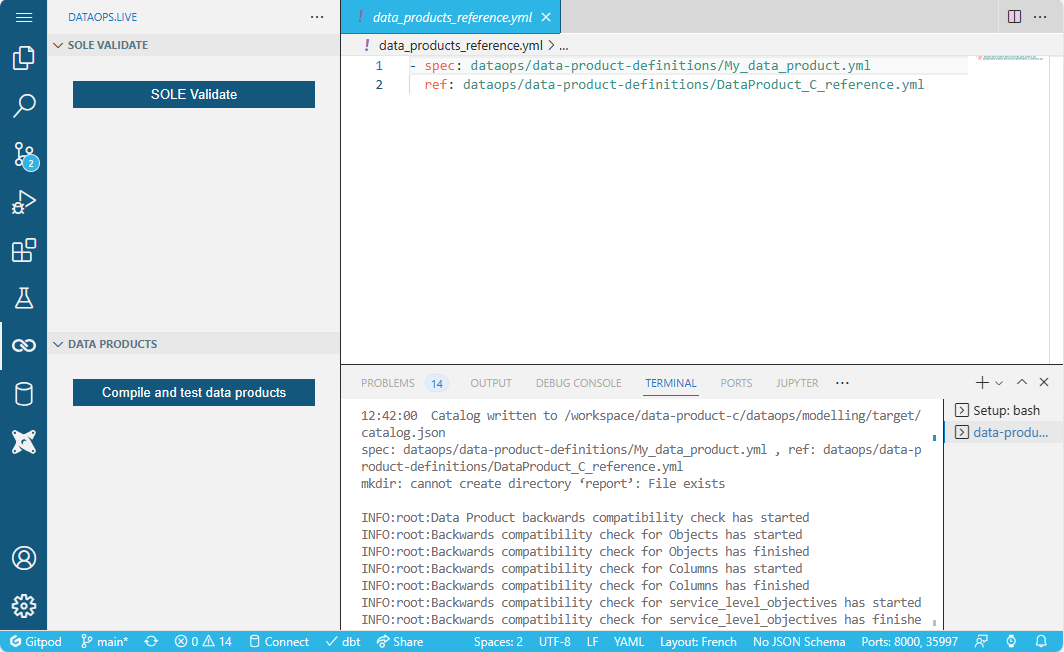
Add a file named data_products_reference.yml in the root directory. It holds the mapping between data product specifications and what they will be tested against. For example:
- spec: dataops/data-product-definitions/CRM_data.yml
  ref: dataops/data-product-definitions/CRM_data_reference.yml
Once this is done, you can use the Compile and test data products button in VS Code:
Adding an optional pre-commit hook
You can add a pre-commit hook to validate the data products for breaking changes.
-
Add the pre-commit script by coping it once you are in the development environment:
mkdir hooks
cp /runner-tools/data-product-test.sh ./hooks/data-product-test.sh -
Add the pre-commit tool configuration
.pre-commit-config.yaml:.pre-commit-config.yamlrepos:
- repo: local
hooks:
- id: custom-hook
language: system
name: custom-hook
entry: hooks/data-product-test.sh