DevReady Setup and Configuration
What is DevReady — DataOps development environment?
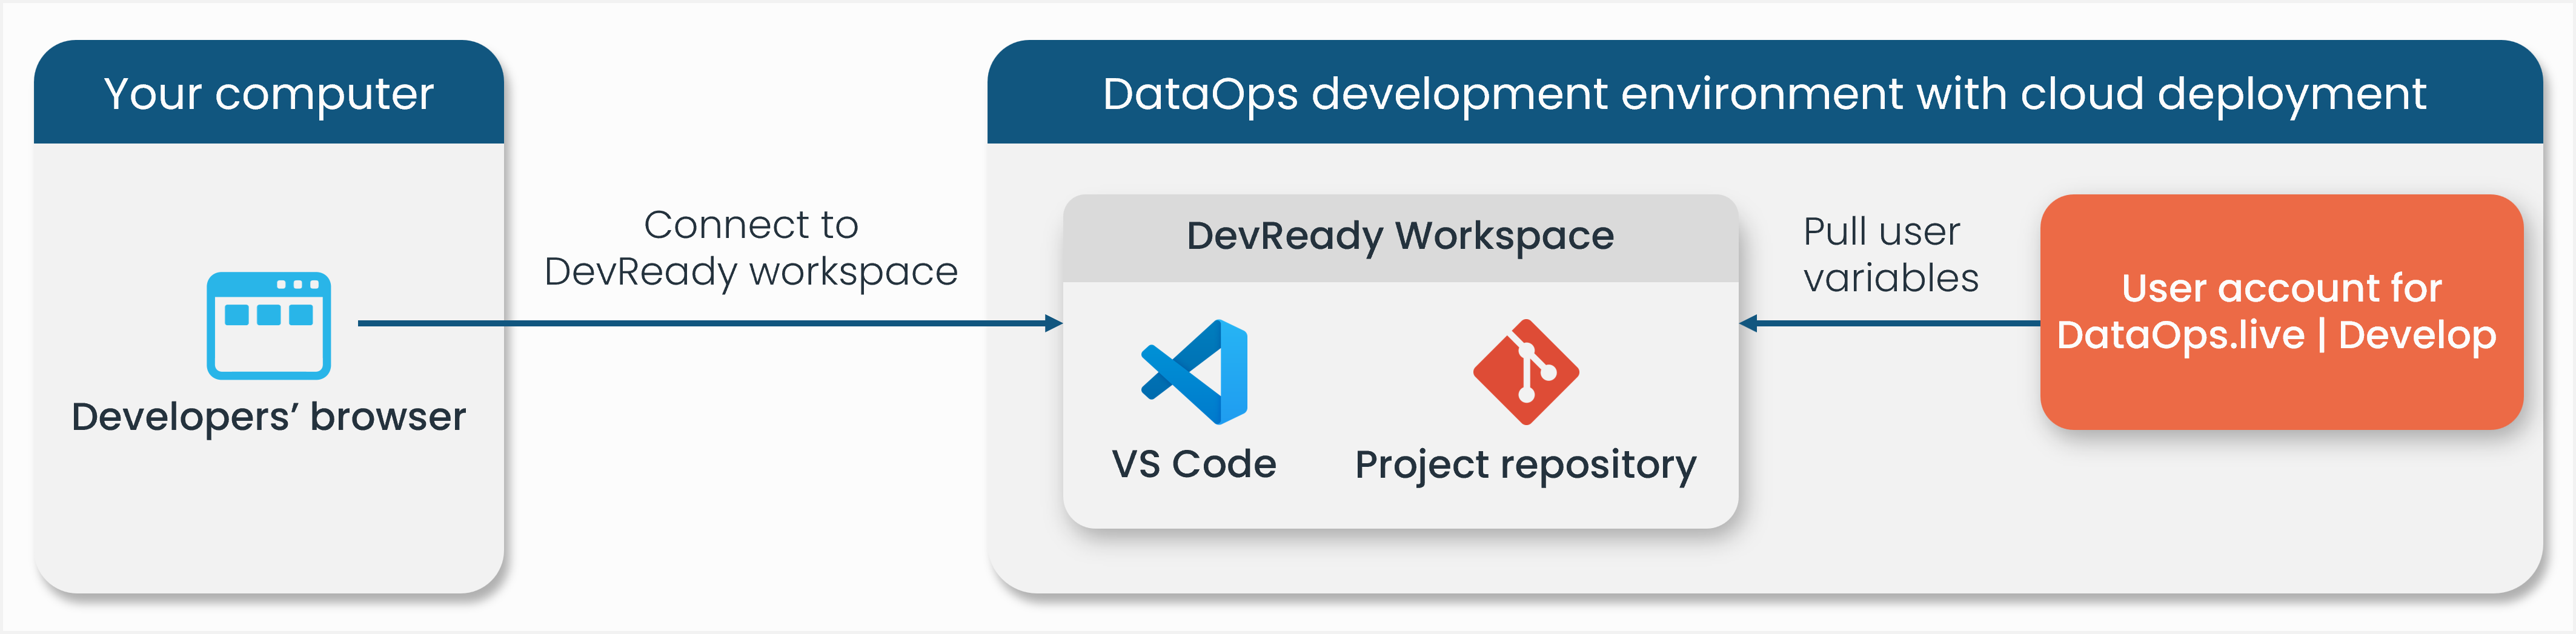
DevReady is a browser-based tool that automates development environments for each of your tasks in seconds. You can use DevReady with Visual Studio (VS) Code that supports full-featured Git integration.
DevReady gives you highly optimized data development experience for key DataOps use cases without installation and helps you speed up the development process when writing software.
Setup overview
Pre-requisites
-
Some tools that you might run in DevReady for fast feedback create local files that should not be committed to your project later. To avoid mistakes make sure the following is in your
.gitignorefile:.gitignoredataops/modelling/dbt_packages
snowflake.log -
If you are using SSO with your Snowflake account, you will need to first setup a Snowflake OAuth Security Integration.
DevReady setup
Initial setup within the data product platform
To let the DevReady automatically work with your DataOps project so that you can start coding immediately, you must first do the below setup steps.
-
Under the top-level Projects menu, click your chosen project to open its details.
-
Click Develop from the menu.
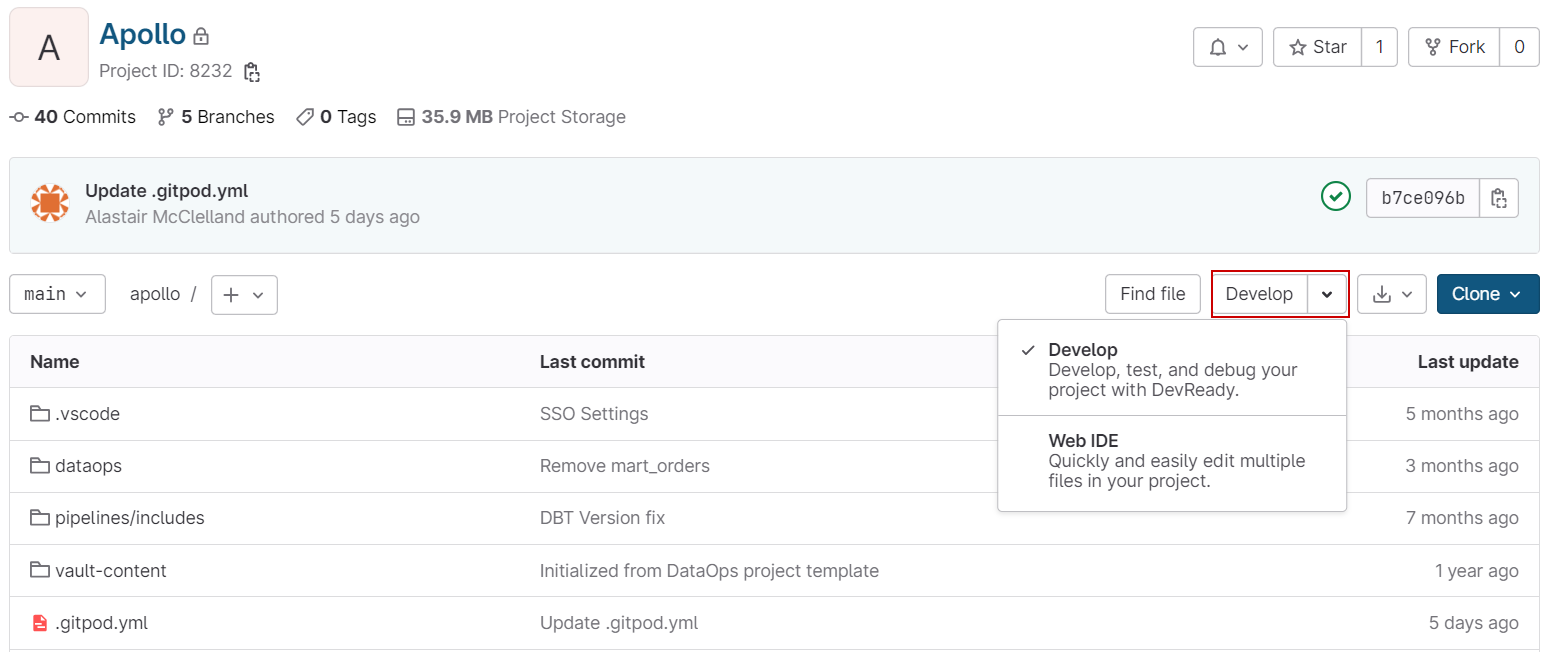
You will see a confirmation message if this is your first time doing this.
Giving DevReady access to your DataOps account
When accessing Develop, you will need to sign in using the dataops.live organization. See Organization Sign-in for more information about this authentication step.
-
Click DataOps.live | Develop from the menu of your open project to open up a workspace in the DataOps development environment. If you haven't done this recently, you may be asked to reauthenticate:
-
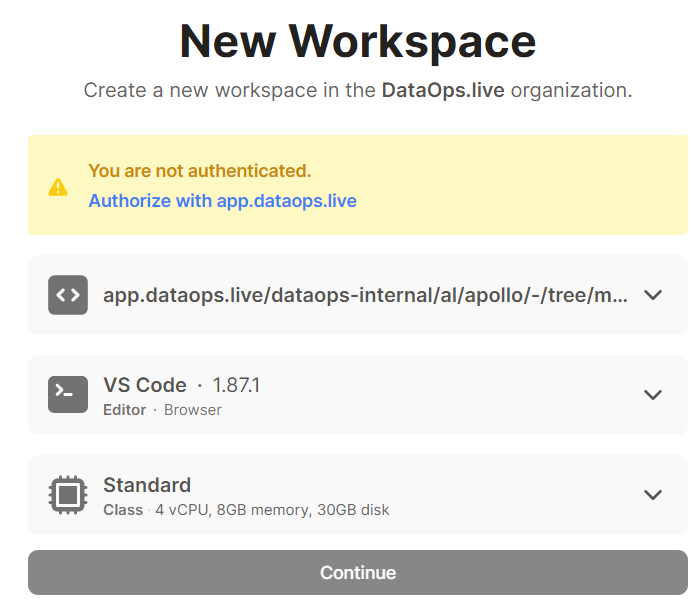
In the new window, click Authorize with app.dataops.live.
-
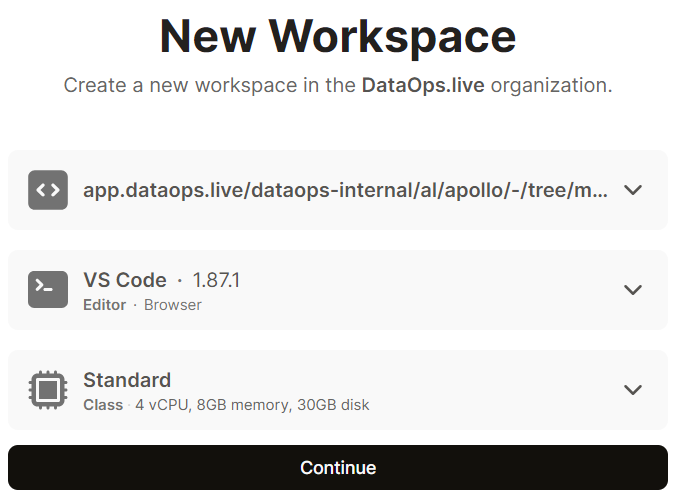
In the new window that opens, make sure the default VS Code browser is selected and click Continue.
Other editors may not work and certainly will not have the optimized DataOps developer experience.
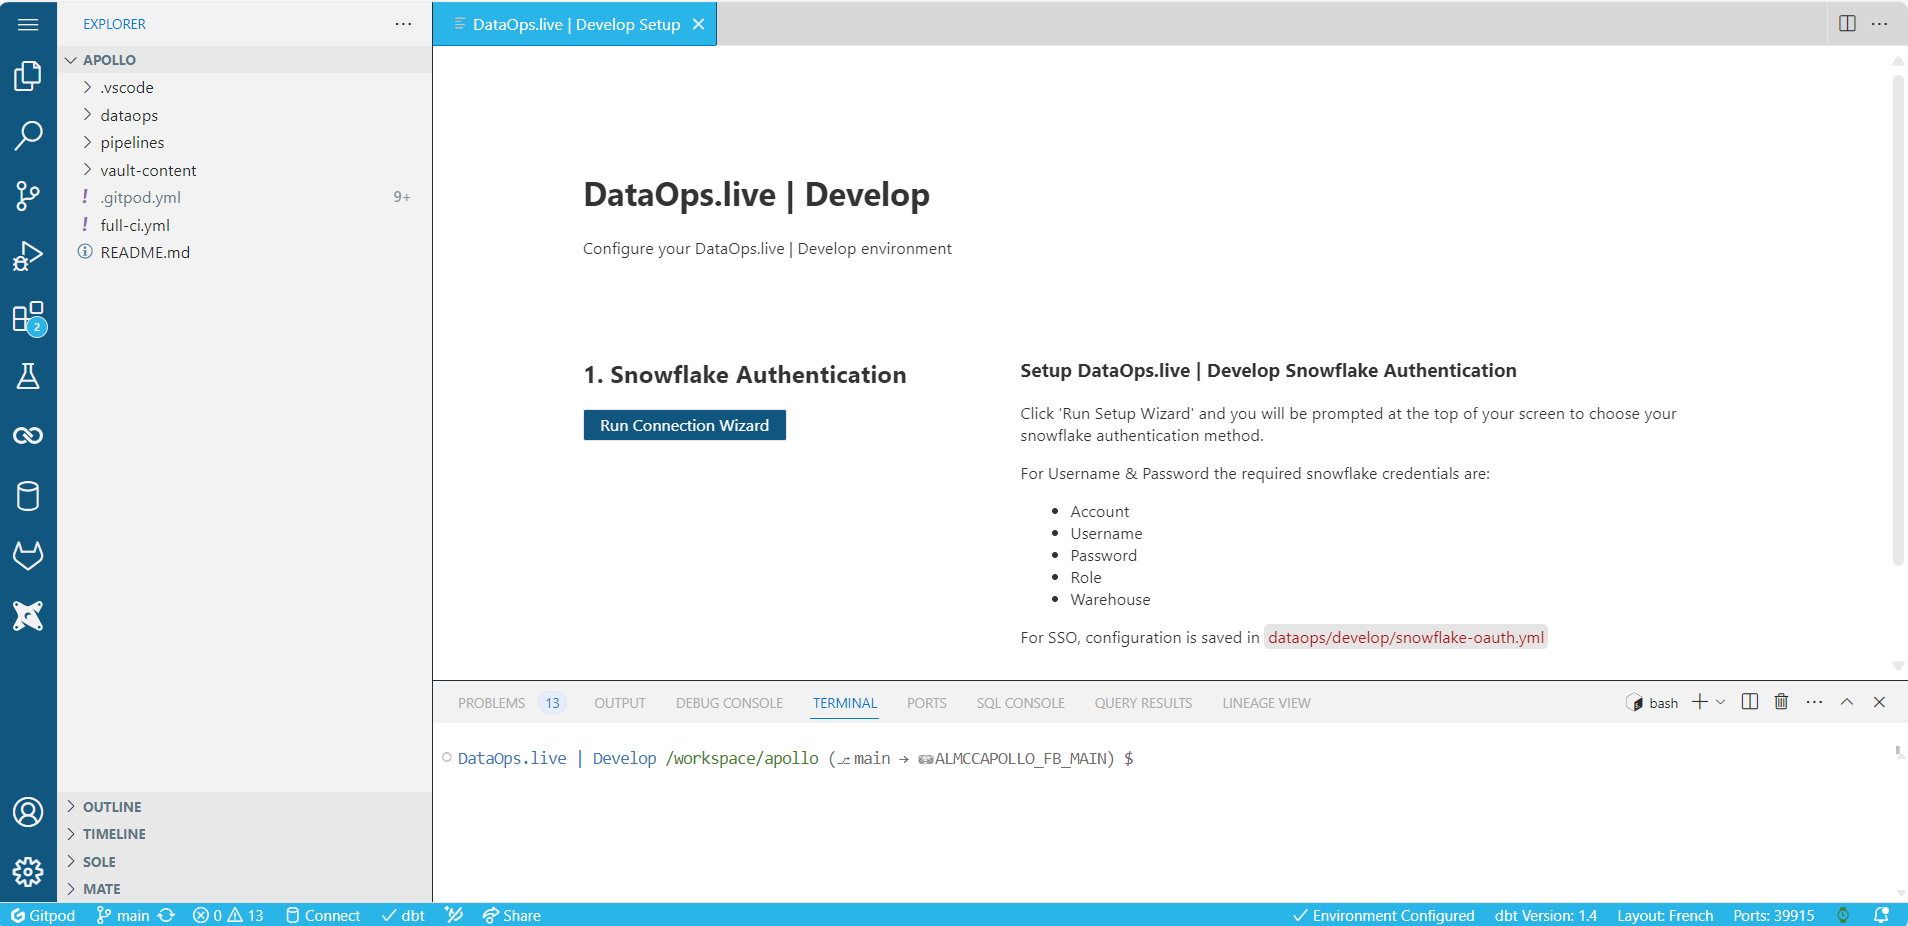
After the progress popup disappears, you should now see the DevReady that looks like this:
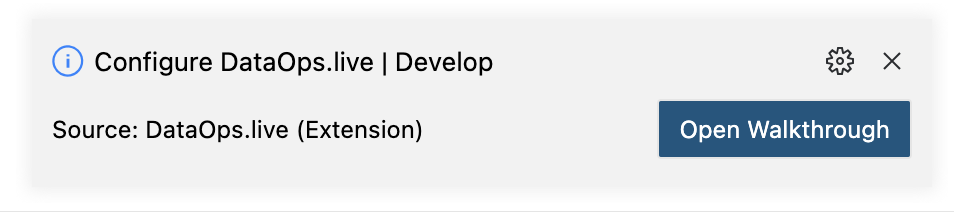
Once you return to DevReady, you can open it by clicking Open Walkthrough on the popup.
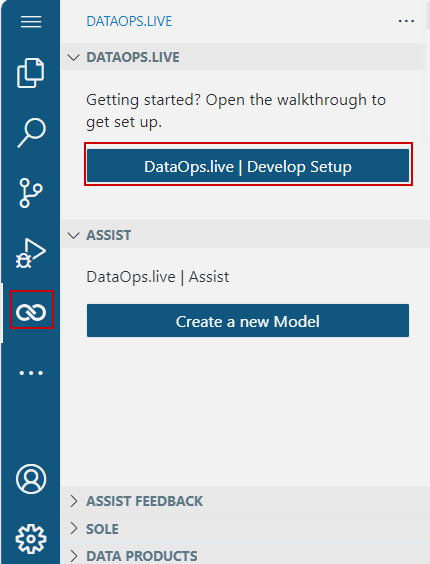
Or by clicking the DataOps icon on the sidebar and then selecting DataOps.live | Develop Setup.
Giving DevReady access to Snowflake
The DataOps.live extension provides a step-by-step guide to help you set up the Snowflake connection for DevReady and store your credentials securely, simplifying your experience in the development environment.
When you open the development environment for the first time without setting any credentials beforehand, a notification message prompts you to open the setup walkthrough. Once open, a one-step setup displays on the VS Code. Following the on-screen guidance lets you choose the Snowflake authentication method and then set your Snowflake credentials.
Snowflake connection
-
Click Run Setup Wizard.
-
Choose from Username & Password, Key Pair, or OAuth if you are using SSO.
DevReady incorporates Single Sign-On capabilities to streamline and secure user access across Snowflake accounts. For more information, see the Secure user access to Snowflake documentation.
Username & password and key-pair authentication
-
On top of the VS Code, choose a storage method for your Snowflake credentials.
Two options are available:
- DataOps.live account: Offers secure storage — no need to reenter when reopening or starting a new workspace for the same project.
- Visual Studio Code secret storage: Stores credentials within the workspace but only lasts for the lifetime of that workspace. You'll need to reenter them for a new workspace.
For a more permanent solution without using your DataOps.live account, consider using DevPod through your local VS Code client. You can set this up in your account preferences by selecting VS Code as your preferred editor.
-
Enter your Snowflake credentials following the on-screen instructions.
Key PairWhen selecting the Key Pair option, the private key specified must include the BEGIN and END sections. Additionally, if the private key is encrypted, you must provide the passphrase. For more information on key-pair authentication, including Orchestrator support, see key-pair authentication.
These credentials are for tools like dbt in the DataOps development environment to connect with your Snowflake. Once you enter them, the DataOps development environment setup will configure your environment. You only need to do this once for each workspace.
The VS Code status bar displays the currently selected version of dbt.
Multi-Factor Authentication (MFA)
DataOps.live Develop supports MFA caching for Snowflake connections. If your Snowflake account has MFA enabled, this feature will minimize the number of approval prompts you must handle during your development workflow.
- The first time you connect to Snowflake, you will be prompted to approve the connection via your MFA device (e.g., Duo Mobile push notification)
- The MFA token is cached, and subsequent connections will use the cached token, eliminating the need for additional MFA approvals
- The token is valid for approximately 4 hours, after which you will need to approve a new MFA request
Turning on Snowflake MFA caching
MFA caching is now automatically enabled for all username/password authentication to minimize the number of approval prompts. If your account does not use MFA, the system will fall back to standard authentication.
MFA caching must be allowed on the Snowflake Account by an ACCOUNTADMIN. You can turn caching on by running the following SQL command:
ALTER ACCOUNT SET ALLOW_CLIENT_MFA_CACHING = TRUE;
Single Sign On
You'll be guided through a few steps with prompts as follows:
-
If your DevReady SSO setup has been configured to allow multiple warehouses, choose a warehouse from the dropdown menu at the top of the window.
-
If your DevReady SSO Setup has been configured to allow multiple roles, choose a role from the dropdown menu at the top of the window.
-
Confirm you wish to sign in with SSO.
The built-in VS Code trusted URL mechanism will prompt you to open a browser window to complete the SSO process.
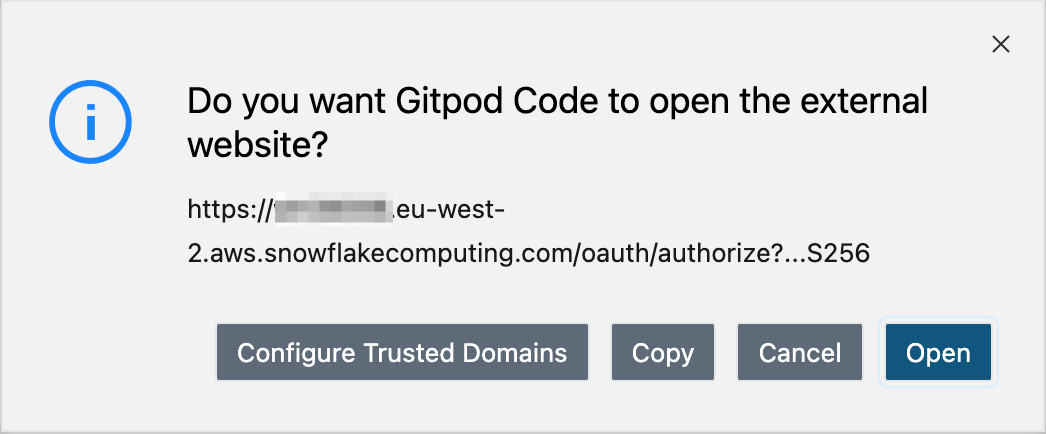
Once you click Open, you will be redirected to your Snowflake account where you can choose to log in with your SSO provider.
-
Click Allow to confirm the Snowflake account and role you are granting DevReady permission to use.
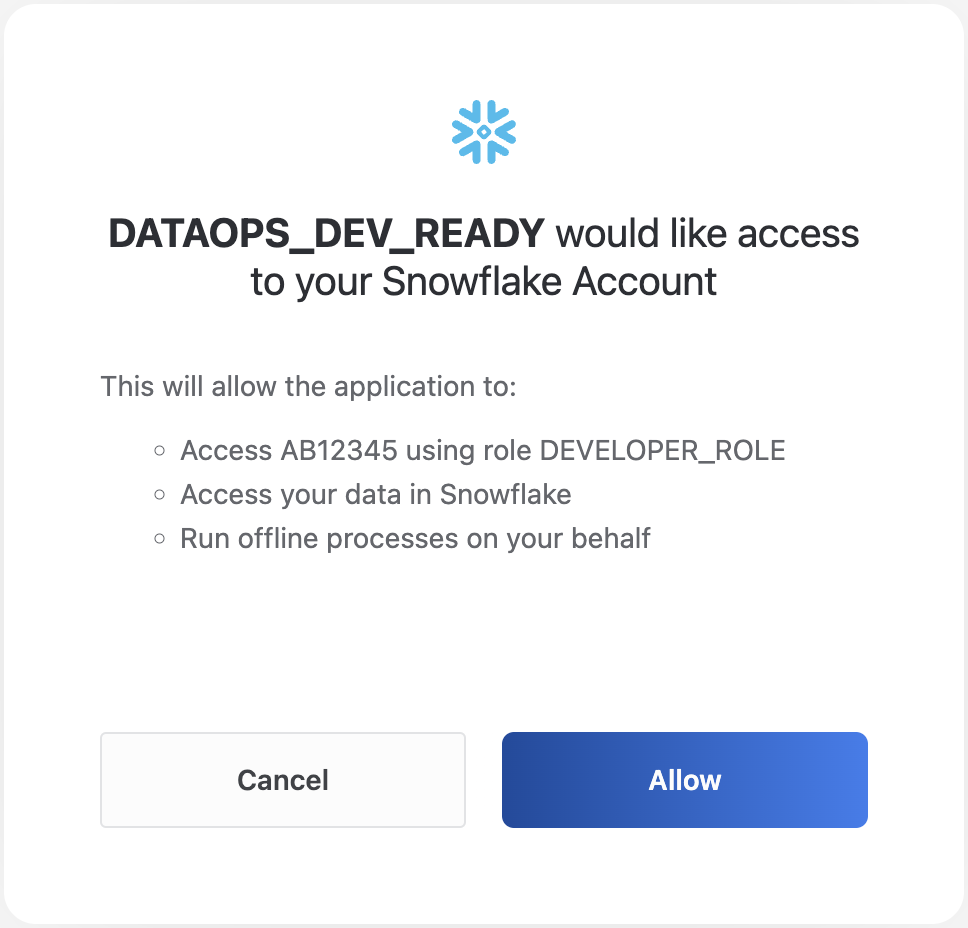
-
Close the browser window and return to VS Code.
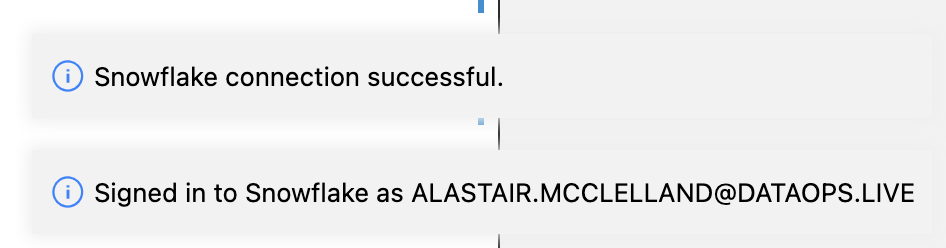
You should be back on your DevReady window where DevReady is setting up your workspace. There should be a popup in the bottom right corner of VS Code confirming you are now connected to Snowflake.
dbt version
The dbt version set in the variables.yml file in the main folder of your DataOps project is the source version for DevReady and MATE Orchestrator.
Once you have signed in to Snowflake as described in the previous steps, DevReady automatically gets the default dbt version used in MATE.
If you're satisfied with this version for your workspace, no action is needed.
However, if you prefer to use a different dbt version, you can modify it in the YAML file as described below:
-
Navigate to the
variables.ymlfile atpipelines/includes/config/variables.yml. -
Change the version value for the variable
DATAOPS_FEATURE_MATE_DBT_VERSION.Available versions correspond to those in the MATE orchestrator used in pipelines. You can also enter a custom dbt version bundled with MATE. For more information, see MATE Orchestrator.
-
Save and commit your changes.
Workspaces automatically stop after 30 minutes of inactivity and get deleted if left inactive for 14 days. However, you can prevent deletion by pinning a workspace.
Checking your DevReady setup
MATE
To test that MATE is working correctly:
-
Navigate to a
.sqlfile in thedataops/modelling/models/directory. -
Choose Execute dbt SQL in the top right of the screen.

SOLE
Check if everything works well by verifying the SOLE configuration using one of the following methods.
-
Run the command:
terminalsole-validate -
On the left vertical bar, click the icon DataOps.live → SOLE validate.
Any SOLE compilation error will show on the VS Code console. For more information, check out SOLE compilation and validation.
Congratulations, you should now be fully set up to use the DevReady. You can get into a clean, ready-to-develop workspace by clicking DevReady within seconds.
Workspaces and network access
DevReady workspaces run in a DataOps.live VPC. If you have Snowflake IP allowlists
implemented, you must add the IP addresses 18.135.200.239, 18.169.227.255 and
52.56.96.175 to your allowlist.
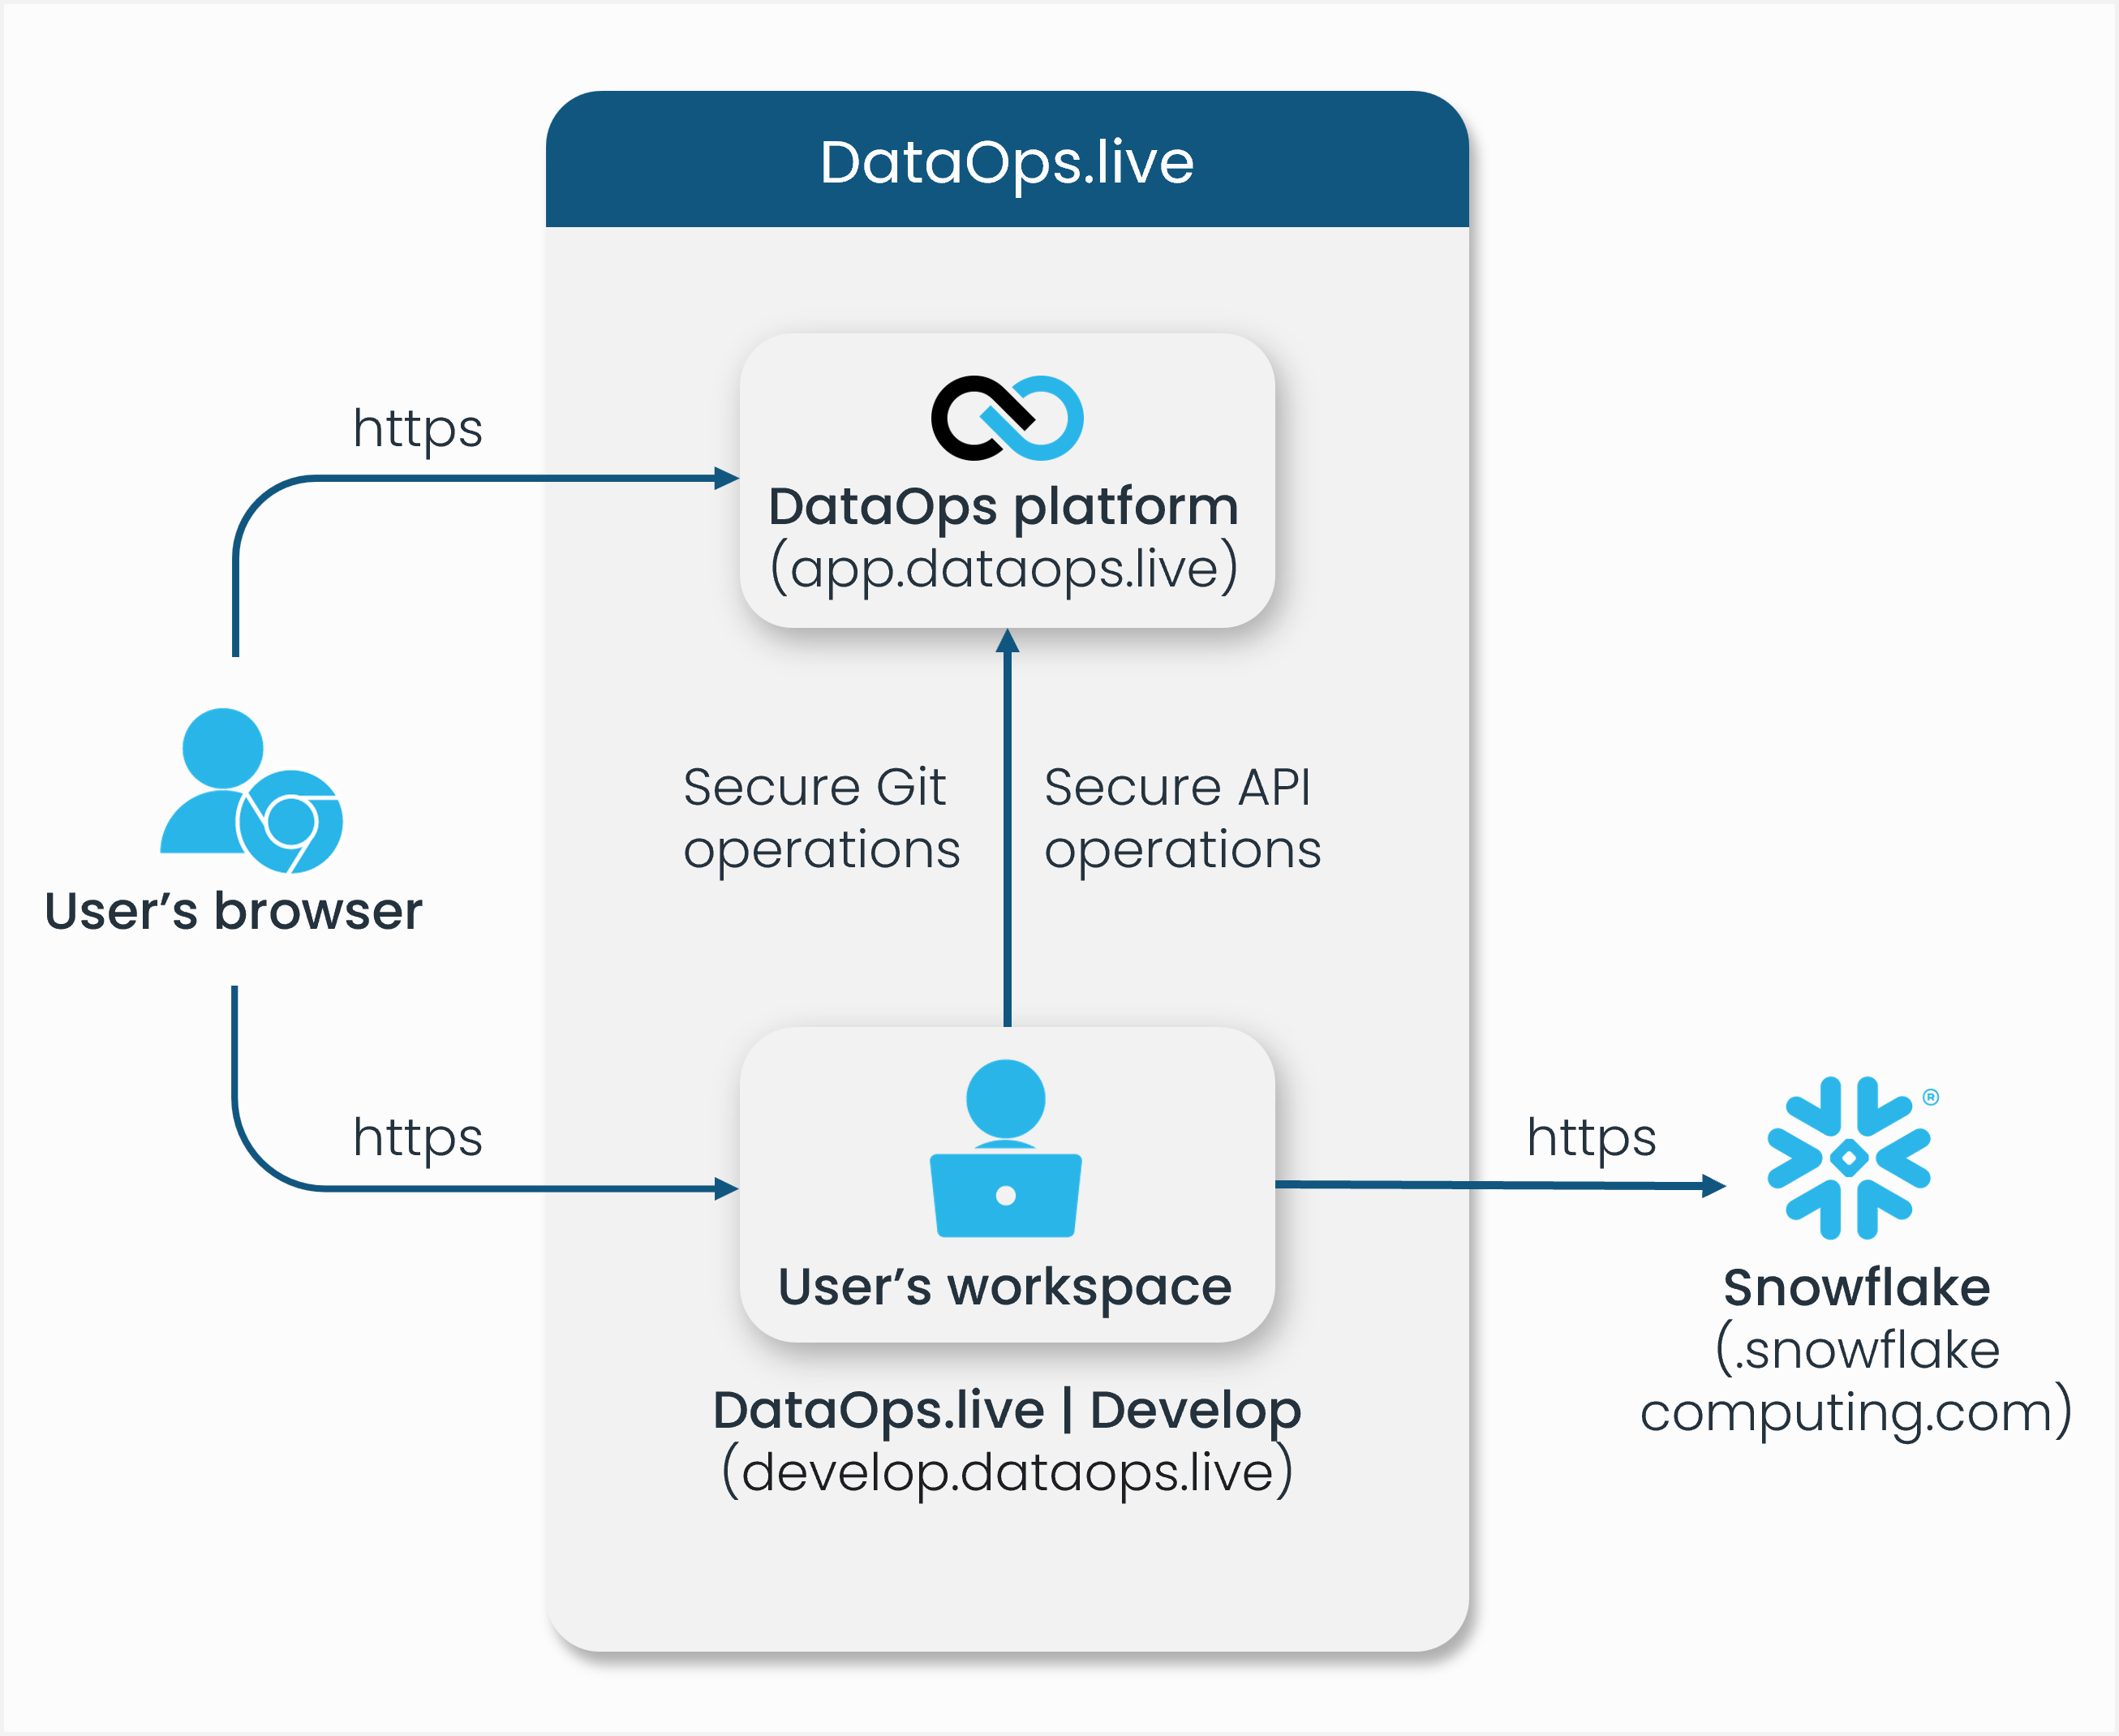
The DevReady manages the developer environments as workspaces. A workspace is operated as a self-contained docker image shipping with a prepackaged set of tools.
Every user's workspace is a dedicated docker container on an EKS cluster in the same VPC as the data product platform. The user accesses the workspace environment over the public internet. The Git operations like push or checkout use a secure connection between the data product platform and the workspace. Access to Snowflake is performed from the workspace via a direct, secure connection.
If you need to connect to a service through Private Link, refer to administering Private Link.
Custom startup jobs
You can register your own custom startup jobs in the DevReady. These jobs will
run after the user has completed the setup. These jobs are configured in
dataops-develop.yml.
Example
startup_script:
  terminal: one
  script:
    - echo "Hello from startup_script"
Example with dependencies
startup_script:
  terminal: custom_startup
  script:
    - echo "Hello from startup_script"

startup_script_part_2:
  terminal: custom_startup
  needs:
    - startup_script
  script:
    - echo "Hello from startup_script_part_2"
Note the same terminal name is used for both jobs.
Example with dependencies and multiple terminals
startup_script_a:
  terminal: custom_startup_a
  script:
    - echo "Hello from startup_script_a"

startup_script_b:
  terminal: custom_startup_b
  script:
    - echo "Hello from startup_script_b"
Note different terminal names are used for both jobs.
Override the default startup
You can even override the default setup terminal by adding a setup job of your
own, but be sure to include the default setup script items as well.
setup:
  terminal: setup
  script:
    - /dataops-dde/scripts/setup/30-pre-setup.sh
    - /dataops-dde/scripts/setup/50-setup.sh
    - /dataops-dde/scripts/setup/70-post-setup.sh
    - /dataops-dde/scripts/setup/99-setup-complete.sh