Dynamic Transformation Quickstart Guide
This section walks you through migrating your dbt Core project into a fully streamlined data pipeline. Here is how it works: you’ll move your dbt Core project to Snowflake, and DataOps.live provides pipeline capabilities (CI/CD, orchestration, and more) to those dbt models within Snowflake.
The Dynamic Transformation platform manages the automatic migration for you, ensuring a smooth transition. Plus, you gain access to DataOps.live Develop, a browser-based development environment where you can innovate and test your models with the help of DataOps.live Assist.
Note: For current enterprise customers, this dynamic transformation flow only works if your environment includes a runner named dataops-runner.
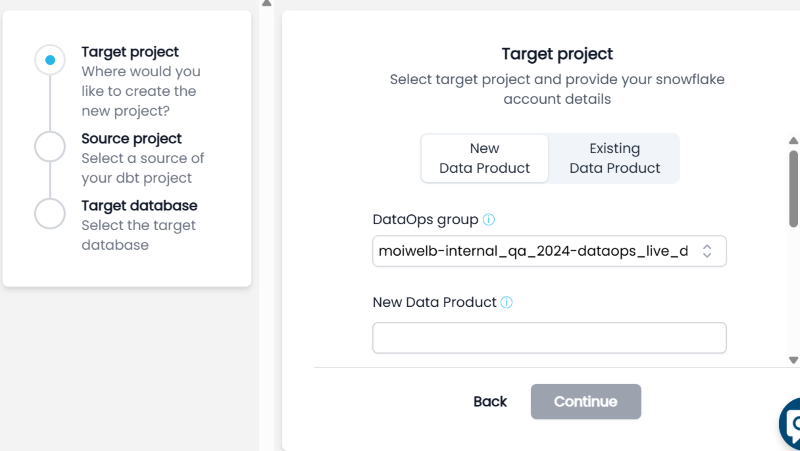
Step 1. Define the target project in Snowflake
-
Start typing the name of an existing DataOps group to display a list of options. The group is contained within your customer account and has projects and subgroups.
-
Enter a name for the new project in the New Data Product field.
-
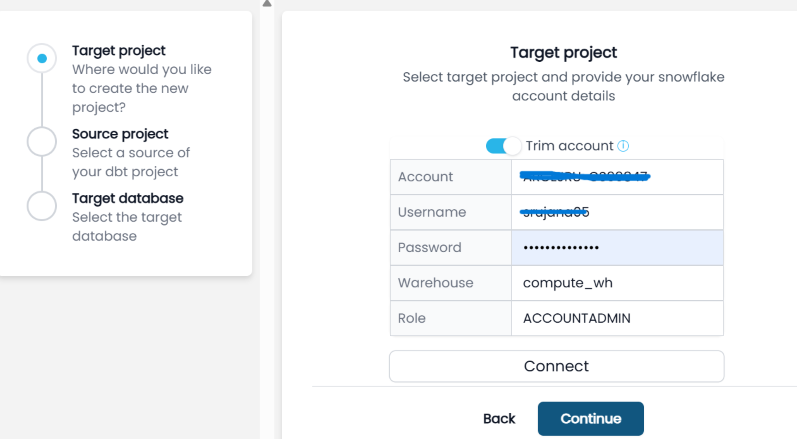
Enter the login information for the Snowflake account where you want to execute the dbt project and click Connect.
-
Once you see the successful connection message, click Continue.
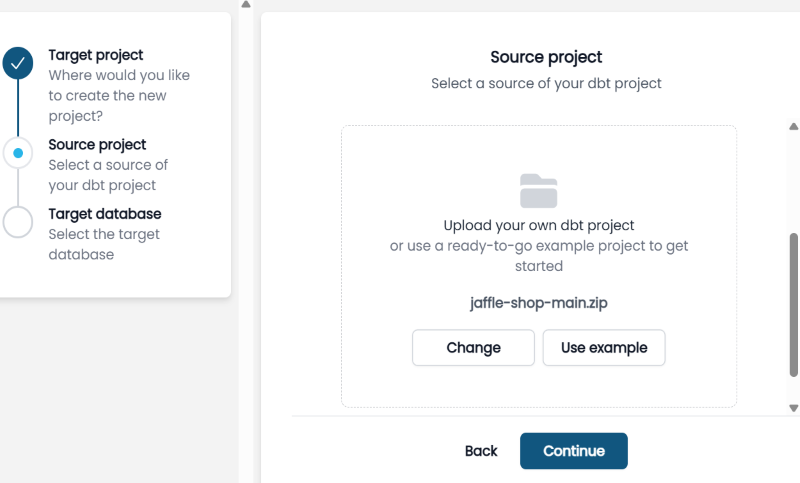
Step 2. Select the source dbt project
-
Upload or drop a zip folder of the dbt project you want to migrate. A message will appear to confirm the upload, indicating the number of files.
-
Once you see the successful upload message, click Continue.
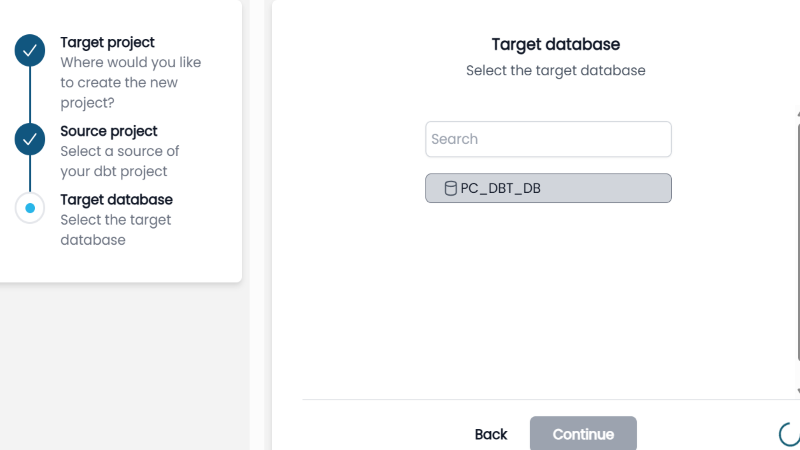
Step 3. Define the target database for your model
-
From the database list in the Snowflake account, select a database and click Continue.
-
From the confirmation window, do one of the following:
- Click Open Develop to launch our browser-based development environment and start development on the dbt project.
- Click Open Project to open the pipeline on the DataOps.live platform.
