MATE Project Documentation
Documentation is a critical part of MATE and all other components of the data product platform. But, as this content focuses on MATE, let's dive into how to build MATE docs.
Why?
Good, relevant, and well-written documentation reduces stakeholder and user dependence on the data team and improves collaboration and self-service, one of the seven pillars of #TrueDataOps. However, documentation is often given a lower priority than writing code. This is because the documentation is usually created in a separate tool. We have solved this challenge by automating our documentation function and keeping the docs themselves as close to the code as possible.
We have achieved this in two ways:
Documenting models in YAML files
The documentation of MATE models occurs in YAML files inside the modeling directory (/dataops/modelling/models).
These docs are written in the same YAML file where your MATE tests are configured.
By way of example, let's document the stg_product_types and stg_orders models described in Using SQL to Build MATE Models.
Let's assume that you haven't yet configured any MATE tests for this model, so we will have to create a new YAML file.
As demonstrated in this YAML file, all you do is add a description below each model. You can also add a description below each column.
version: 2

models:
  - name: stg_product_types
    description: This model contains one unique product type per row
    columns:
      - name: product_type_id
        description: Unique key for stg_product_types
      - name: product_type_code
        description: Primary key for stg_product_types
      - name: product_type_description

  - name: stg_orders
    description:
    columns:
      - name: order_id
      - name: product_type
      - name: items_ordered
      - name: order_date
Doc blocks
Doc blocks are used to create longer and more descriptive documentation. They are created and rendered in Markdown files (.md) in the same directory as the model YAML files (/dataops/modelling/models).
The workflow to build the product_type doc block is as follows:
- Create a new file called
product_types.mdto document the different product types in thestg_product_typesmodel. - Add the required text wrapped in
{% docs <doc name> %}and{% enddocs %}. - Save the file.
- Call the doc block in a model's YAML file.
This code snippet shows how to create a doc block.
{% docs product_types %}

The product type will be one of the following values:

| Type          | Description                                                                                             |
| ------------- | ------------------------------------------------------------------------------------------------------- |
| toy_trains    | This product type categorizes all the toy trains irrespective of their brand, size, shape, and color    |
| toy_cars      | This product type categorizes all the toy cars irrespective of their brand, size, shape, and color      |
| toy_dolls     | This product type categorizes all the toy dolls irrespective of their brand, size, shape, and color     |
| toy_airplanes | This product type categorizes all the toy airplanes irrespective of their brand, size, shape, and color |

{% enddocs %}
You can create one file per doc block or add multiple doc blocks to a single file. The key is to use the {% docs <doc name> %} with a unique name at the top of each block.
Lastly, the way to refer to a doc block is to use the statement "{{ doc('<doc name>') }}" as a model or column description.
For instance:
version: 2

models:
  - name: stg_orders
    description:
    columns:
      - name: order_id
      - name: product_type
        description: "{{ doc('product_types') }}"
      - name: items_ordered
      - name: order_date
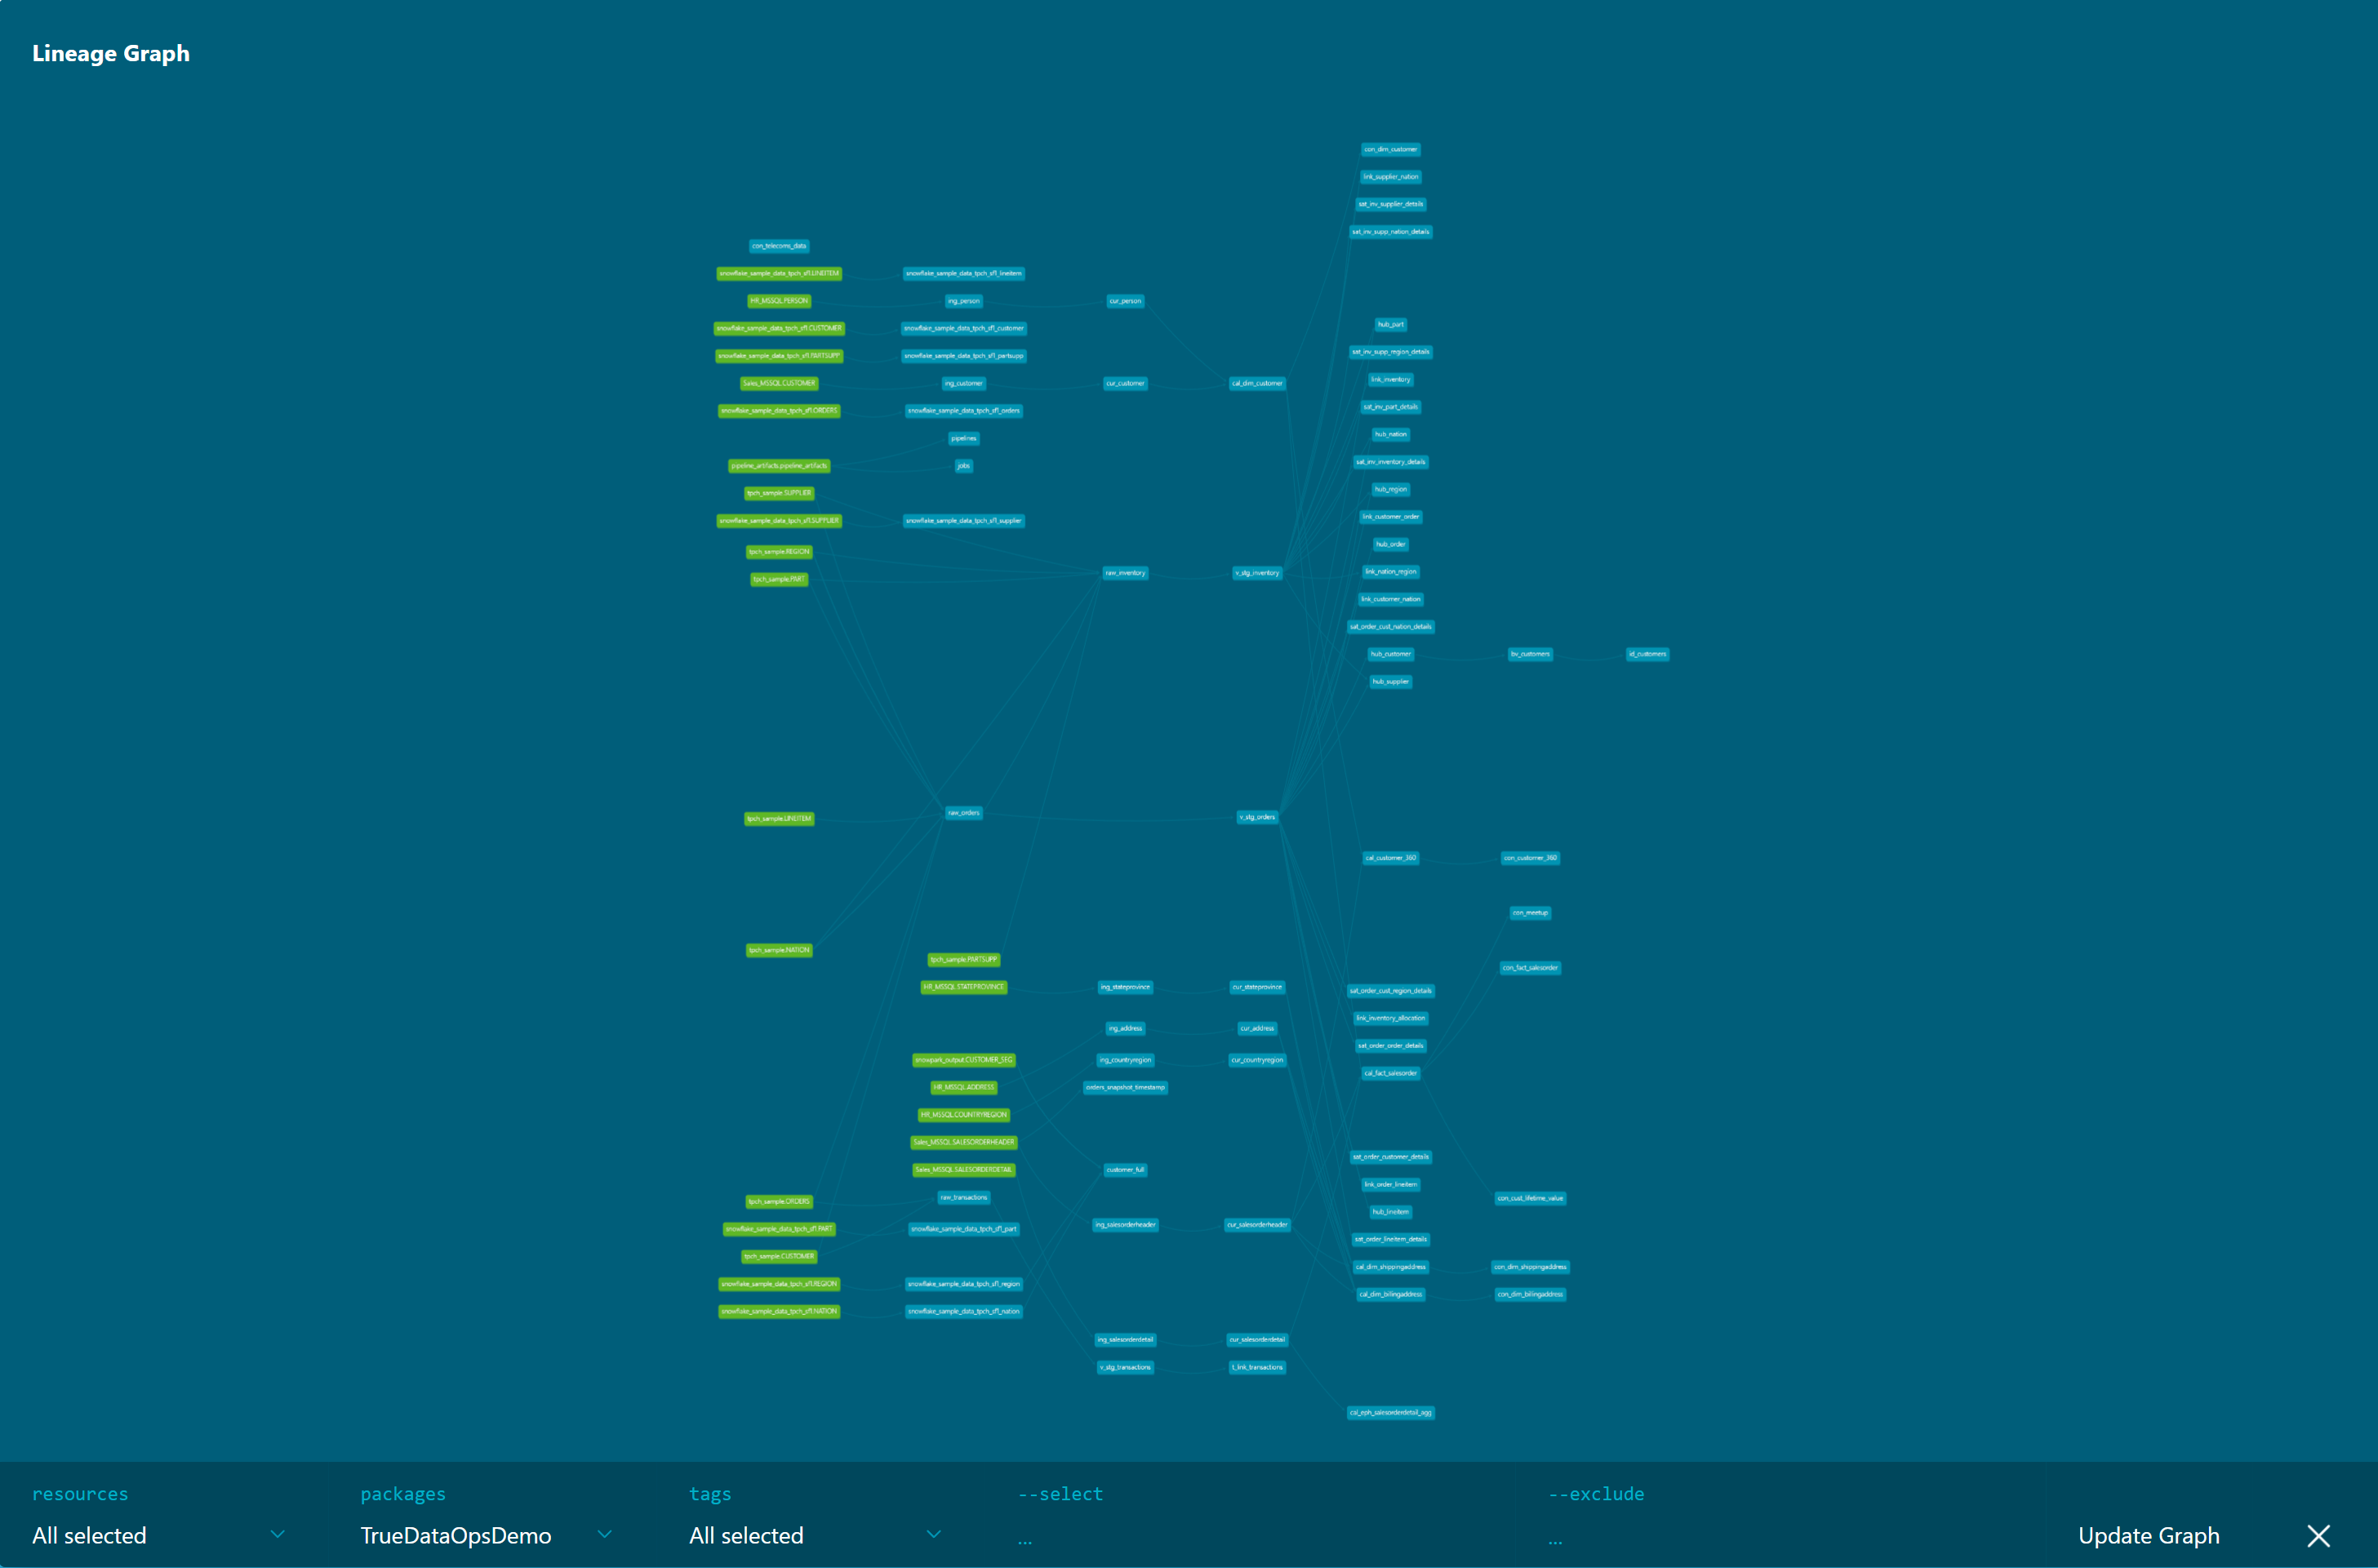
Colored data lineage graph
Prerequisite (dbt 1.4 or later)
The generated documentation site also includes a lineage graph showing the dependencies between the models in your project. The default layout looks like the following:
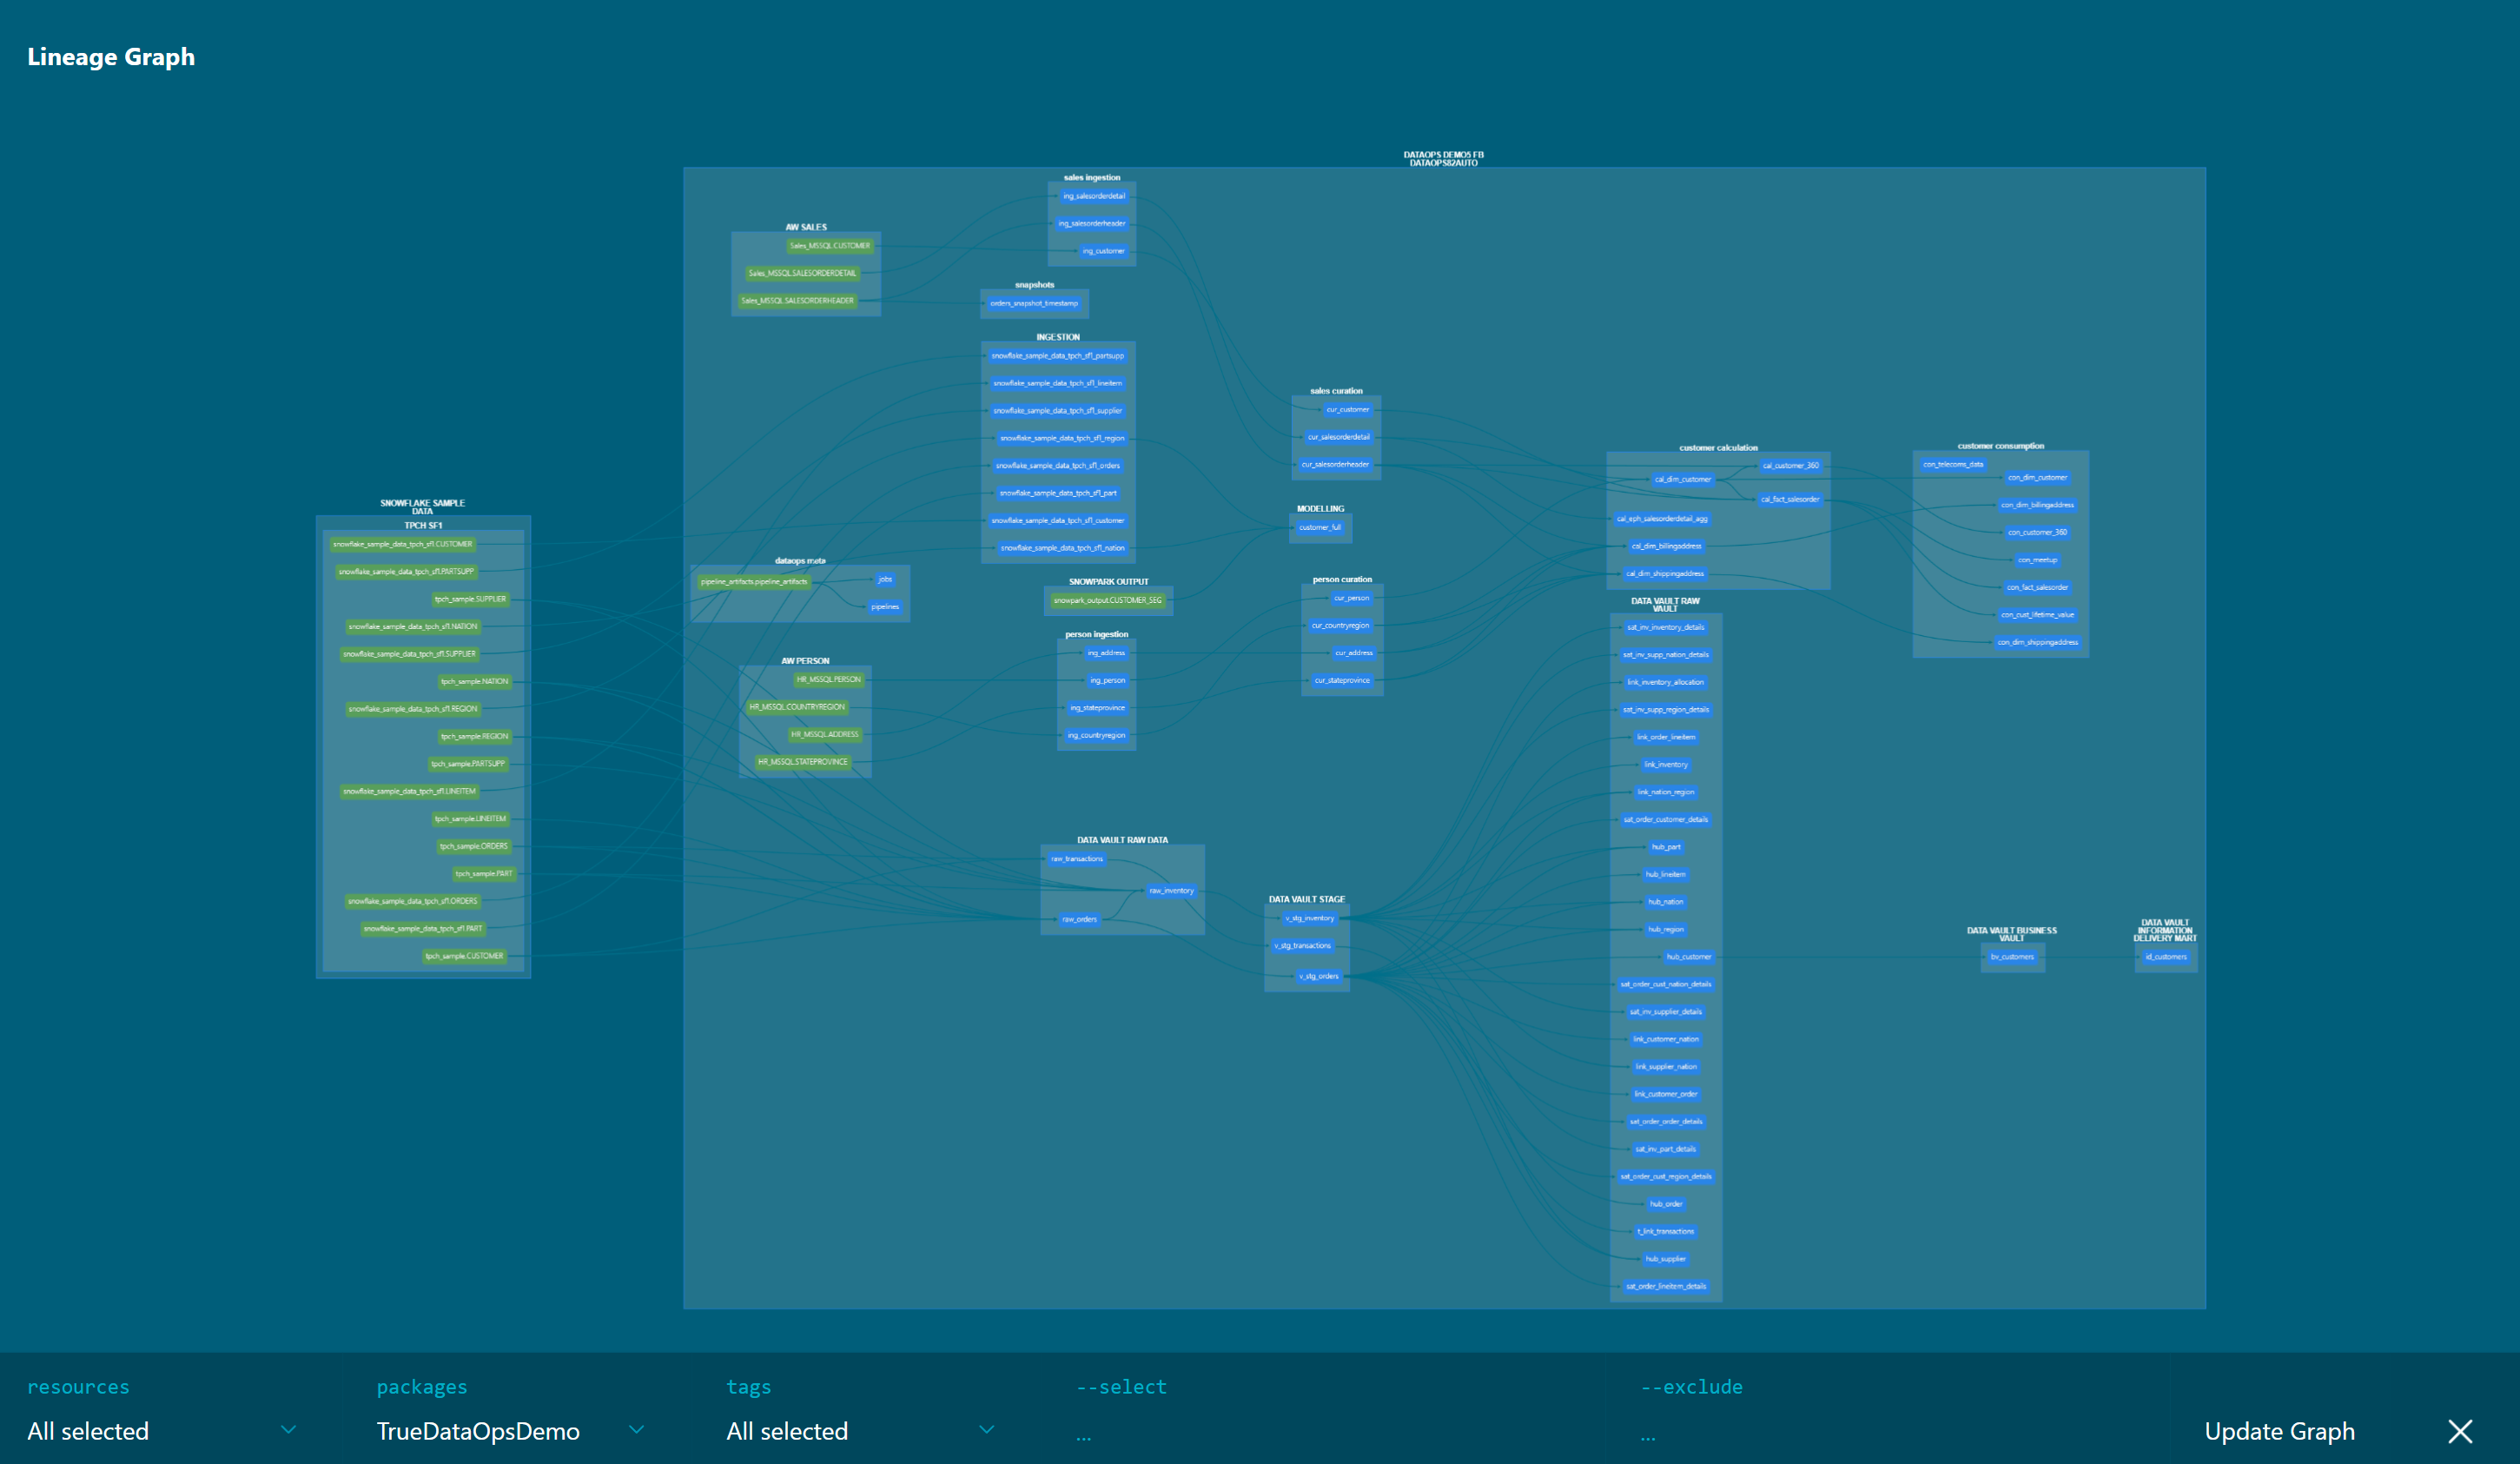
You can customize the data lineage graph in two ways by:
- Setting the node colors
- Introducing the logical stages to organize nodes into groups
These parameters are typically configured in dataops/modelling/dbt_project.yml. Still, just like other model-specific configurations, you can set them using a config() Jinja macro in the model's SQL file or as a config resource property in the model's YAML file.
Node colors
Prerequisite (dbt 1.4 or later)
You can decide on node color in the generated docs and logical stages using the parameter node_color.
models:
  TrueDataOpsDemo:
    ingestion:
      materialized: table
      schema: INGESTION
      +docs:
        node_color: "#e76f51"
    modelling:
      materialized: table
      schema: MODELLING
      +docs:
        node_color: blue
Logical stages
Prerequisite (dbt 1.4 or later)
Introducing logical stages makes it possible to generate more compact and organized lineage graphs by grouping related nodes to better represent the data flow in the generated documentation. Using logical stages is optional and only affects the lineage graph. The default layout is used without grouping if you don't specify logical stages. There are two modes of operation for working with logical stages:
- Explicitly set the logical stages to use. With this approach, you can define the grouping and the logical stage names.
models:
  TrueDataOpsDemo:
    ingestion:
      materialized: table
      schema: INGESTION
      +docs:
        logical_stage: Ingestion
In the rendered layout, the nodes are organized into labeled containers based on the configured logical stages.
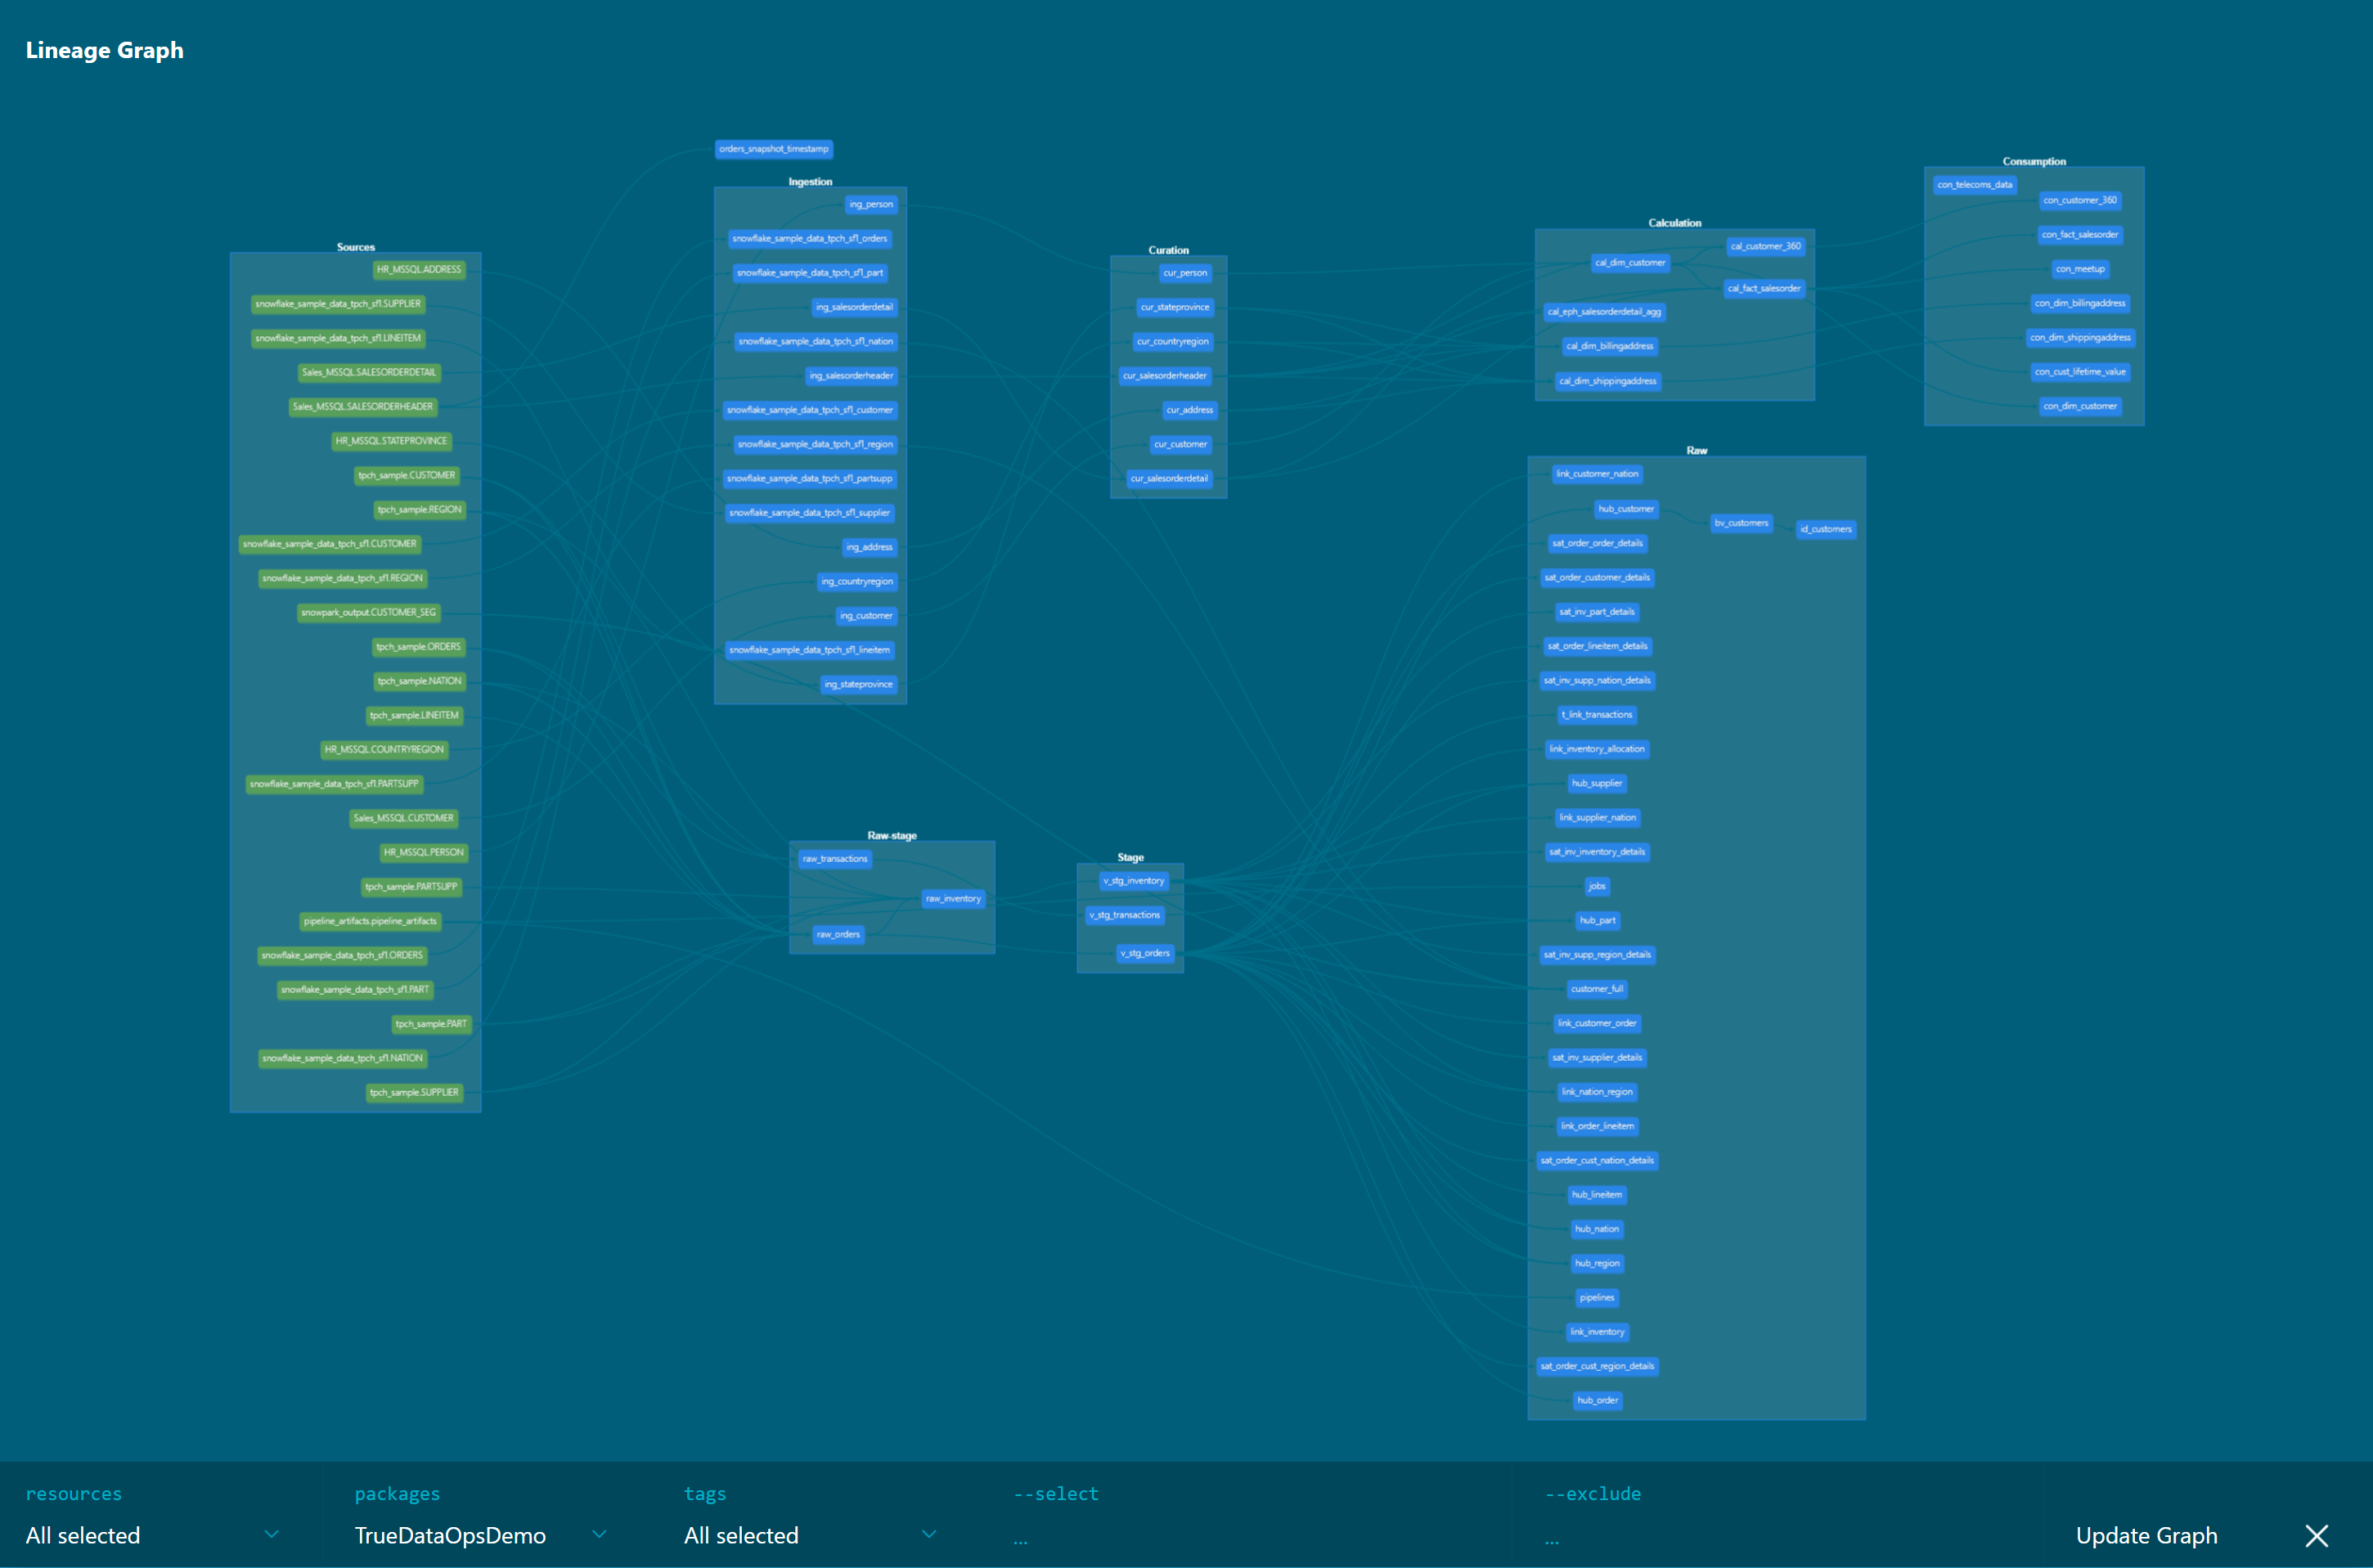
- Use the
autokeyword to infer the grouping from the database and schema specified for the given model.
models:
  TrueDataOpsDemo:
    ingestion:
      materialized: table
      schema: INGESTION
      +docs:
        logical_stage: auto
The containers, in this case, are created based on the schemas and databases the nodes belong to.
Generating the documentation
At the end of a pipeline run, the default behavior generates project documentation automatically. The code for the job that runs is similar to the following YAML code snippet:
generate_model_docs:
  extends:
    - .modelling_and_transformation_base
    - .agent_tag
  variables:
    TRANSFORM_ACTION: DOCS
  stage: "Generate Docs"
  script:
    - /dataops
  artifacts:
    when: always
    name: modelling_and_transformation
    paths:
      - $TRANSFORM_PROJECT_PATH/target
  icon: ${TRANSFORM_ICON}
Do not change the artifacts in this job, or this job's documentation will not show up as part of the automated documentation.
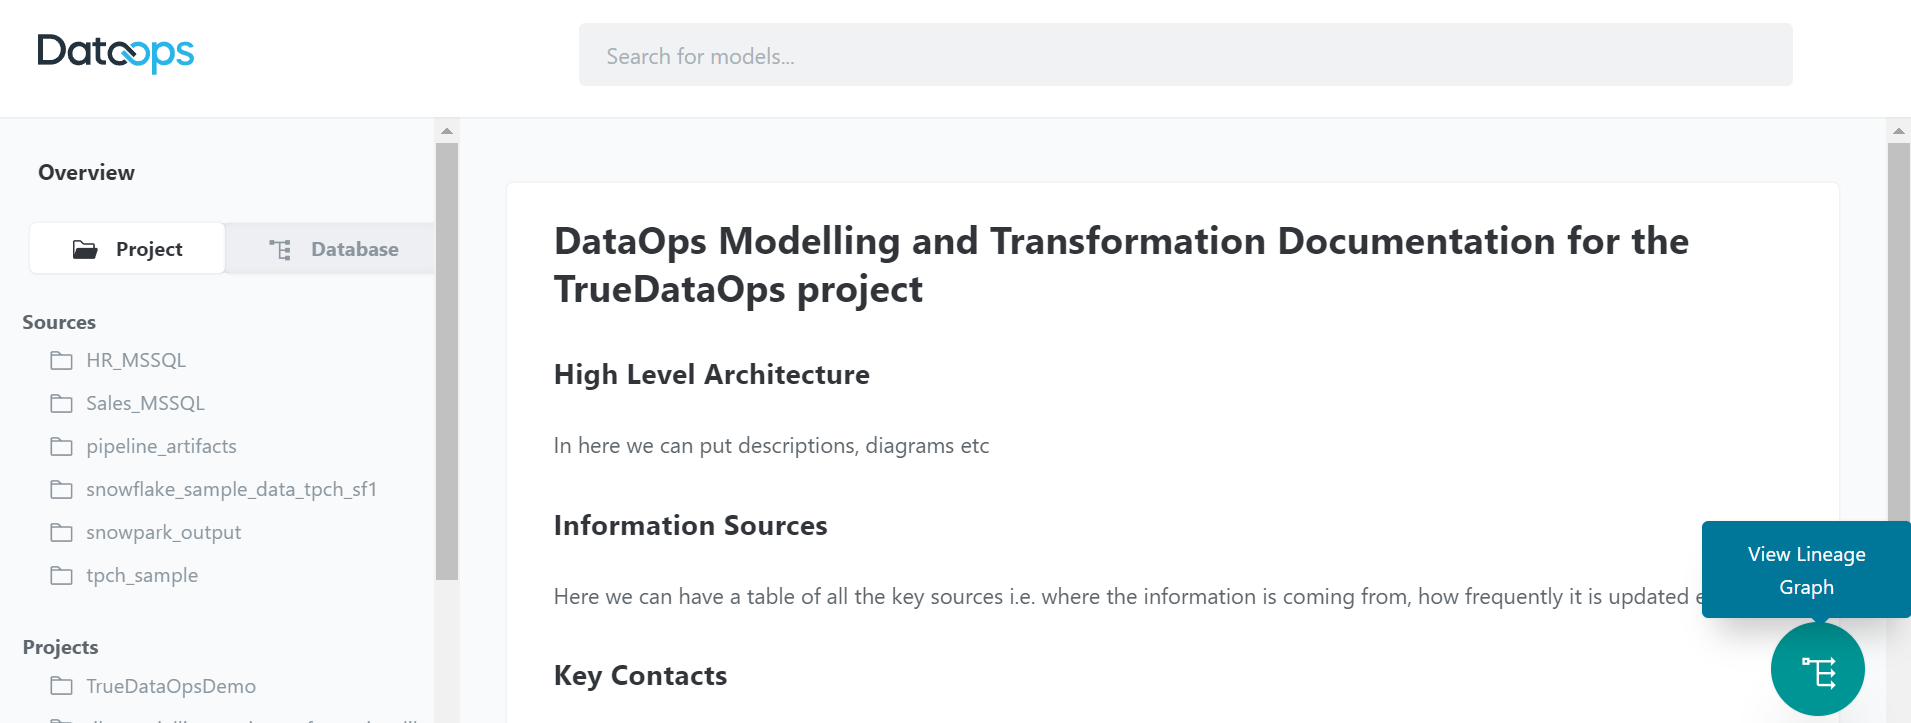
Viewing the documentation
The following details are relevant to view the project documentation.
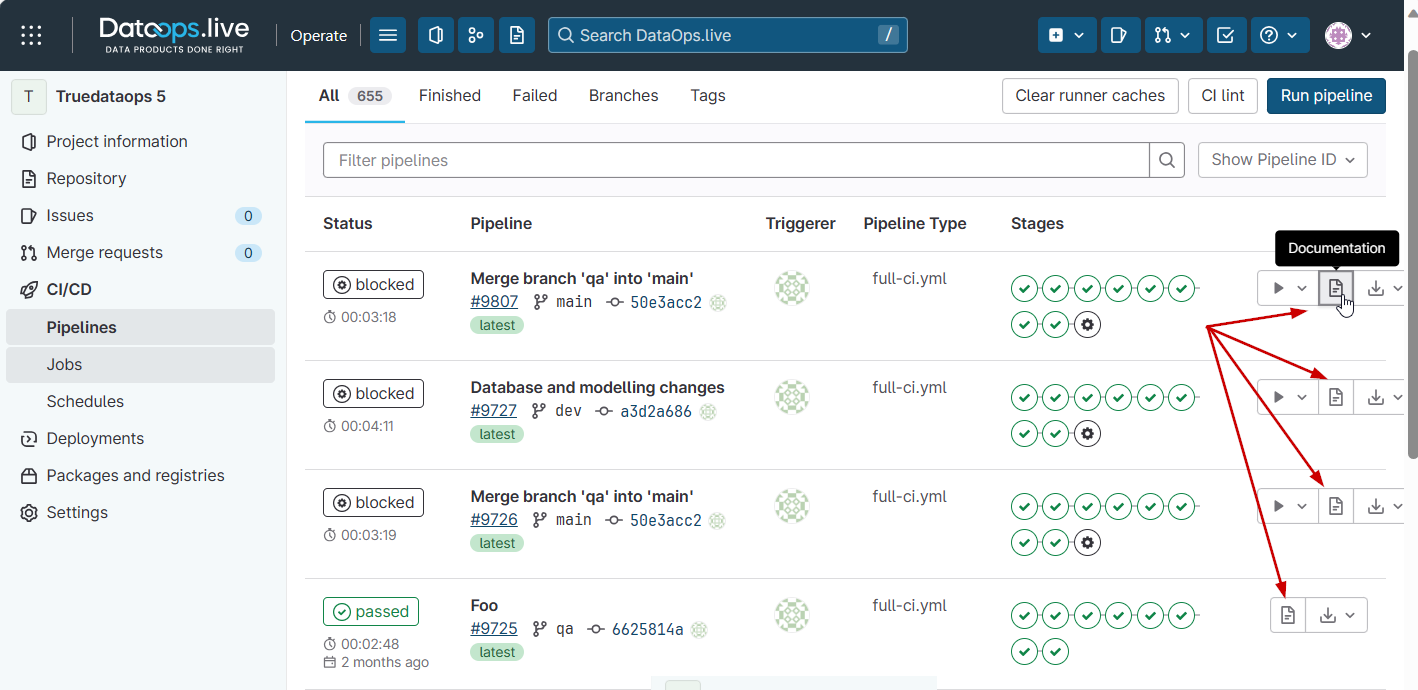
1. View documentation
The automated documentation menu option is found under CI/CD → Pipelines, and against each pipeline, see the Documentation icon on the right side of each pipeline row.
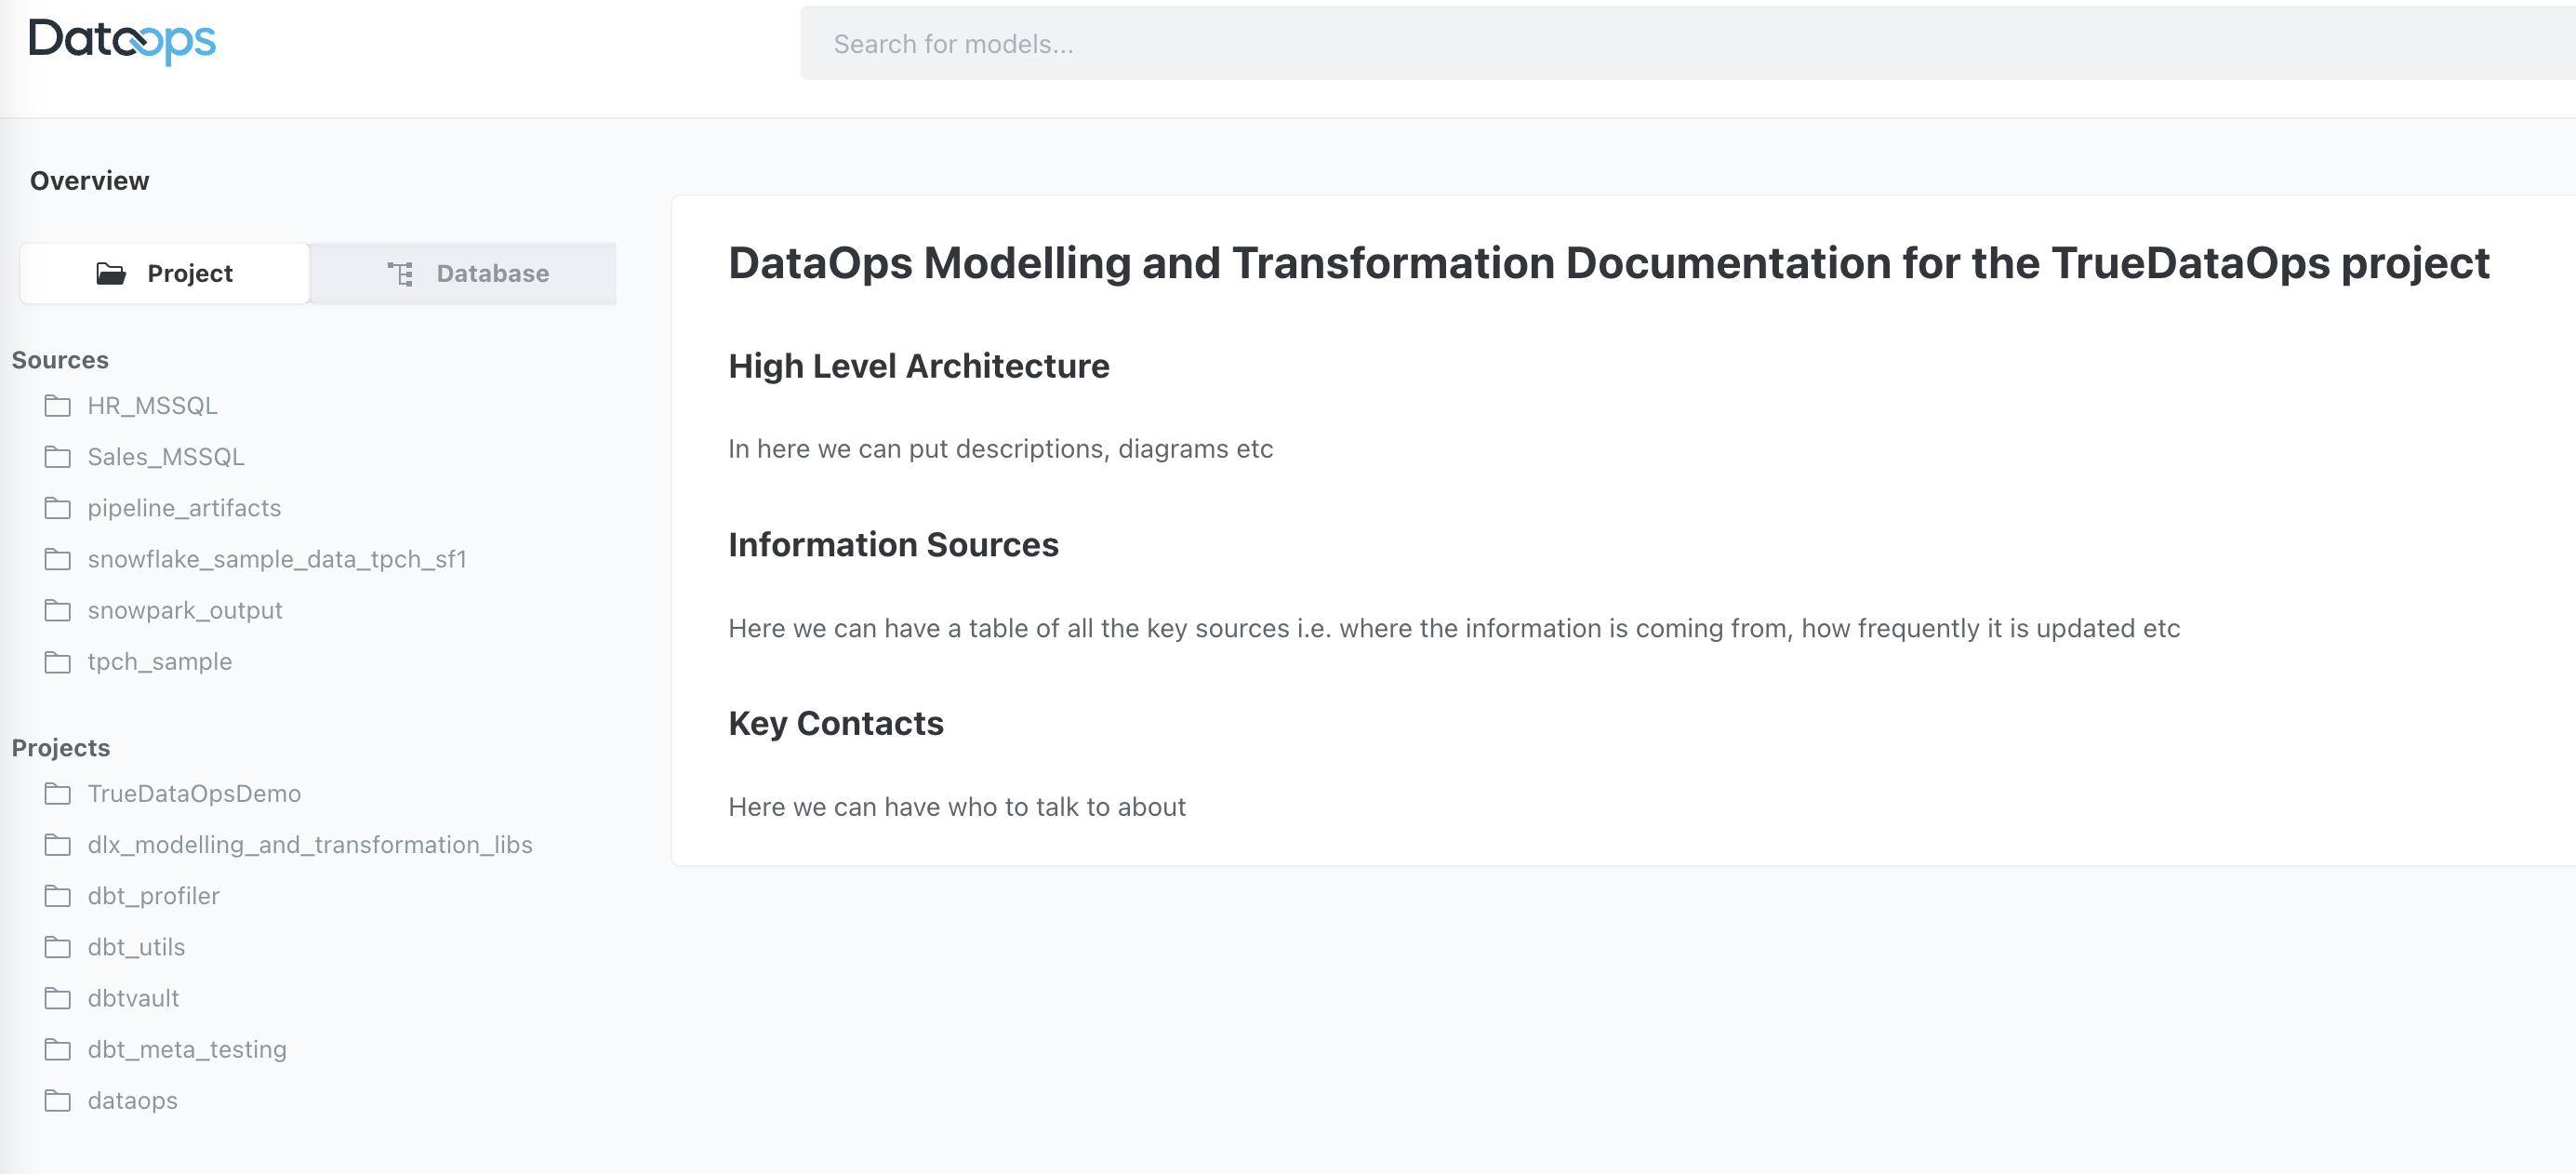
2. Project overview
Project documentation opens up a new interface to see the overall project view.
3. Model relationships
This interface also includes the ability to view model relationships.
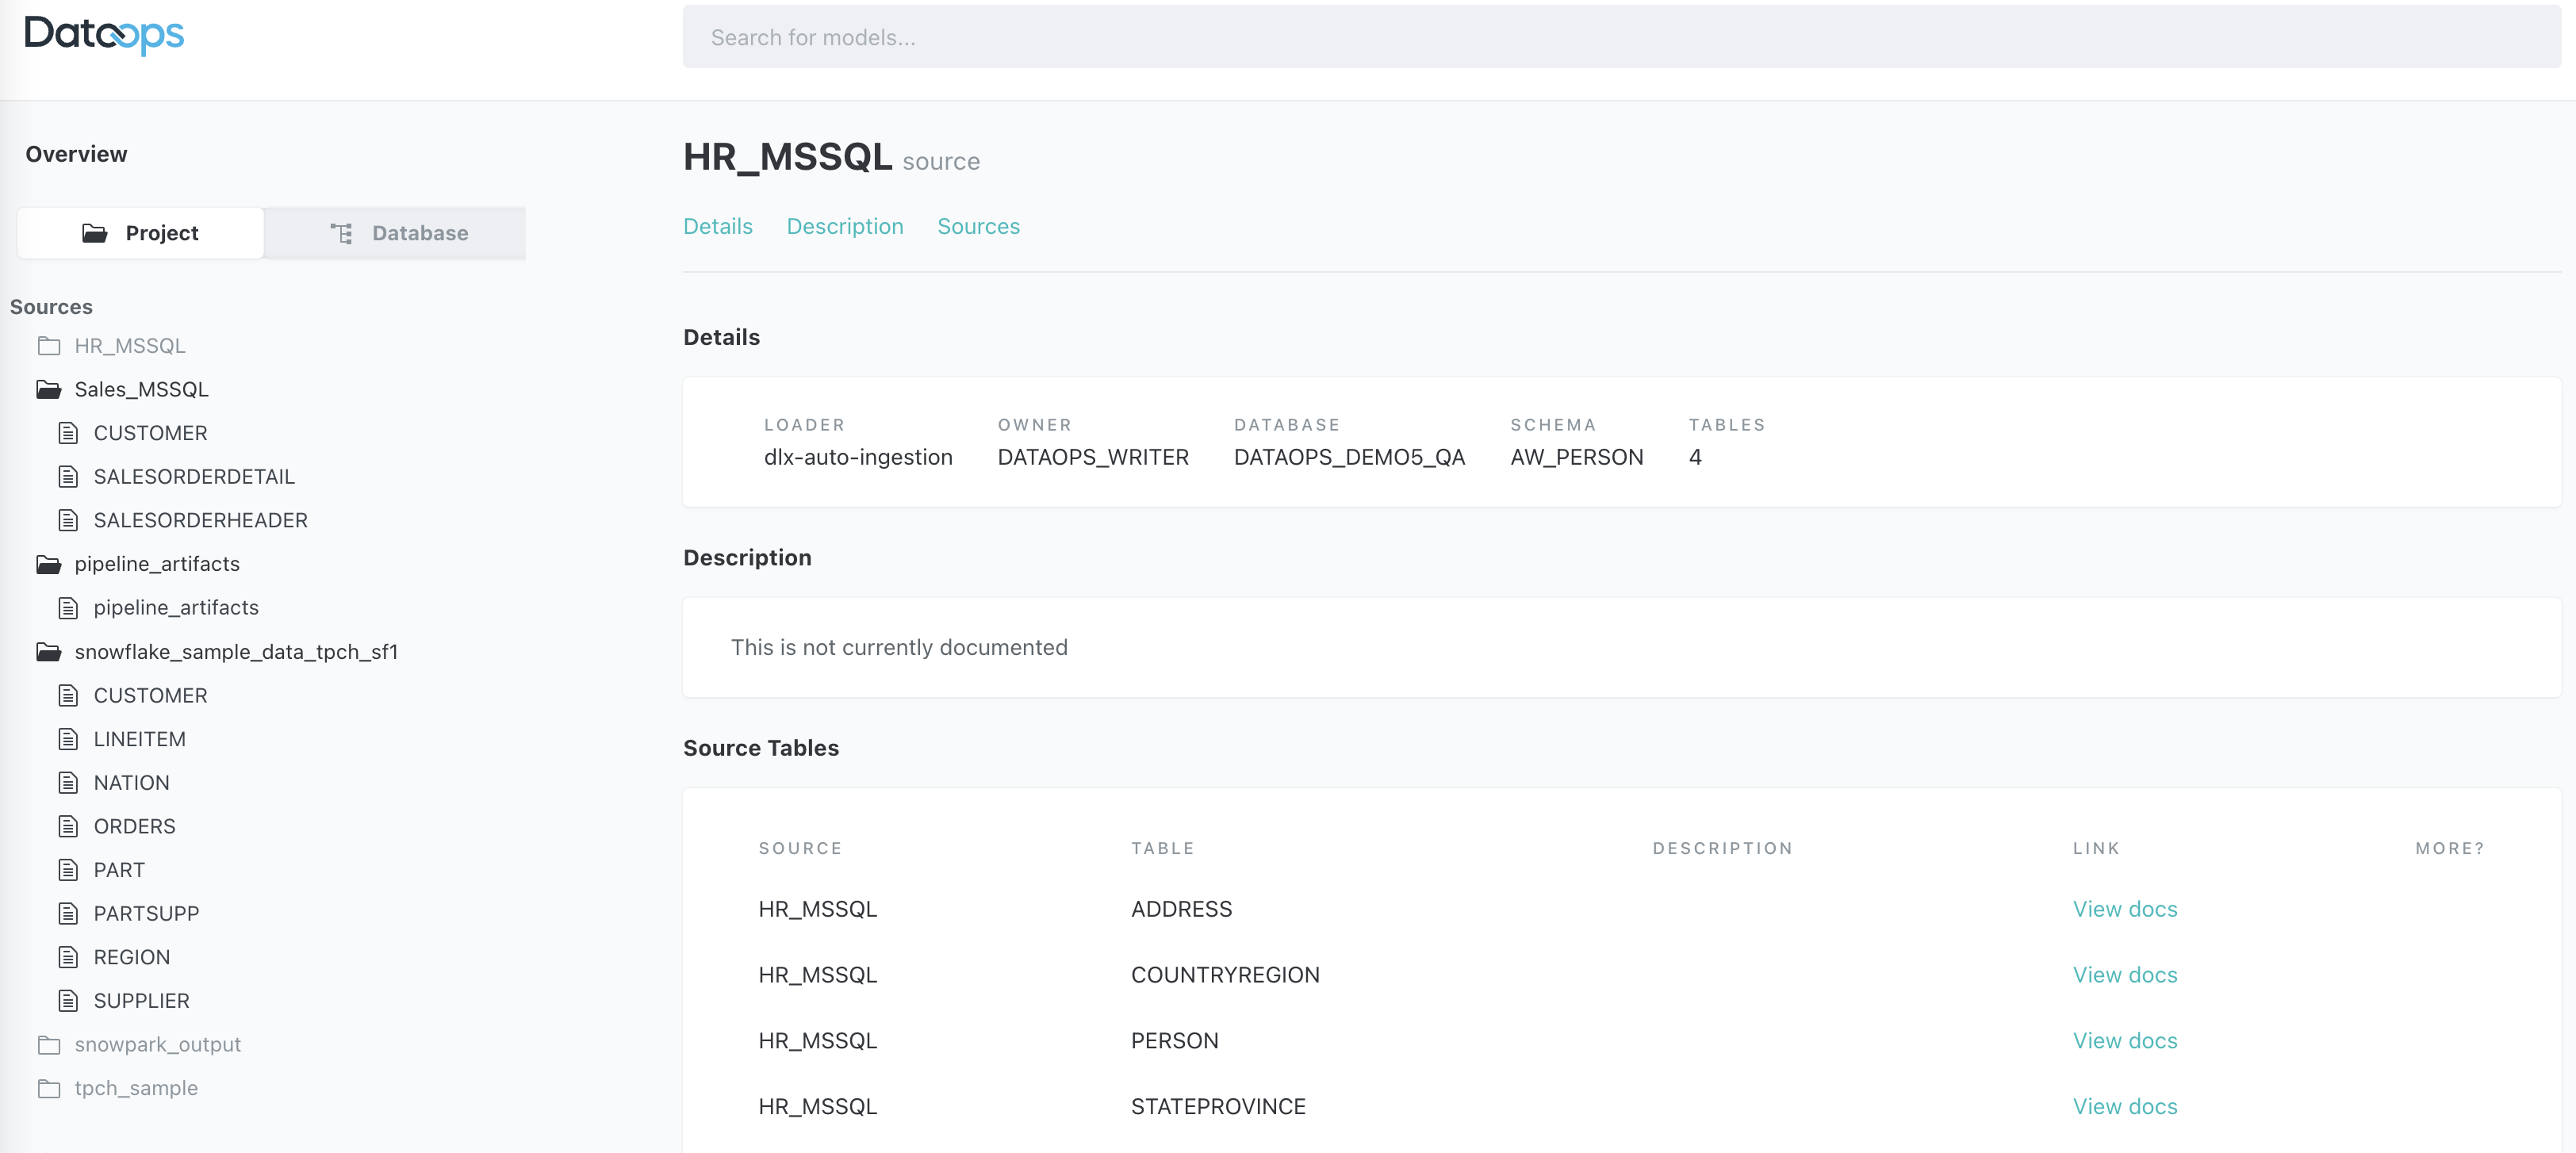
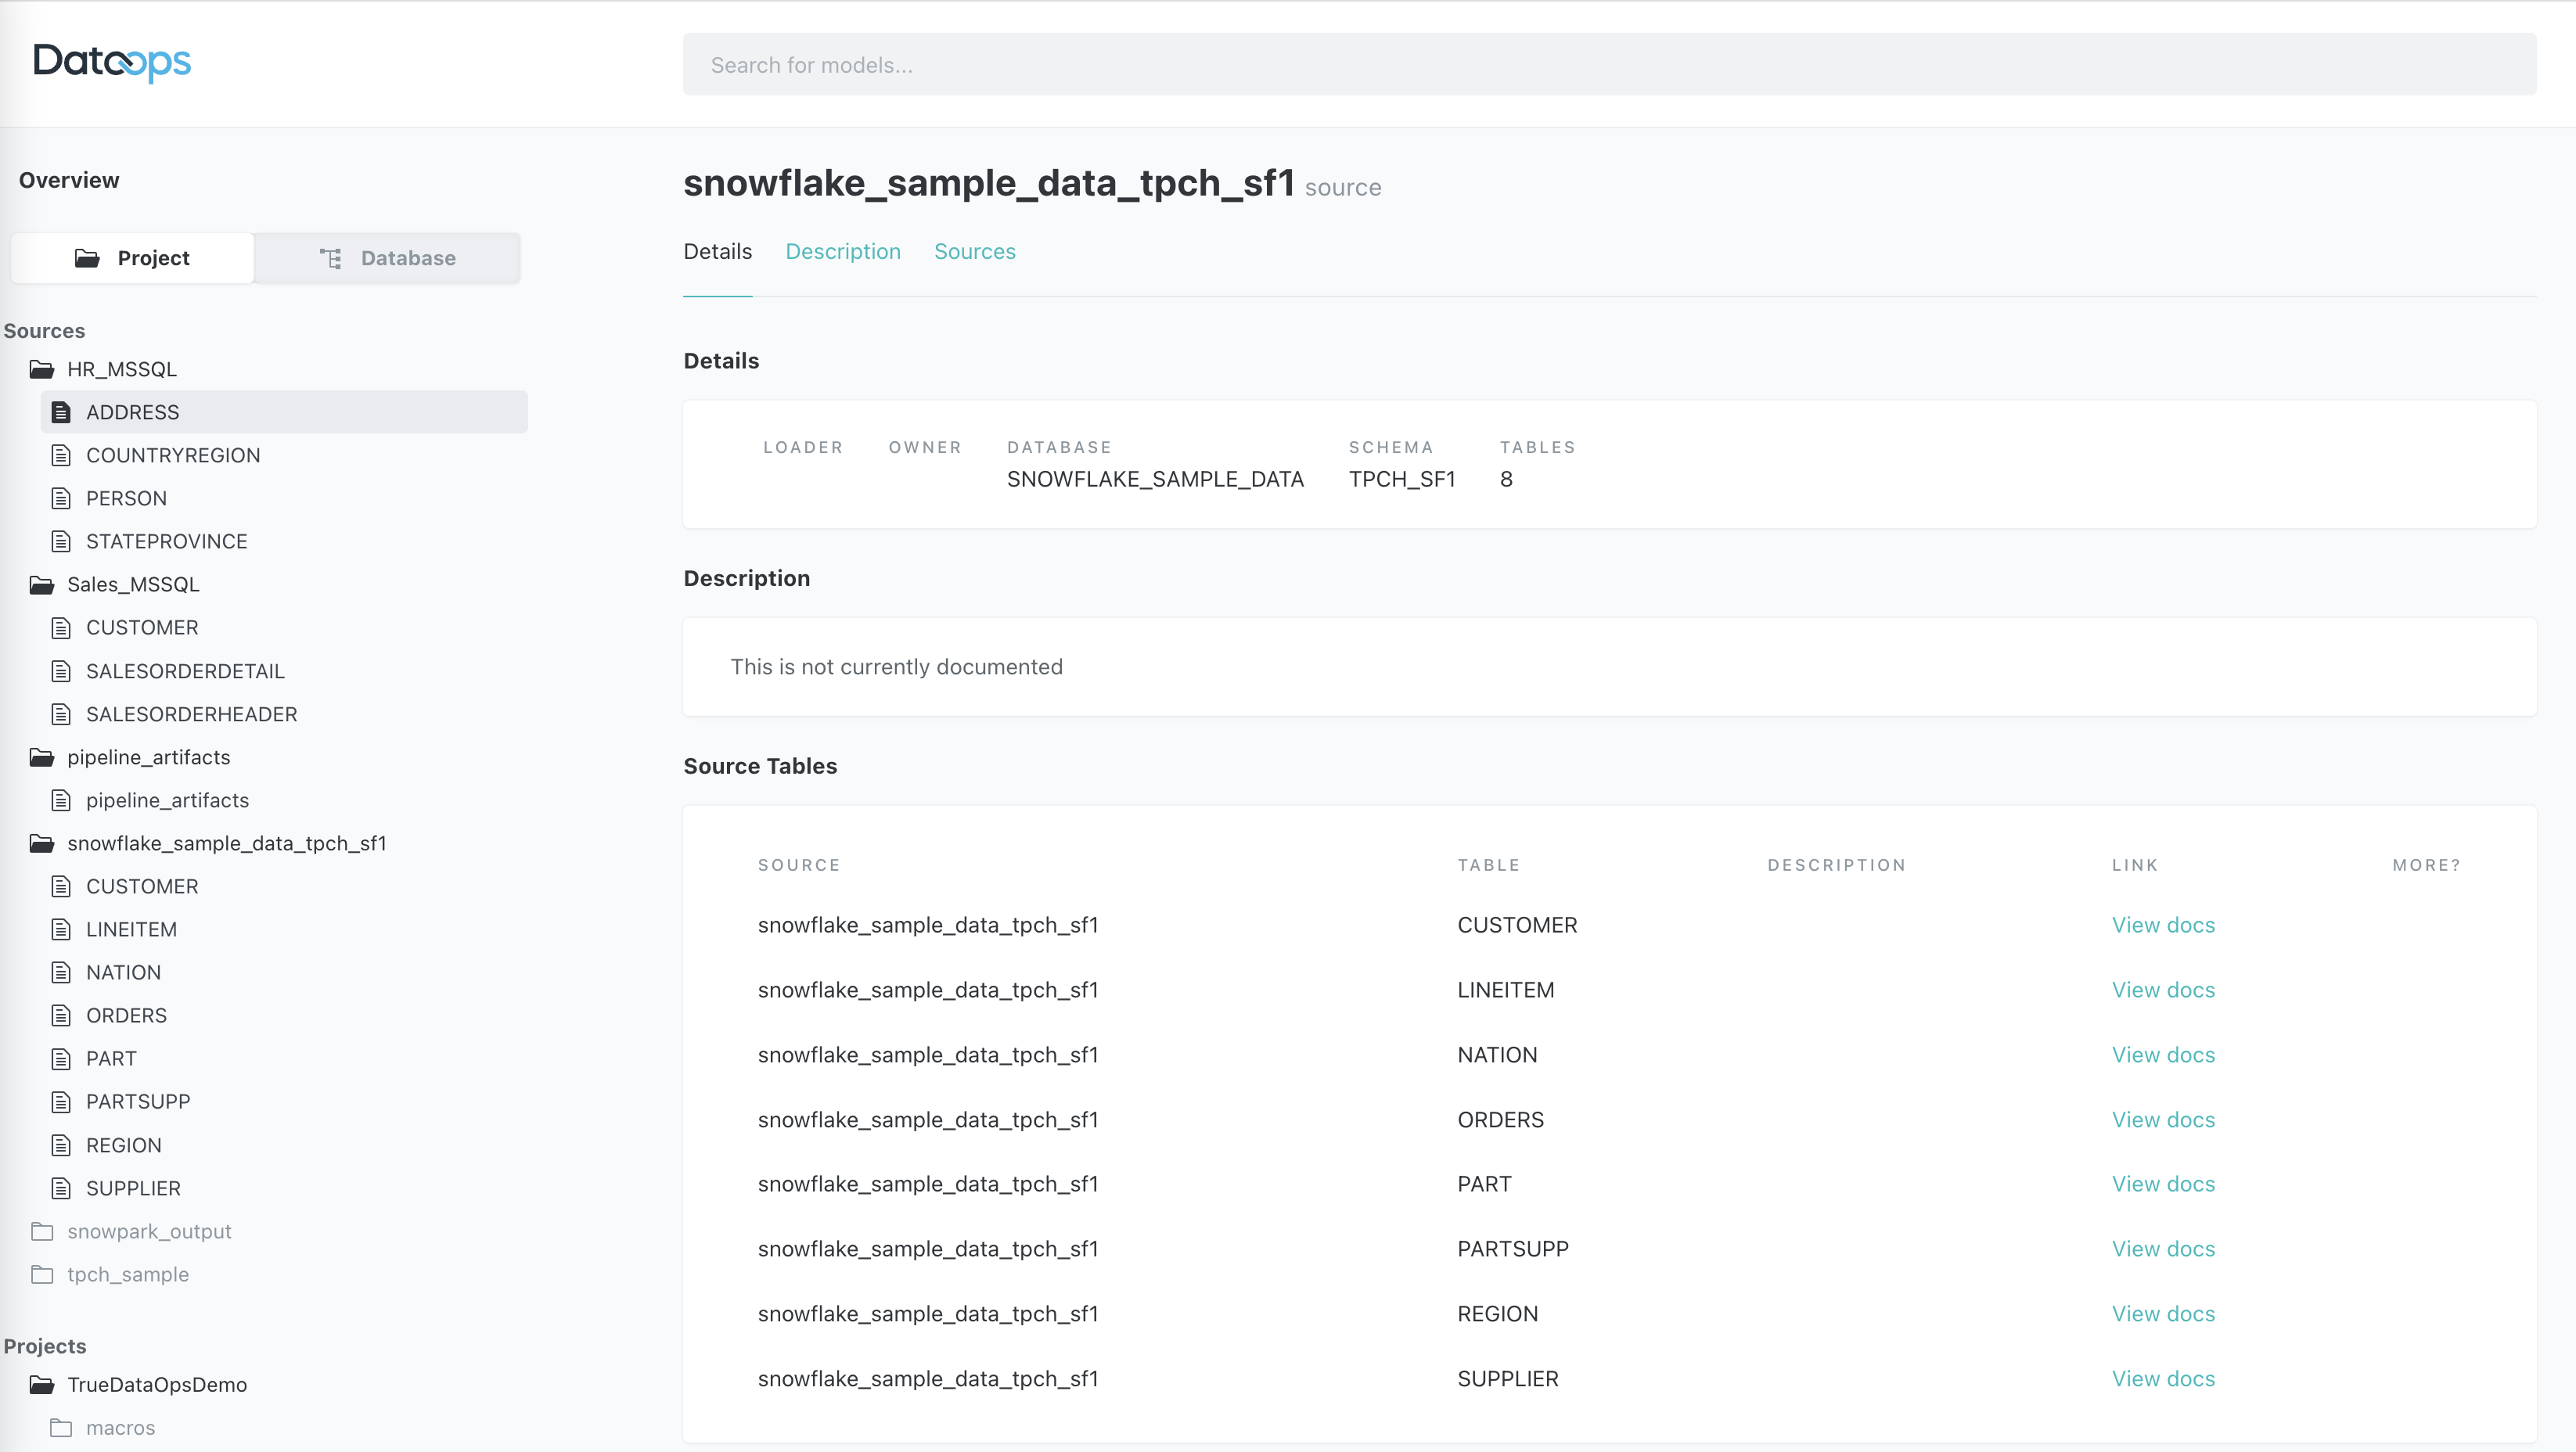
4. Model details
It also includes the ability to drill down into a model's details.
5. Lineage graph
Lastly, the lineage graph can be opened by clicking on the bottom right icon.