Get Started with Spendview for Free
Spendview for Snowflake is a free module of DataOps.live Observe, a core component of the data product platform.
You must register to access Spendview for Snowflake. Once registered, you can add as many Snowflake accounts as needed and start monitoring them.
Signing up
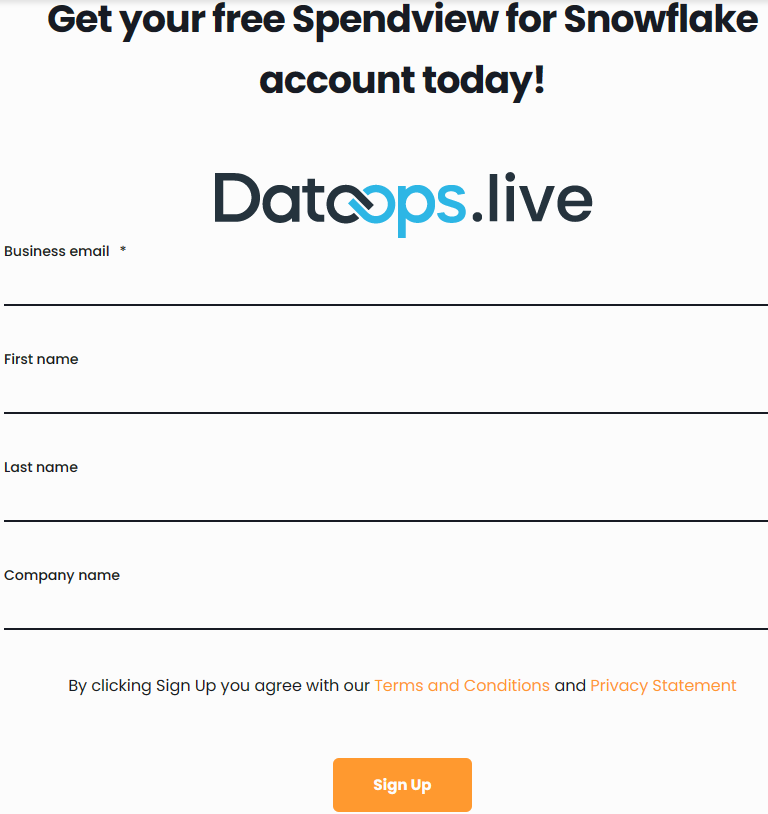
From the DataOps.live website, register using your business email address to access the Spendview for Snowflake free module for the first time.
Prerequisites
- You can access Snowflake as a new user with the role
DATAOPS_OBS_VIEWER, which has the necessary permissions. See Create user and warehouse for more information. - If a firewall protects your Snowflake account, you must add our IPs to the allowlist to enable access to your account:
35.176.116.33,3.11.127.149, and18.170.83.22.
Register
-
In your browser, go to the DataOps.live website and click Use it for free now!.
-
In the open form, enter your user information, including your business email address, and click Sign up.
-
Check your inbox for the trial sign-up email.
-
In the email, read the instructions and click the activation link.
-
Set a new password, confirm it, and click Change password. You get a confirmation message, and the login page opens. See Authentication methods for more information.
-
Enter your email address and password and click Sign in.
-
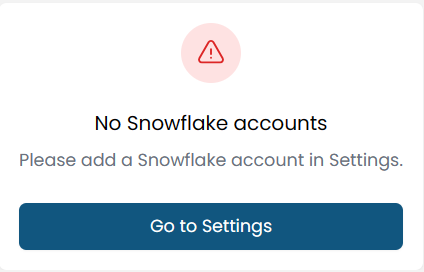
Click Go to settings in the prompt message to open a page and add the Snowflake accounts you want to monitor.
-
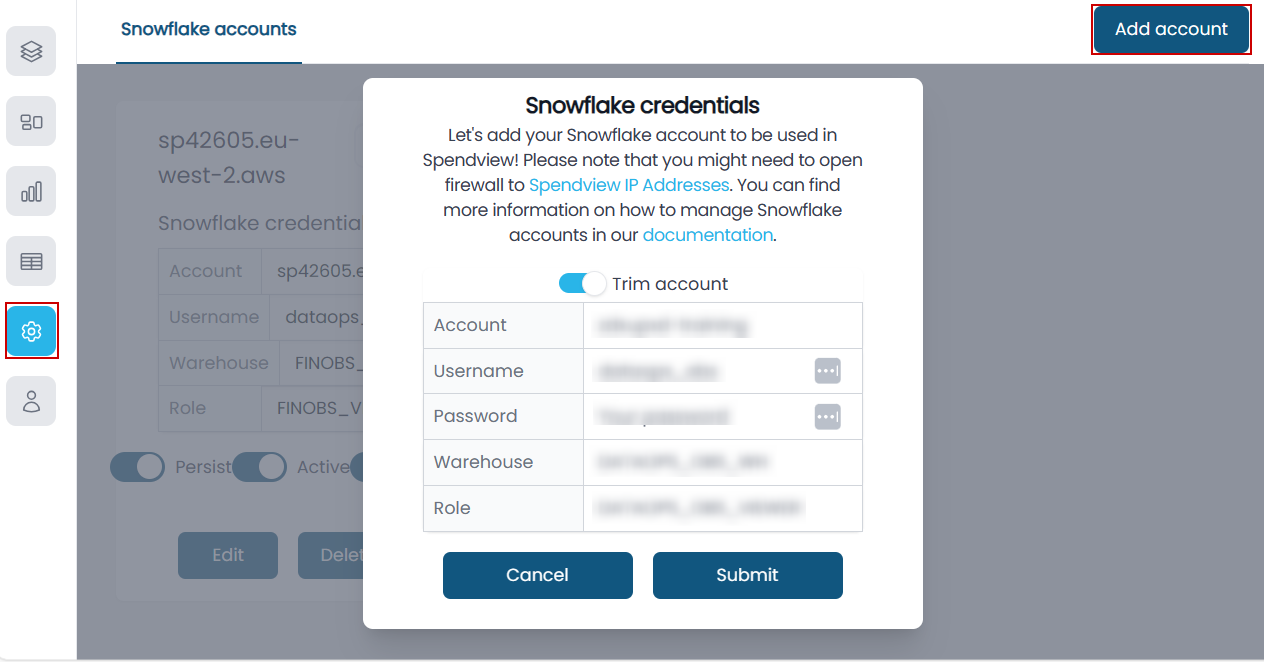
Click Add account on the top right to open a form.
-
Enter your Snowflake login information and click Submit. Learn more about how to add a Snowflake account.
This creates and adds the account to the Snowflake accounts page.
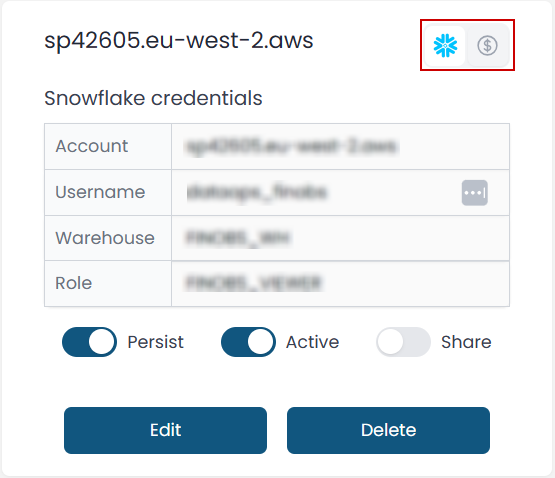
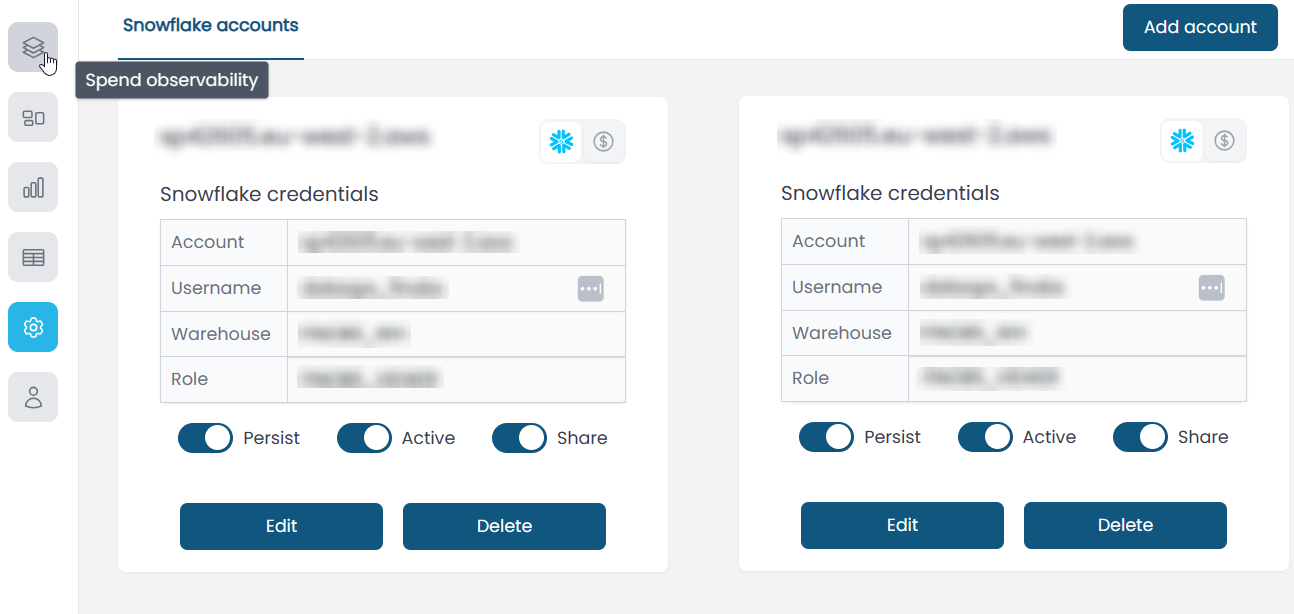
You can switch between two views to have real-time insight into the account cost — per Terabyte and credit — and the account login information. Read more about how to manage accounts.
-
Repeat the last two steps to add all the Snowflake accounts you want to monitor.
-
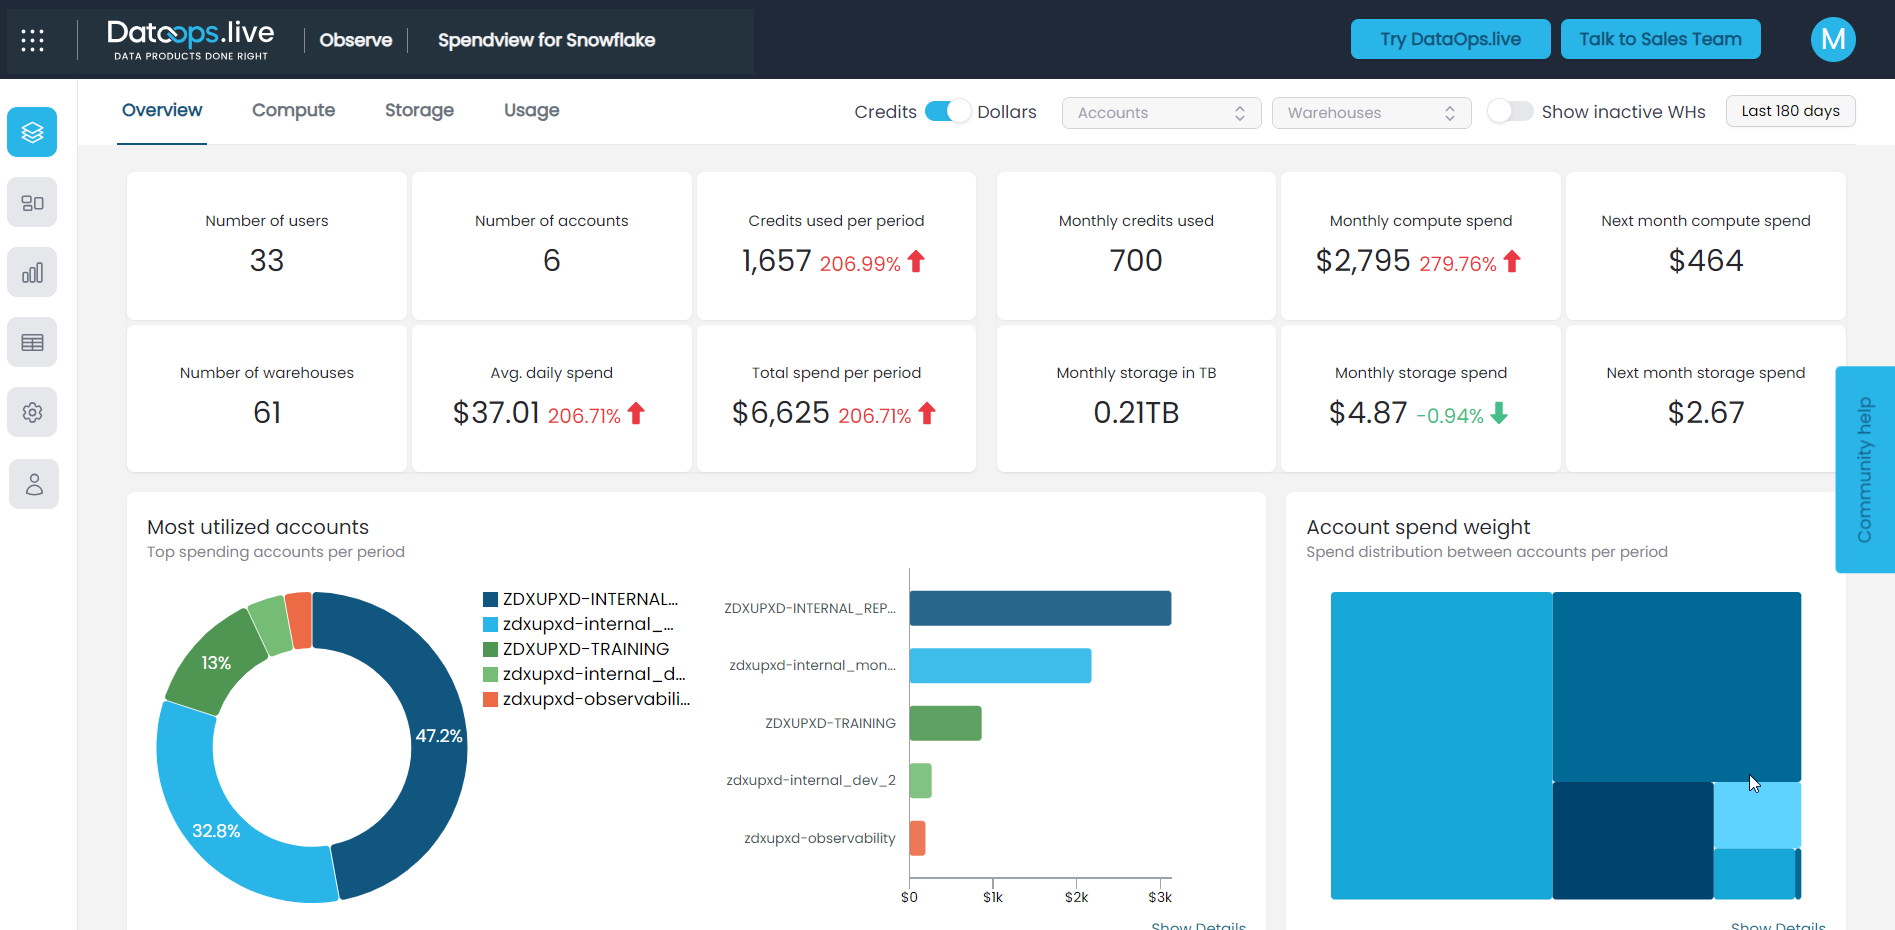
Click the Spend observability icon on the left sidebar to open the free module and explore the Snowflake accounts' spending and usage.
noteYour access to the icons on the left sidebar depends on your role in Spendview. See Access levels and roles for more information.
Signing in
-
In your browser, go to the DataOps.live Observability login page and click Sign in.
-
Enter your email address in the open form and click Continue.
-
Enter your password and click Sign in. See Authentication methods for more information.
-
Explore the real-time visibility of the Snowflake accounts' spending and utilization through the different menus.
Your access to the icons on the left sidebar depends on your role in Spendview. See Access levels and roles for more information.
Adding a Snowflake account
-
On the sidebar, click the Snowflake accounts icon.
-
Click Add account on the top right to open a form.
-
Enter your Snowflake account name. To get the account name:
-
Log in to Snowflake.
-
Click the dropdown arrow next to the Snowflake icon on the bottom left and, in the open list, select the account you want to monitor.
-
Click the copy icon next to the account to get the account name.
If you want to use the account URL, click the link icon next to the account.
-
Enter the copied account in the form and replace
.with-, if you are using the account name.For example,
oalsots.ot18677becomesoalsots-ot18677.You can get the current Snowflake account name from the address in your browser — the text immediately following the two forward slashes:

-
Keep the Trim account toggle on if you want to have the account you entered in the field automatically formatted to the expected format.
-
-
Enter a username, a password, and a warehouse name. You can use an existing user and warehouse or create new ones.
-
As an account user, you must have a default role with at least the permissions
USAGE_VIEWERandGOVERNANCE_VIEWERon the Snowflake database. Learn more about creating a new user with the proper permissions using a script. -
What you enter in the warehouse field will be the Snowflake warehouse used by Spendview for Snowflake. Your Snowflake user should have the correct privileges to use this warehouse. Learn more about creating a new warehouse using a script.
We recommend you use an existing warehouse frequently used as the queries triggered by the platform are relatively small. They will not increase your expenses significantly if they run on a warehouse used by other users.
-
-
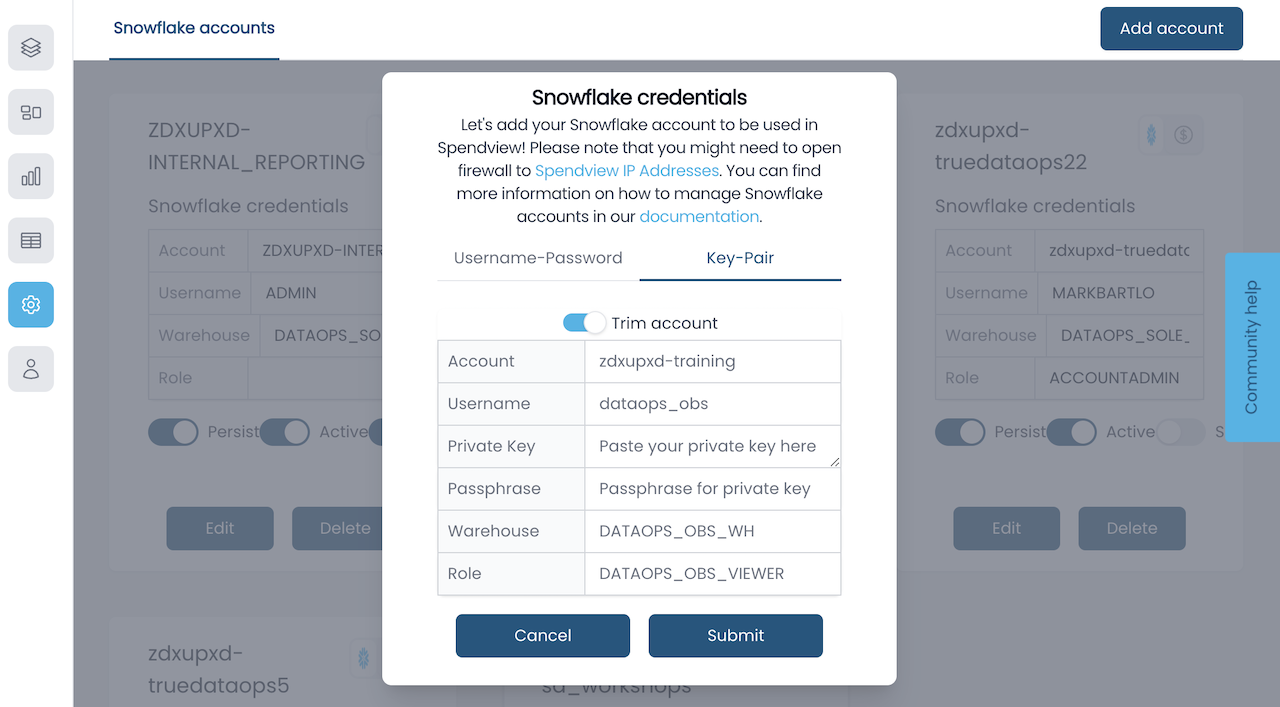
(Optional) As an alternative to the username-password authentication, you can connect Snowflake accounts using key-pair authentication as well. Select the "Key-Pair" tab in the connection form and fill in the private key and the passphrase for the key.
-
(Optional) Enter a specific Snowflake role that you want to use to monitor the Snowflake account. If this field is not set, the default Snowflake role for the user will be used.
Necessary PermissionsThe Snowflake role must have permissions equivalent to
USAGE_VIEWERandGOVERNANCE_VIEWERon the Snowflake database. -
Click Submit to add the Snowflake account.
-
Repeat the above steps to add all the Snowflake accounts you want to monitor.
All added accounts have Persist, Active, and Share toggles, the first two are enabled by default.
- Toggle Active off if you want to stop monitoring the account but keep it listed on the Snowflake accounts page.
- Toggle Persist off if you want to delete the account from the Snowflake accounts page once logged out.
- Toggle Share on if you want to give access to this account to specific Spendview users. See Inviting users for more information.
You can switch between the account details and its cost view by clicking the icons on the top right of the tile. For more information about editing the account attributes, see Editing an account.