Modeling and Transformation Examples
Let's say you need to develop a robust data product. You can follow a simple workflow where you start by creating a new branch, ingesting sample data into a Snowflake database, and testing this data to validate its quality and integrity.
Once source data is clean and validated, you can use the Modelling and Transformation Engine (MATE) to define data transformation and insert dynamic content into models to turn the source data into valuable data marts and data products. You can then test these assets before integrating them into the production environment.
The following sections detail each step in the workflow.
Prerequisites
To carry out the exercises in this guide, you need the following:
- A new DataOps project, created from the standard template and configured with a runner.
- Your Snowflake account will need to have the Snowflake sample data available.
Exercise 1: Create a new feature branch
The first thing you need to do is to create a new feature branch exercises for a specific DataOps project.
- Open your project on the data product platform.
- Navigate to Repository → Branches.
- Click New branch on top right.
- Name the branch
exercises.
Exercise 2: Run the pipeline and look at the docs
Your next step is to run the new exercises feature branch pipeline so the template content
(based on the Snowflake sample data) is built in Snowflake.
-
Open your project on the data product platform and click Web IDE. This opens your project's
exercisesbranch in an instance of VS Code.
-
Check that the
.agent_tagin the file/pipelines/includes/config/agent_tag.ymlis configured and the variables are set up. -
Open the
/full-ci.ymlfile and comment out the three sample MATE jobs for now:/full-ci.ymlinclude:
...
## Modelling and transformation jobs
# - /pipelines/includes/local_includes/modelling_and_transformation/test_all_sources.yml
# - /pipelines/includes/local_includes/modelling_and_transformation/build_all_models.yml
# - /pipelines/includes/local_includes/modelling_and_transformation/test_all_models.yml -
Commit your changes to exercises and run the
full-ci.ymlpipeline.Did you know?DataOps automatically generates documentation from your MATE content, even if you do not compile/run any models.
-
Switch back to the platform and navigate to CI/CD → Pipelines using the project sidebar.
Your most recent pipeline (probably the only one, unless you needed to re-run it) will be at the top of the list.
-
Click the documentation 📄 button on the far right side of the pipeline to open the docs in a new tab.
A few things to note about the docs:
-
There are several projects listed on the left-hand navigation. The Snowflake sample content from your DataOps project will be under the MyProject item (as this is the default project name at the top of your
dbt_project.ymlfile). The other projects are DataOps and dbt libraries that are included in the build process. -
Clicking the Database tab on the left-hand navigation shows that you have sources from the
SNOWFLAKE_SAMPLE_DATAdatabase and the sample models are in theSAMPLESschema within our production database. -
These docs are built using the dbt docs package, so navigation functionality and much of the content are very similar to the standard dbt docs.
-
Docs are generated for every pipeline unless you take out the reference to
generate_modelling_and_transformation_documentation.ymlfrom your pipeline file (full-ci.yml), which is a job originating from the DataOps reference project.For more information, see Project Documentation.
Exercise 3: Test the source tables
After ingestion, the first step in most DataOps pipelines should be to run a comprehensive set of data tests on the ingested data. It is common practice to create dbt sources on all tables that will be used as source data for MATE models so that you can add the tests there.
-
Open your project on the data product platform, select Web IDE, and make sure you are editing the
exercisesbranch. -
Open file
dataops/modelling/sources/snowflake_sample_data/tpch_sf1/customer.ymland examine the tests against columnC_CUSTKEY. These are standard column tests from MATE: unique and not null. -
Open file
full_ci.ymland uncomment the job filetest_all_sources.yml:/full-ci.ymlinclude:
...
## Modelling and transformation jobs
- /pipelines/includes/local_includes/modelling_and_transformation/test_all_sources.yml
# - /pipelines/includes/local_includes/modelling_and_transformation/build_all_models.yml
# - /pipelines/includes/local_includes/modelling_and_transformation/test_all_models.yml -
Commit your changes to exercises and run the
full-ci.ymlpipeline. -
Open the pipeline view, either by:
-
Switching back to the platform, navigating to CI/CD → Pipelines using the project sidebar and the pipeline status should be
RUNNING. -
Clicking the pipeline link that displays in the lower left of the VS Code

-
-
Once the pipeline completes, open the Tests tab (you may need to refresh the page) and click through to view the results.

Exercise 4: Build all models
Now you have well-tested source data (of course, many more tests than this will be in a real project), you can start building models. Fortunately, the sample data in our project template has a curation layer of simple models built from the sources you just tested. See Building MATE Models for more information.
Many modern data warehouse implementations use a curation, or similarly-named layer, for data cleansing and standardization after the ingestion stage. These tables usually follow the ingestion tables column-for-column, row-for-row, including type conversion, cleansing rules, etc.
-
Open your project on the data product platform, select Web IDE, and check you are editing the
exercisesbranch. -
Open file
dataops/modelling/models/snowflake_sample_data/curation_customer.sqland examine the model SQL. -
The project template includes a job to run these tests: open file
full_ci.ymland uncomment the job filebuild_all_models.yml(leave test_all_sources.yml also uncommented):/full-ci.ymlinclude:
...
## Modelling and transformation jobs
- /pipelines/includes/local_includes/modelling_and_transformation/test_all_sources.yml
- /pipelines/includes/local_includes/modelling_and_transformation/build_all_models.yml
# - /pipelines/includes/local_includes/modelling_and_transformation/test_all_models.yml -
Commit your changes to exercises and run the
full-ci.ymlpipeline. -
Once the pipeline is completed, open Snowflake and look at the new tables in the
SAMPLESschema of your production database.
If you need to check which database DataOps.live is using, i.e., the name of your production database, check the generated documentation for the pipeline that just ran.
Exercise 5: Test all models
So you have built your first proper data warehouse layer. The next step will be to test it. For more information, see MATE Automated Data Testing.
-
Open your project on the data product platform, select Web IDE, and check you are editing the
exercisesbranch. -
Open file
dataops/modelling/models/samples/samples_customer.sqland examine the tests against columnC_CUSTKEY. As with the source, you are using the same two standard tests to ensure data integrity after the model build. -
The project template also includes a job to run these tests: open file
full_ci.ymland uncomment the job filetest_all_models.yml. Leave the previous two job files also uncommented:/full-ci.ymlinclude:
...
## Modelling and transformation jobs
- /pipelines/includes/local_includes/modelling_and_transformation/test_all_sources.yml
- /pipelines/includes/local_includes/modelling_and_transformation/build_all_models.yml
- /pipelines/includes/local_includes/modelling_and_transformation/test_all_models.yml -
Commit your changes to exercises and run the
full-ci.ymlpipeline. -
Open the pipeline view and examine the additional test results once the run completes.

Exercise 6: Create a mart
Once a data warehouse has ingested, cleansed, and tested source data, it is time to build useful data products. For this exercise, let's create a very simple data mart that presents some source data in a new layer.
-
Open your project on the data product platform, select Web IDE, and check you are editing the
exercisesbranch. -
Create a file named
dataops/modelling/models/mart/mart_orders.sql:Did you know?If you create the file at the top level and specify a full path, the DataOps development environment will create intermediate directories for you.
dataops/modelling/models/mart/mart_orders.sql{{ config(alias='ORDERS') -}}
SELECT
O_ORDERKEY AS "Order Key",
O_CUSTKEY AS "Customer Key",
O_ORDERSTATUS AS "Order Status",
O_TOTALPRICE AS "Total Price",
O_ORDERDATE AS "Order date",
O_ORDERPRIORITY AS "Order Priority",
O_CLERK AS "Clerk",
O_SHIPPRIORITY AS "Ship Priority",
O_COMMENT AS "Comment",
(SELECT COUNT(*) FROM {{ ref('samples_lineitem') }} WHERE L_ORDERKEY = O_ORDERKEY) AS "Number of Line Items"
FROM {{ ref('samples_orders') }} -
Open file
dataops/modelling/dbt_project.ymland add the mart definition to themodelssection (final two lines below):dataops/modelling/dbt_project.ymlmodels:
...
MyTemplate:
snowflake_sample_data:
+schema: SAMPLES
mart:
+schema: MART -
Commit your changes to exercises and run the
full-ci.ymlpipeline. -
Look at the generated documentation and the new table and schema in Snowflake.

Exercise 7: Reorganize the pipeline jobs
You may have noticed that we have not added or changed any pipeline jobs in the last exercise, yet the new table was built. This is because the existing Build all Models is configured to build all models in the project, so any new ones get picked up automatically.
However, that is not what wanted. To build each layer at a time, so you can test each one before building the next, you need to create separate jobs to build each layer.
-
Open your project on the data product platform, select Web IDE, and check you are editing the
exercisesbranch. -
Open file
pipelines/includes/config/stages.ymland add four new stages afterSource Testing:pipelines/includes/config/stages.ymlstages:
- Pipeline Initialisation
- Vault Initialisation
- Snowflake Setup
- Additional Configuration
- Data Ingestion
- Source Testing
- Curation Build
- Curation Testing
- Mart Build
- Mart Testing
- Data Transformation
- Transformation Testing
- Generate Docs
- Clean UpBy the wayYou don't have to delete any stages right now - if there are no jobs in a stage, it will not show on pipelines.
-
Create a new job file called
pipelines/includes/local_includes/modelling_and_transformation/build_curation_models.ymlwith the following job definition:pipelines/includes/local_includes/modelling_and_transformation/build_curation_models.ymlBuild Curation Models:
extends:
- .modelling_and_transformation_base
- .agent_tag
variables:
TRANSFORM_ACTION: RUN
TRANSFORM_MODEL_SELECTOR: snowflake_sample_data
stage: Curation Build
script:
- /dataops
icon: ${TRANSFORM_ICON} -
Create another new job file called
pipelines/includes/local_includes/modelling_and_transformation/test_curation_models.ymlwith the following job definition:pipelines/includes/local_includes/modelling_and_transformation/test_curation_models.ymlTest Curation Models:
extends:
- .modelling_and_transformation_base
- .agent_tag
variables:
TRANSFORM_ACTION: TEST
TRANSFORM_MODEL_SELECTOR: snowflake_sample_data
stage: Curation Testing
script:
- /dataops
icon: ${TESTING_ICON}
artifacts:
when: always
reports:
junit: $CI_PROJECT_DIR/report.xml -
Open file
full-ci.ymland edit the links tobuild_all_models.ymlandbuild_all_models.ymlto point to the new curation jobs:/full-ci.ymlinclude:
...
## Modelling and transformation jobs
- /pipelines/includes/local_includes/modelling_and_transformation/test_all_sources.yml
- /pipelines/includes/local_includes/modelling_and_transformation/build_curation_models.yml
- /pipelines/includes/local_includes/modelling_and_transformation/test_curation_models.yml -
Commit your changes to exercises and run the full-ci.yml pipeline. You will see the new stages and jobs, and looking in the logs for the
Build Curation Modelsjob, you will notice that it is only building theSAMPLESschema tables now.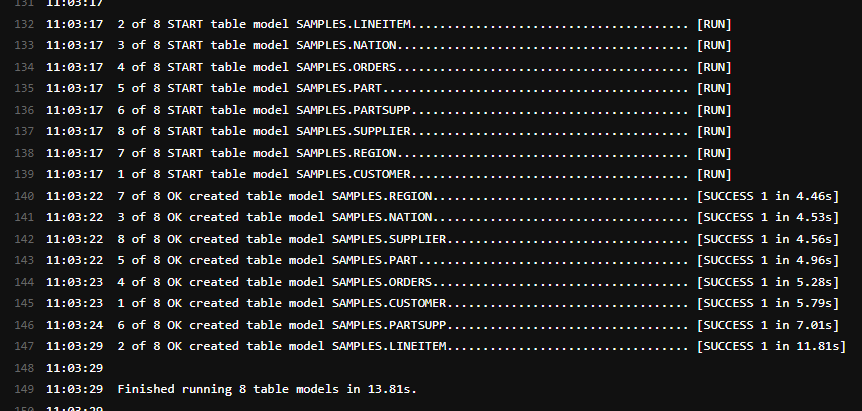
Exercise 8: Build and test the new mart
Finally, you must create pipeline jobs to build and test the new mart. As you now know how and where to set up the necessary configuration files for this, the following steps will point you in the general direction of what is needed to accomplish this.
-
Make sure you are still in the
exercisesbranch. -
Create two new job files to build and test the mart.
HintYou could copy the existing curation jobs - only a small difference is needed, and make sure you link them into
full-ci.yml. -
Run the pipeline and check it all works. You may notice that there are no tests to run in the
Test Mart Modelsjob. -
Create a YAML file alongside the new mart model and add some tests.
Exercise 9: Merge your exercises into production
Finally, once you complete all the exercises, bring them back to production. To do so, you must create a merge request:
-
Navigate in your sidebar to Merge requests.
-
Click New merge request.
-
Verify that your new merge request states from
exercisesintomain. -
Review all the other settings, and at the bottom of the screen, click Create merge request.
-
After peer review, you can finally merge your change back to your production branch.