Data Product Pipelines
With the data product platform, you can use pipelines to build, test, deploy, and update standalone or composite data products in your DataOps project. DataOps pipelines use the data product specification to create and publish data product manifests that hold all the properties and information of the data product and refresh it every time a pipeline runs.
Follow the steps below to build data products or migrate your existing DataOps pipelines to data products. See Building Data Products for detailed information.
Creating your first data product
DataOps.live projects are the central hub where teams collaborate, build, and manage data products. Each project has visual flows representing the pipelines of data transformations and movement from start to finish.
You can structure and organize each data product through data characteristics and relationships within a data ecosystem to allow other teams or users to discover and reuse what has already been done.
Let's see how you can build your first pipeline in your DataOps project to build a data product. All executions of DataOps code happen within DataOps pipelines that comprise a series of individual jobs.
Prerequisites
-
Modify your dbt connection profile to enable dbt to connect to your warehouse also during development. To do so, browse to
/dataops/modellingin your project and opendbt_project.yml. Add the profilesnowflake_operations./dataops/modelling/dbt_project.ymlname: MyProject
version: "1.0"
config-version: 2
profile: snowflake_operations -
Set up the DataOps development environment - the ready-to-code environment for your DataOps use cases.
Add a
.gitpod.ymlfile to the project's directory containing the data product. This will instruct GitPod to use the correct container. For example:.gitpod.ymltasks:
- name: Setup
before: |
# Needed when comparing from a feature branch
gp env GOLDEN_MANIFEST_FROM_DIFFERENT_BRANCH=1
/dataops-cde/scripts/dataops_cde_setup.sh
# Installs optional pre-commit hook(s)
# pip install pre-commit
# pre-commit install
# The current image used for data products in the development environment
image: $DATAOPS_DATAPRODUCT_RUNNER_IMAGESee Working with data products in the DataOps development environment for more information.
Step 1 - Create a Data Product Specification file
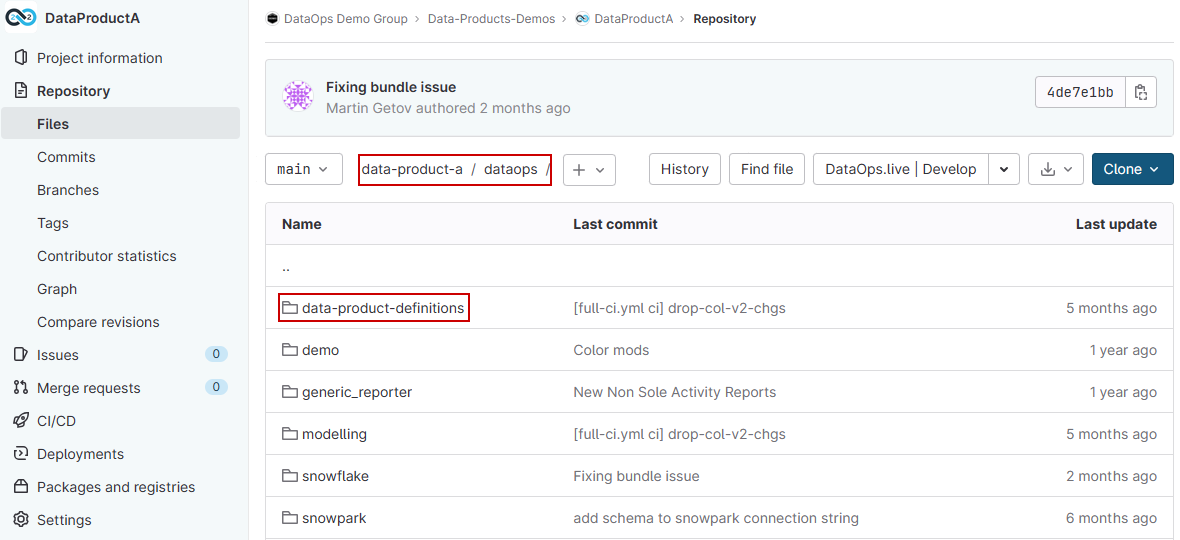
First, create the folder data-product-definitions in your project directory under /dataops.
Then create a new data product specification file my_data_product.yml with the following structure:
id: [data product id]
name: [data product name]
description: [data product description]
schema_version: 1.0.0
dataset:
  name: [Name of the dataset]
  description: [description of the dataset]
  mate_models:
    - select:
        [
          selector of the models that we would like to include in the data product,
        ]
output_ports:
  - id: [id of the output_port]
    name: [output port name]
    type: [type usually Tables]
    description: [description of the output port]
service_level_indicators:
  - mate_tests:
      - select:
          [
            selector of the test that we would like to include in the data product,
          ]
service_level_objectives:
  - name: [name of the SLO]
    description: [description of the SLO]
    test_select: [selector of the test that is related to this SLO]
Step 2 - Create a Data Product orchestrator job in the project
The Data Product orchestrator enriches the data product specification with the metadata from the pipeline run. At the end of the pipeline, the orchestrator generates the data product manifest as a merged document from the specification and the data product snippets and publishes the manifest into the data product registry.
In your project directory under pipelines/includes/local_includes/ create a data_product_orchestrator.yml job file with the following structure:
"Data Product Orchestrator":
  extends:
    - .agent_tag
  stage: "Data Product"
  image: $DATAOPS_DATAPRODUCT_ORCHESTRATOR_IMAGE
  variables:
    DATAOPS_DATA_PRODUCT_SPECIFICATION_FILE: dataops/data-product-definitions/my_data_product.yml
    # path to the Data Product Manifest that we would like to use for backward compatibility
    # DATAOPS_DATA_PRODUCT_REFERENCE_FILE: dataops/data-product-definitions/reference_manifest.yml
    # DATAOPS_DATA_PRODUCT_REFERENCE_FILE_FROM_DIFFERENT_BRANCH: 1
  script:
    - /dataops
  artifacts:
    paths:
      - dataops/report/data_product_manifest_viewer/
    name: "Data Product Manifest Viewer"
    expose_as: "dataopsreport"
  icon: ${DATAOPS_ICON}
You can use different methods to transform data in your data products. For more information, see Creating Custom Data Products Snippets.
Then add the stage Data Product in the stages (pipelines/includes/config/stages.yml) towards the end, right before Clean Up.
stages:
  - Pipeline Initialisation
  - Vault Initialisation
  - Snowflake Setup
  - Additional Configuration
  - Data Ingestion
  - Source Testing
  - Data Transformation
  - Transformation Testing
  - Generate Docs
  - Data Product
  - Clean Up
Finally, add the job /pipelines/includes/local_includes/data_product_orchestrator.yml to the full-ci.yml pipeline file.
include:
  - /pipelines/includes/bootstrap.yml

  ...

  - /pipelines/includes/local_includes/data_product_orchestrator.yml
Step 3 - Build your first data product
If everything is set up correctly, you can run the full-ci.yml file containing the pipeline definition in your project directory. See Running Pipelines for more information about the methods to run pipelines.

Step 4 - Configure backward compatibility
Subsequent pipelines can check for backward compatibility.
You must add a reference manifest that holds the last approved data product metadata used by the pipeline to check for data-breaking metadata changes for the dataset and SLO (Service Level Objectives).
-
In your project, navigate to CI/CD → Pipelines and from the latest run of the pipeline that produces the data product go to Reports.
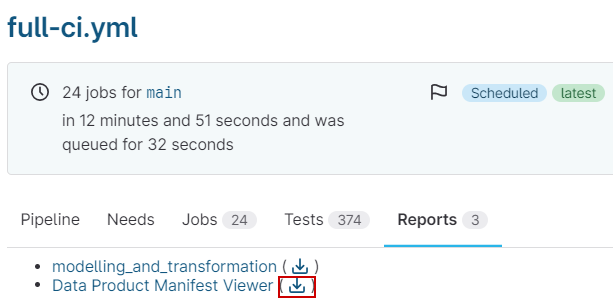
-
Click the download icon next to the Data Product Manifest Viewer.
-
From the downloaded zip rename the
data_product_manifest.ymlfile toreference_manifest.yml. -
Add the
reference_manifest.ymlfile to the project repository atdataops/data-product-definitions/reference_manifest.yml. -
In your project directory under
pipelines/includes, uncomment the following variables in thedata_product_orchestrator.yml.
"Data Product Orchestrator":
  ...
  variables:
    DATAOPS_DATA_PRODUCT_REFERENCE_FILE: dataops/data-product-definitions/reference_manifest.yml
    DATAOPS_DATA_PRODUCT_REFERENCE_FILE_FROM_DIFFERENT_BRANCH: 1