Creating a Project from a Template
To help you get started quickly with our data product platform, a template project with the required configurations is available by default. You can save a lot of time by building on this template project as it:
- Initializes your project with the recommended structure and the default project settings.
- Includes the mandatory directories and files and many best-practice configurations.
- Sets up the dependency on the reference project, providing you seamless access to the data product platform.
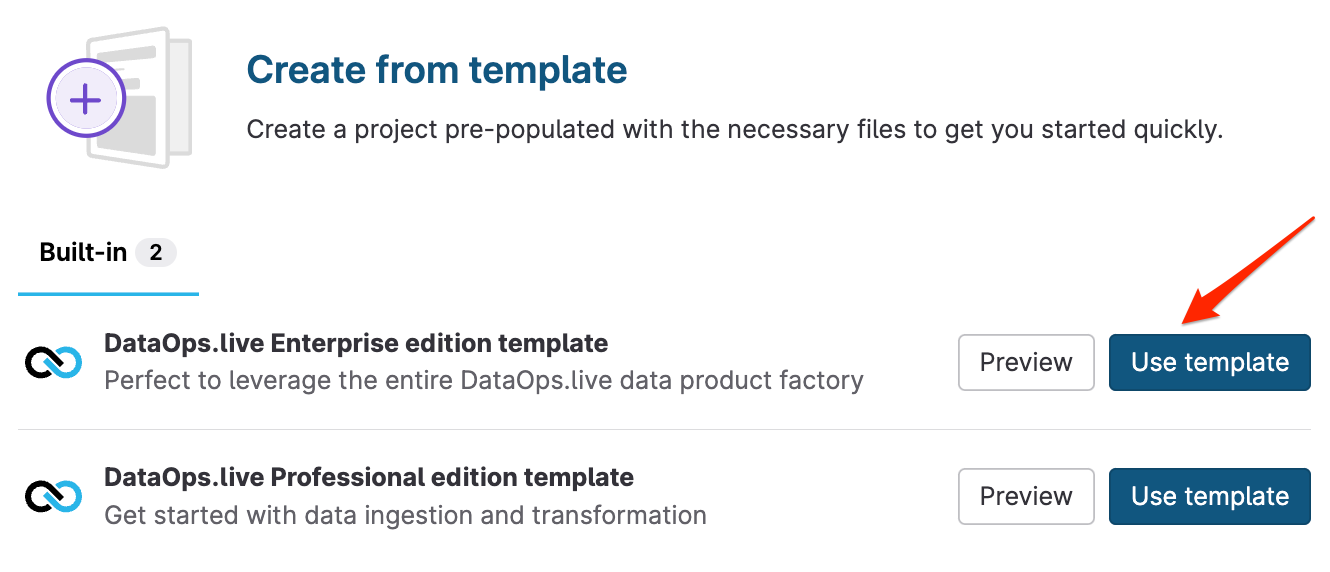
Two versions of the template project are available, depending on your Dataops.live package:
- DataOps Enterprise edition template
- DataOps Professional edition template
Always start from the template project and customize it to suit your needs. Starting from a blank project may lead to mistakes that are hard to find and correct.
Follow these steps to create your new project by cloning the DataOps template project:
-
Within your DataOps group, click New project and select Create from template.
The Create from template page opens.
-
Click Use template next to the version you want to use to open the details of the Enterprise template.
-
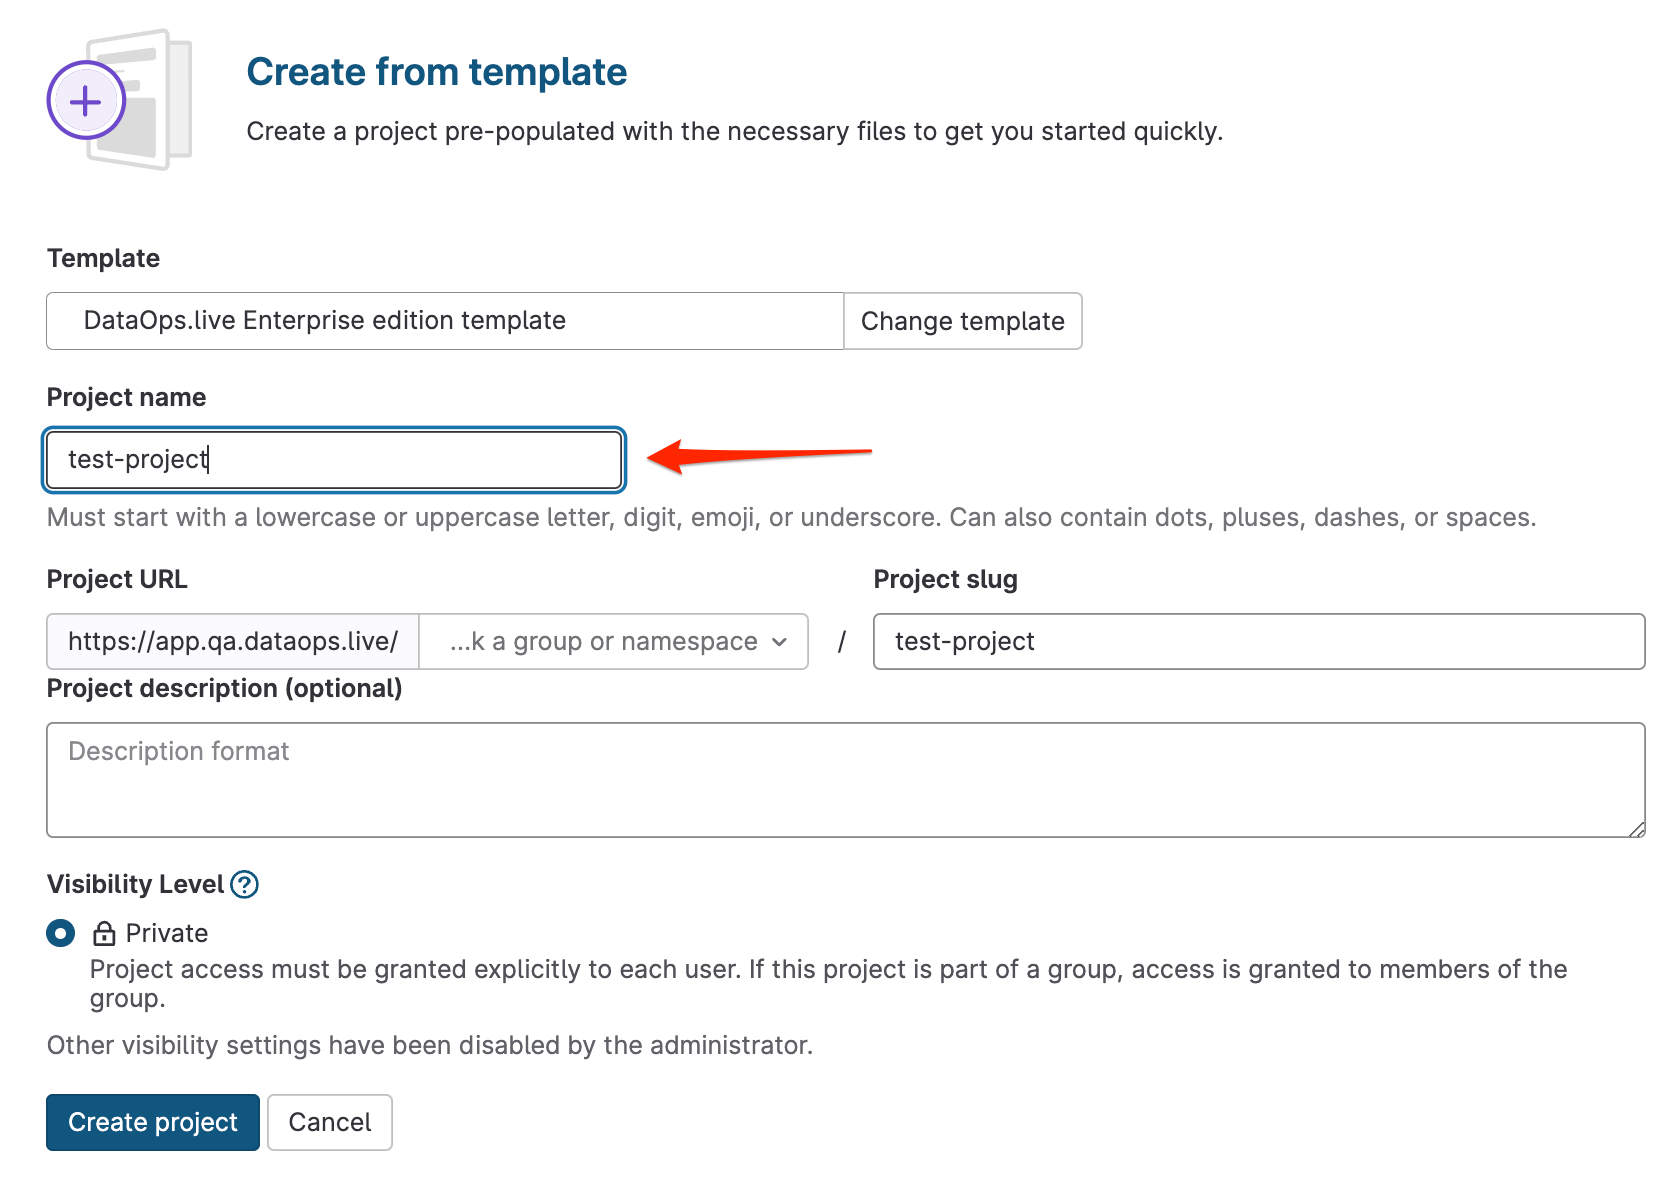
Enter a name and description for your project.
-
Set the project URL and click Create project.
An Import in progress page opens. Once the import is complete, a new page with project details will open.
You are a few steps away from using this template project and start building your data products with DataOps.live.
Follow the steps below for a quickstart, or see how to set up DataOps for a complete environment setup.
-
Make sure you have an active runner associated with your project.
-
Navigate to Settings → CI/CD
-
Expand Runners and check if there's an available runner.
If you create your project inside a group, you should have an available shared runner. Otherwise, you must install a runner.
-
Copy the name of the available runner.
-
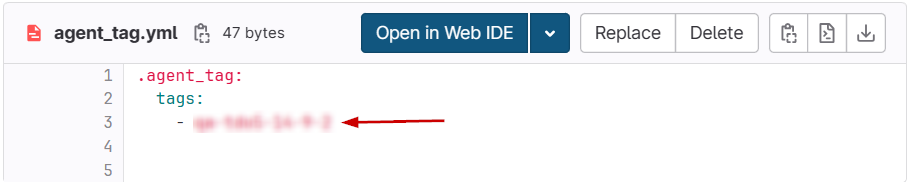
-
Set the runner agent tag in the
agent_tag.ymlfile.-
Navigate to Repository → File and click
pipeline/includes. -
Click
configand openagent_tag.yml. -
Replace
SET_RUNNER_NAME_HEREwith the name of the available runner or the runner you installed.The runner's name is case-sensitive.
-
-
Set variables in the
variables.ymlfile.-
Navigate to Repository → File and click
pipeline/includes. -
Click
configand openvariables.yml. -
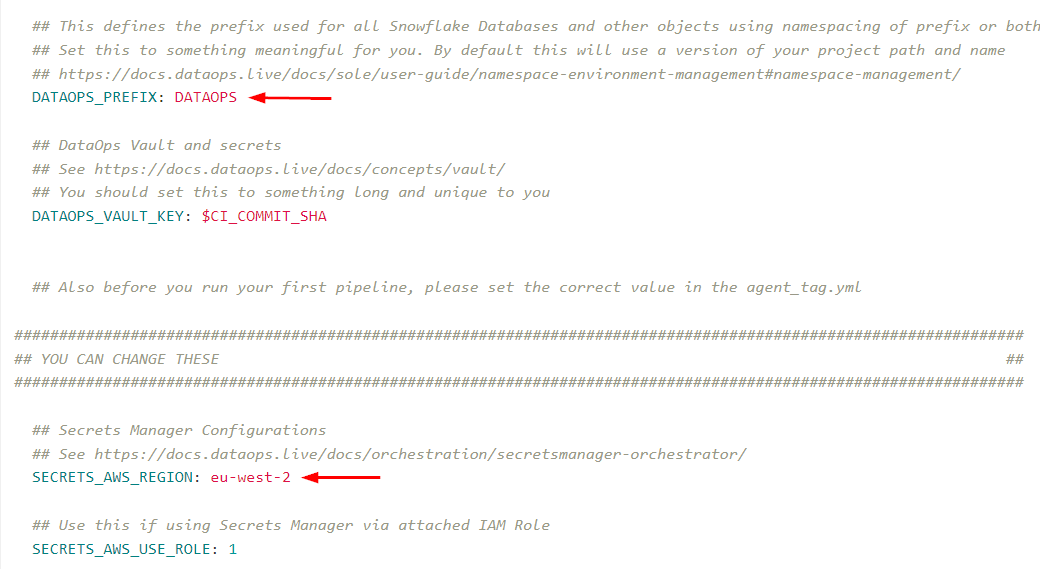
Set the
DATAOPS_PREFIXvariable to something meaningful for you. Use all caps.This defines the name of the environments created by this project: <PREFIX_branch name>.
-
In the secret manager configuration section, ensure the defined region matches where the secrets and runner are stored. For example, this value should differ if you use Azure or HashiCorp vault.
For more information about defining your region-specific parameter, see the Supported parameters documentation under the Secret Manager orchestrator.
-
The template project assumes that you have access to the Snowflake sample data at sources/snowflake_sample_data/tpch_sf1. If this isn't enabled in your Snowflake environment, you may get an error.